Moderation Dashboard Quickstart Part 2: Human Review
NOTE:This page continues where Part 1 of the Moderation Dashboard guide left off. To get the most out of this page, we recommend following Part 1 at least through Step 3 (setting up an action).
Quick Recap
In Part 1, we started to set up a visual moderation policy around guns for a hypothetical gaming platform. We decided to:
- Automatically remove images of real guns (already done in Part 1!)
- Send lower-confidence classifications of real guns for human confirmation, and
- Send images classified as animated guns for review by a human moderator (should be allowed)
In this part, we'll configure our human review rules and walk through the manual review workflow. Before we do, though, it might be helpful to look at Moderation Dashboard's default settings for the animated_gun class we want to monitor. This will help us decide what, if anything, we need to change.
Step 6 (Optional): Send an image to check default behavior
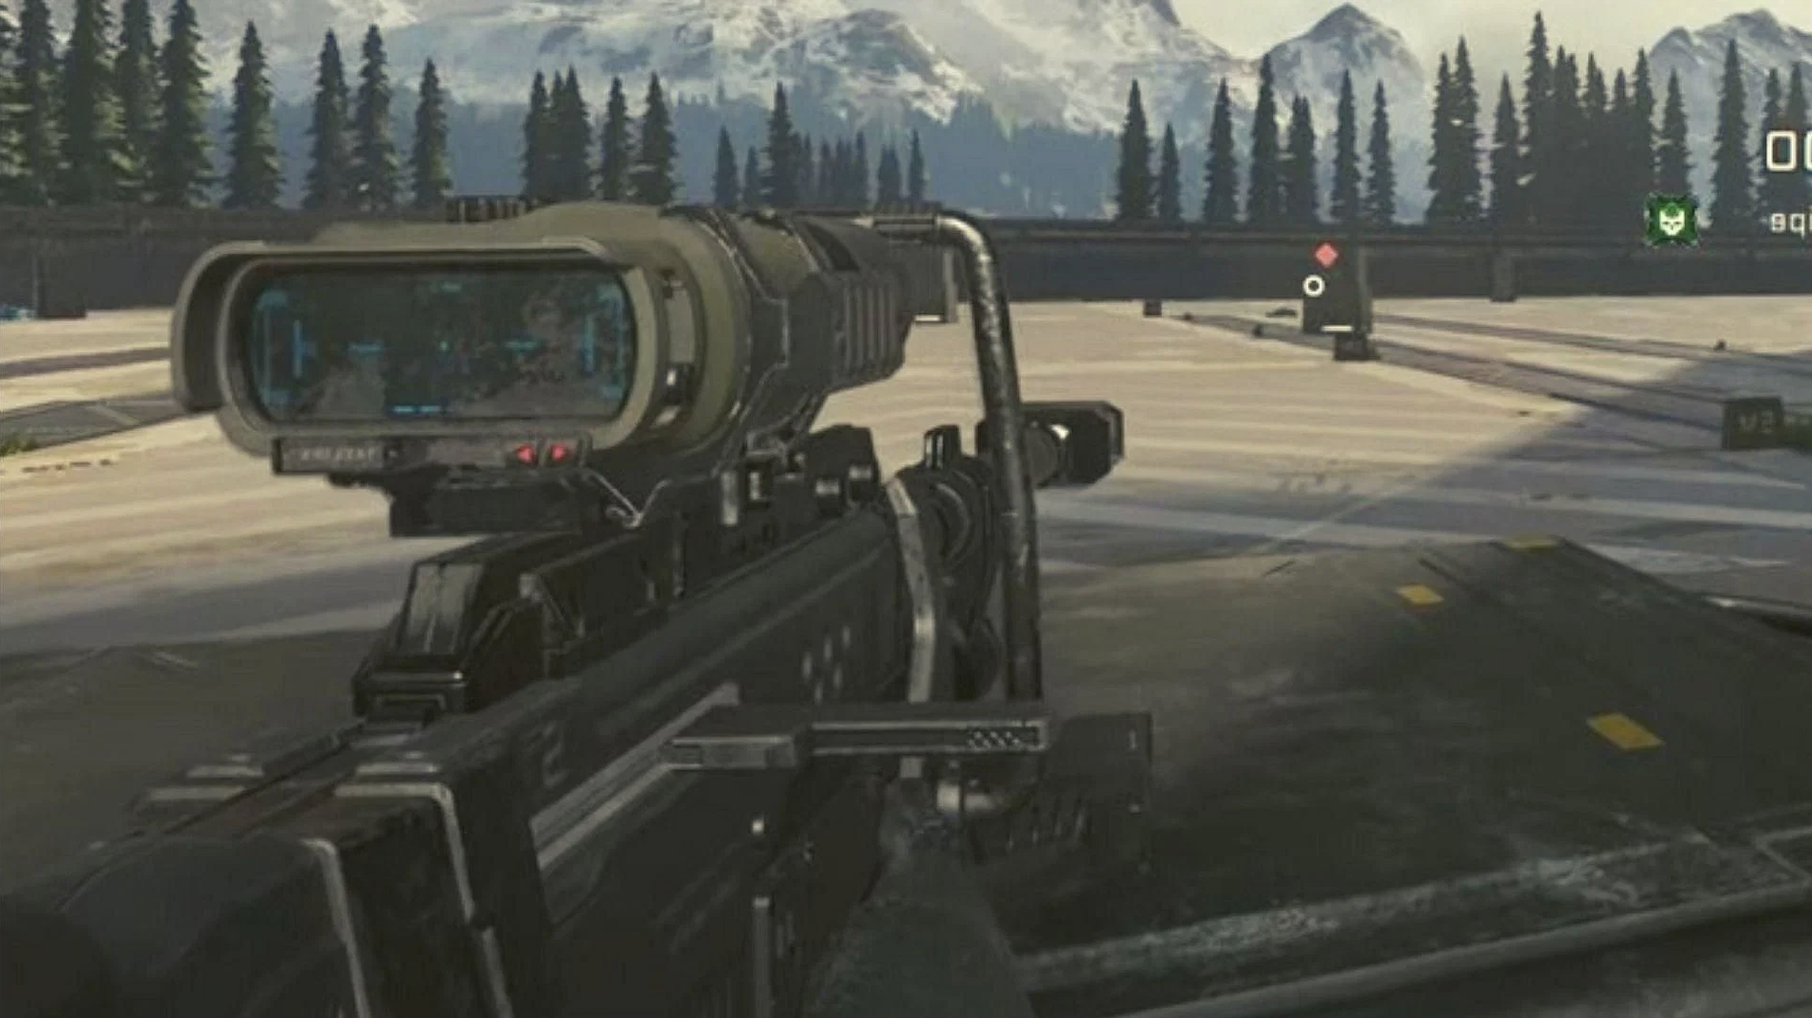
Let's send the animated gun image below and see what happens.
https://i.guim.co.uk/img/media/970d0adca5d95808af3a3044b9a90acac4644497/430_12_2896_1738/master/2896.jpg?width=465&quality=45&auto=format&fit=max&dpr=2&s=e2f924b26c52427b8d5da1219e825bc1
First, run this code snippet to send the image through the Dashboard API (again, use your real API Key instead of our placeholder).
curl --location --request POST 'https://api.hivemoderation.com/api/v2/task/sync' \
--header 'authorization: token xyz1234ssdf' \
--header 'Content-Type: application/json' \
--data-raw '{
    "patron_id": "54321",
    "post_id": "87654321",
    "url": "https://i.guim.co.uk/img/media/970d0adca5d95808af3a3044b9a90acac4644497/430_12_2896_1738/master/2896.jpg?width=465&quality=45&auto=format&fit=max&dpr=2&s=e2f924b26c52427b8d5da1219e825bc1",
    "models": ["visual"]
}'
import requests
import json
url = "https://api.hivemoderation.com/api/v1/task/sync"
payload = json.dumps({
"patron_id": "123456",
"post_id": "123456789",
"url": "https://i.guim.co.uk/img/media/970d0adca5d95808af3a3044b9a90acac4644497/430_12_2896_1738/master/2896.jpg?width=465&quality=45&auto=format&fit=max&dpr=2&s=e2f924b26c52427b8d5da1219e825bc1"
})
headers = {
'authorization': 'token xyz1234ssdf',
'Content-Type': 'application/json'
}
response = requests.request("POST", url, headers=headers, data=payload)
print(response.text)Then, navigate to the user content feed. You should see the sample post show up.

Unlike the first test image we sent in, this image does not get tagged under the "Violence" category. Why? If you navigate back to the Thresholds interface and select Visual Moderation Categories > Violence, you'll see that animated_gun does not appear in the list of default "Violence" classes.
For our content policy, this is actually fine. Remember, we don't want to delete these types of images outright. Instead, we want to have a human moderator to review and make sure no real guns images are misclassified as animated.
Step 7: Set up conditions for human review
Since animated_gun isn't captured by default settings, we'll need to set up a custom condition in order for any action to be taken on these images.
To add this class to our default human review conditions, navigate to the "Review" tab and select "+ Create New" to define a new condition. Use the dropdown menus to select the animated_gun class and the "Range" operator. Let's require a score range of 0.6 to 1.0 to trigger human review:

While we're here, we should also confirm our conditions for lower-confidence classifications of real guns. Scrolling down, you should see review ranges of 0.7 to 0.9 for gun_in_hand and gun_not_in_hand as active by default.
Remember, we want to make sure that no real guns make it onto the platform, even if the initial model classification is inconclusive. These thresholds should catch these cases without flagging unrelated content, so let's leave this unchanged.
Step 8: Set up a second rule to send content to manual review
Now we'll create a second rule to handle our human review cases. In the previous step, we added a score range for animated_gun to our list of manual review conditions and confirmed that lower-confidence classifications for gun_in_hand and gun_not_in_hand are captured by default. So now, all we need to do is set up a rule that sends images that meet these conditions to Moderation Dashboard's manual review feed.
To do this, navigate back to the Rules interface using the sidebar and select "Create New." Then fill in the logic shown below using the dropdown menus. Note that "Flag Post For Review" will be available as an action by default if human review conditions are active – no need to set this up ourselves (phew).

With the review thresholds configured in Step 7, this rule takes care of the second and third parts of our content policy, so we're all set! We can now test our new rule and take a look at review feed interface.
Step 9: Test out manual review rules
Now that our rule is active, let's send in a second animated gun image to test: copy the URL below into the request syntax in Step 6 to send this example image to Moderation Dashboard (you may also want to change the post ID).
https://staticg.sportskeeda.com/editor/2021/12/69832-16406759138773-1920.jpg
Unsurprisingly, Hive's visual model classifies this image as animated_gun with a confidence score of 1.0. Since we added this class to our review conditions in Step 7, this should be flagged by our new manual review rule.
After sending this test image, we can verify that our "Send Post to Manual Review" rule triggered by simply looking at the API response. Also, if you return to the Actions Log in Moderation Dashboard, you should see the rule and corresponding action there:

At this point, no enforcement (e.g., deleting the post) has happened. Instead, Moderation Dashboard should route the image to the Post Review Feed for a final decision by a moderator on our hypothetical platform's Trust & Safety team.
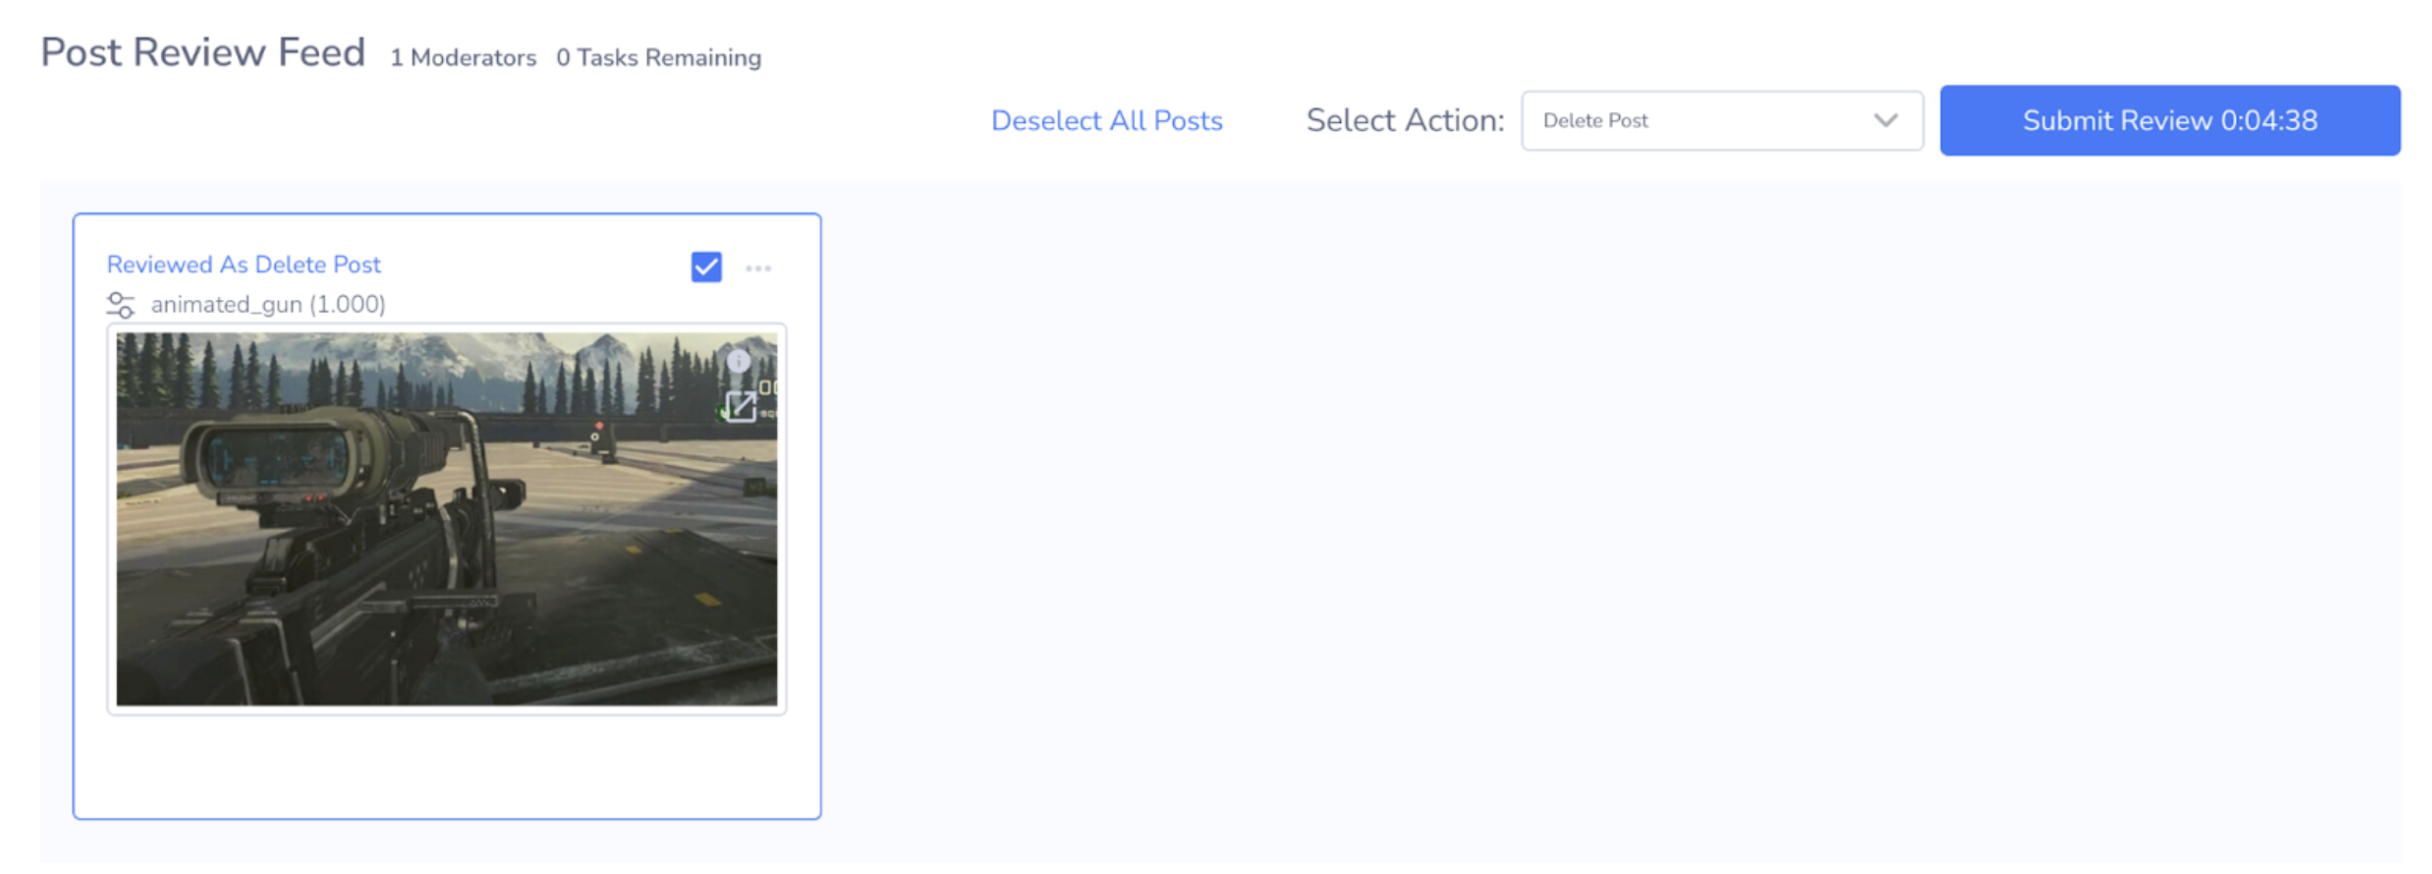
If you navigate to the Post Review Feed using the sidebar, you should see the post there:

If this were reviewed by a moderator following our content policy, they should allow this image (i.e., take no action) based our content policy we decided on.
For the sake of completeness, though, let's also make sure the "Delete Post" action we set up in Part 1 works correctly for manual moderation decisions. Go ahead and tick the box in the upper right hand corner of the post preview – you should see the image header change to "Reviewed as Delete Post" – and then select "Submit Review."
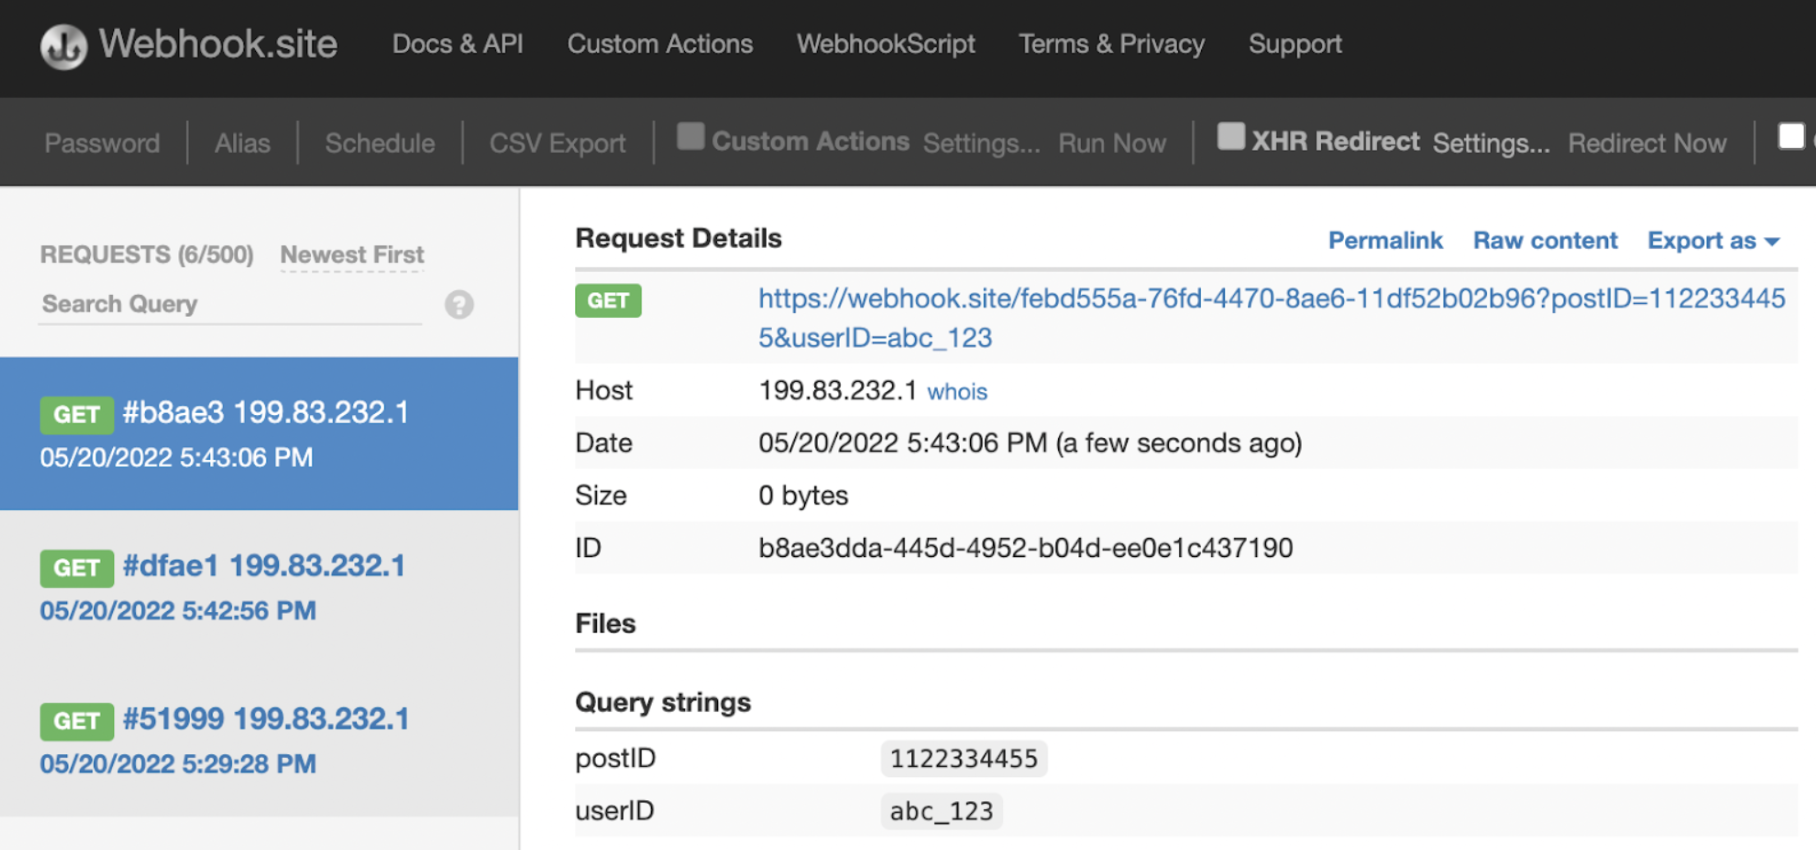
If you return to your Webhook tab, you should see that Moderation Dashboard sent a callback to the URL we set up for our "Delete Post" action:

So now we've confirmed: (1) our manual review rule is working as intended for animated guns, and (2) and our "Delete Post" action works for both our automated rule in Part 1 and the manual decision we entered in the Post Review Feed. Woohoo!
Wrapping up
Hopefully this guide was a helpful starting point for setting up and getting started with Moderation Dashboard. To recap, you should now be familiar with:
- How to send content to Moderation Dashboard via the API
- How and when you might change Hive's default classification settings and thresholds
- How to configure and test actions that can be taken on posts
- How to set up and test simple rules for both auto-moderating posts and routing posts to manual review
There are a few features and additional customizability we didn't cover (user rules, spam manager etc.). And maybe the rules we set up don't apply to your platform. But the core concepts presented here are broadly applicable: you can follow these same steps to create and test rules/actions for other types of content that lines up with your platform's policies. As you design your real moderation workflow, be sure to consult our visual and text moderation class descriptions to see how these align with the content you want to screen.
If the possibilities are intimidating, don't worry: Many of our customers start with only a basic set of core rules and then build out more complex policies as they identify gaps and become more familiar with Hive models. Something is always better than nothing!
If you'd like to learn more, you can also find a complete overview of all Moderation Dashboard features in our documentation linked below. Stay tuned for more guides on text moderation and other features!
Updated 2 months ago
