Quickstart
A quick overview of the AutoML workflow and how to get started
Hive’s AutoML platform allows you easily train, evaluate, and deploy customized machine learning models. Beginning with your own data, our platform guides you through the process of creating a fully-functional model accessible via an API endpoint just like Hive pre-trained models.
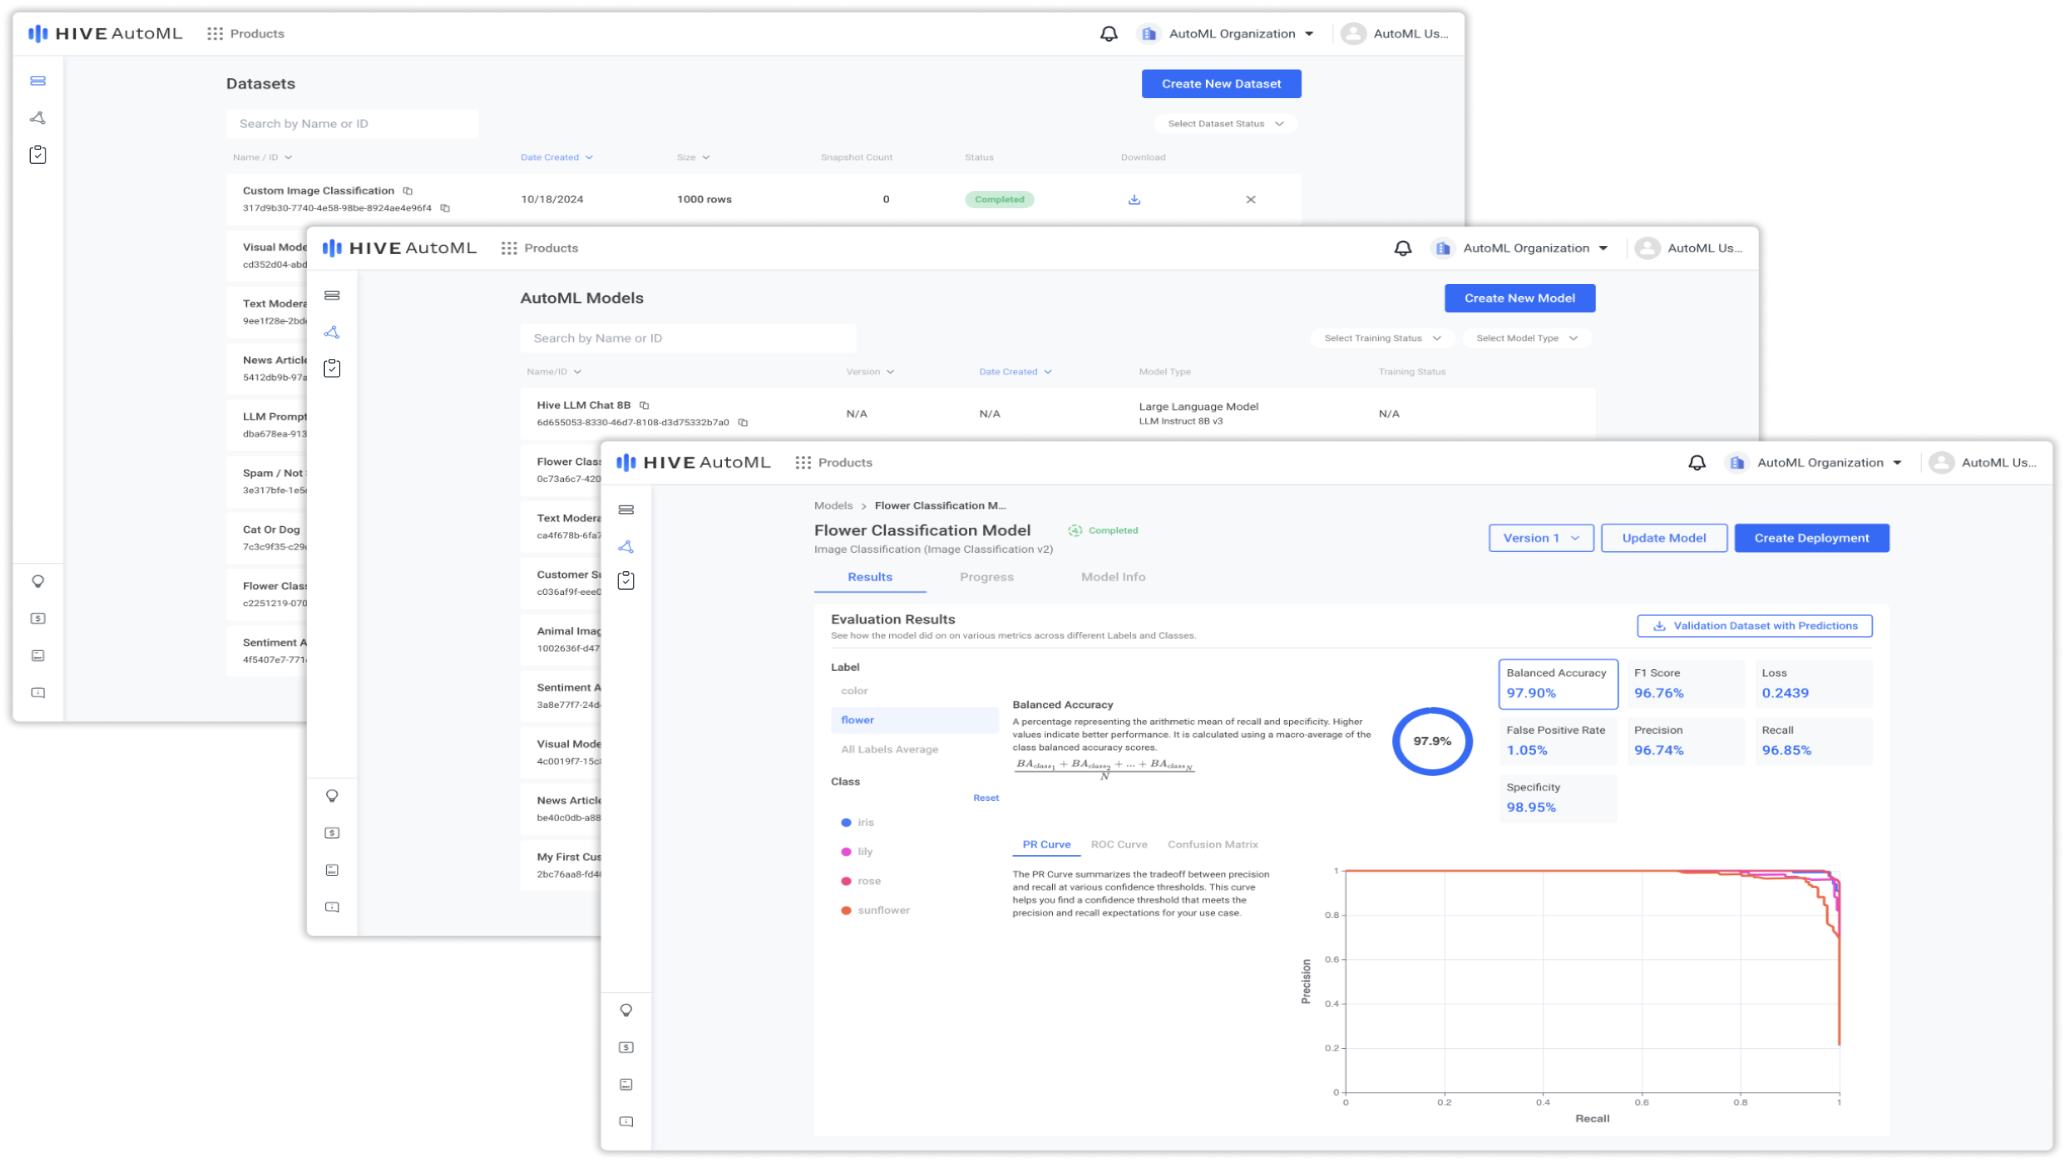
Overview
Hive’s AutoML platform is composed of three primary sections: Datasets, Models, and Evaluations. Visit the relevant documentation pages for these three concepts to get a deep dive into each. For this quickstart, the concept overviews below should be sufficient. Using these overviews and the steps laid out below, you can easily train and deploy your first AutoML model!
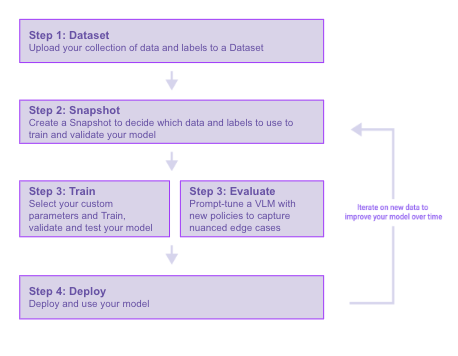
A visualization of the steps necessary to build a model
Step 1. Create a Dataset
Training a machine learning model starts with data. Use the Create New Dataset button to open the dataset creation form. Follow the creation flow to give your dataset a name, upload your dataset file(s), and confirm the column mappings.
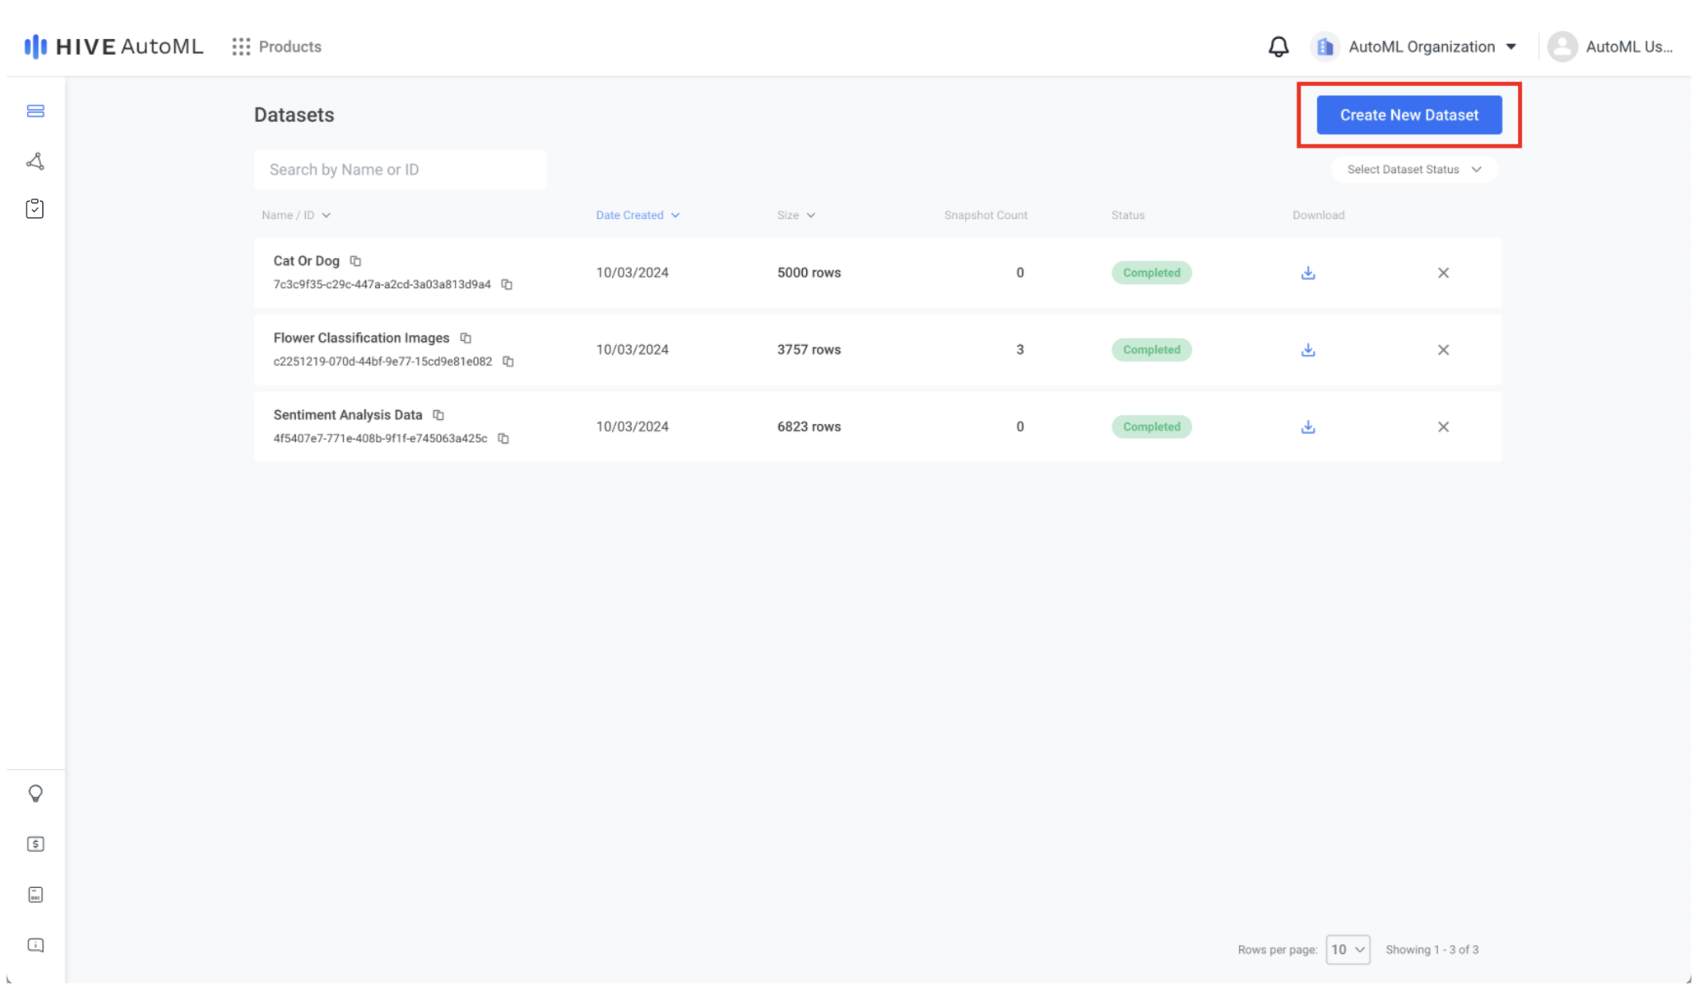
AutoML Dataset Page
Step 2. Create a Snapshot
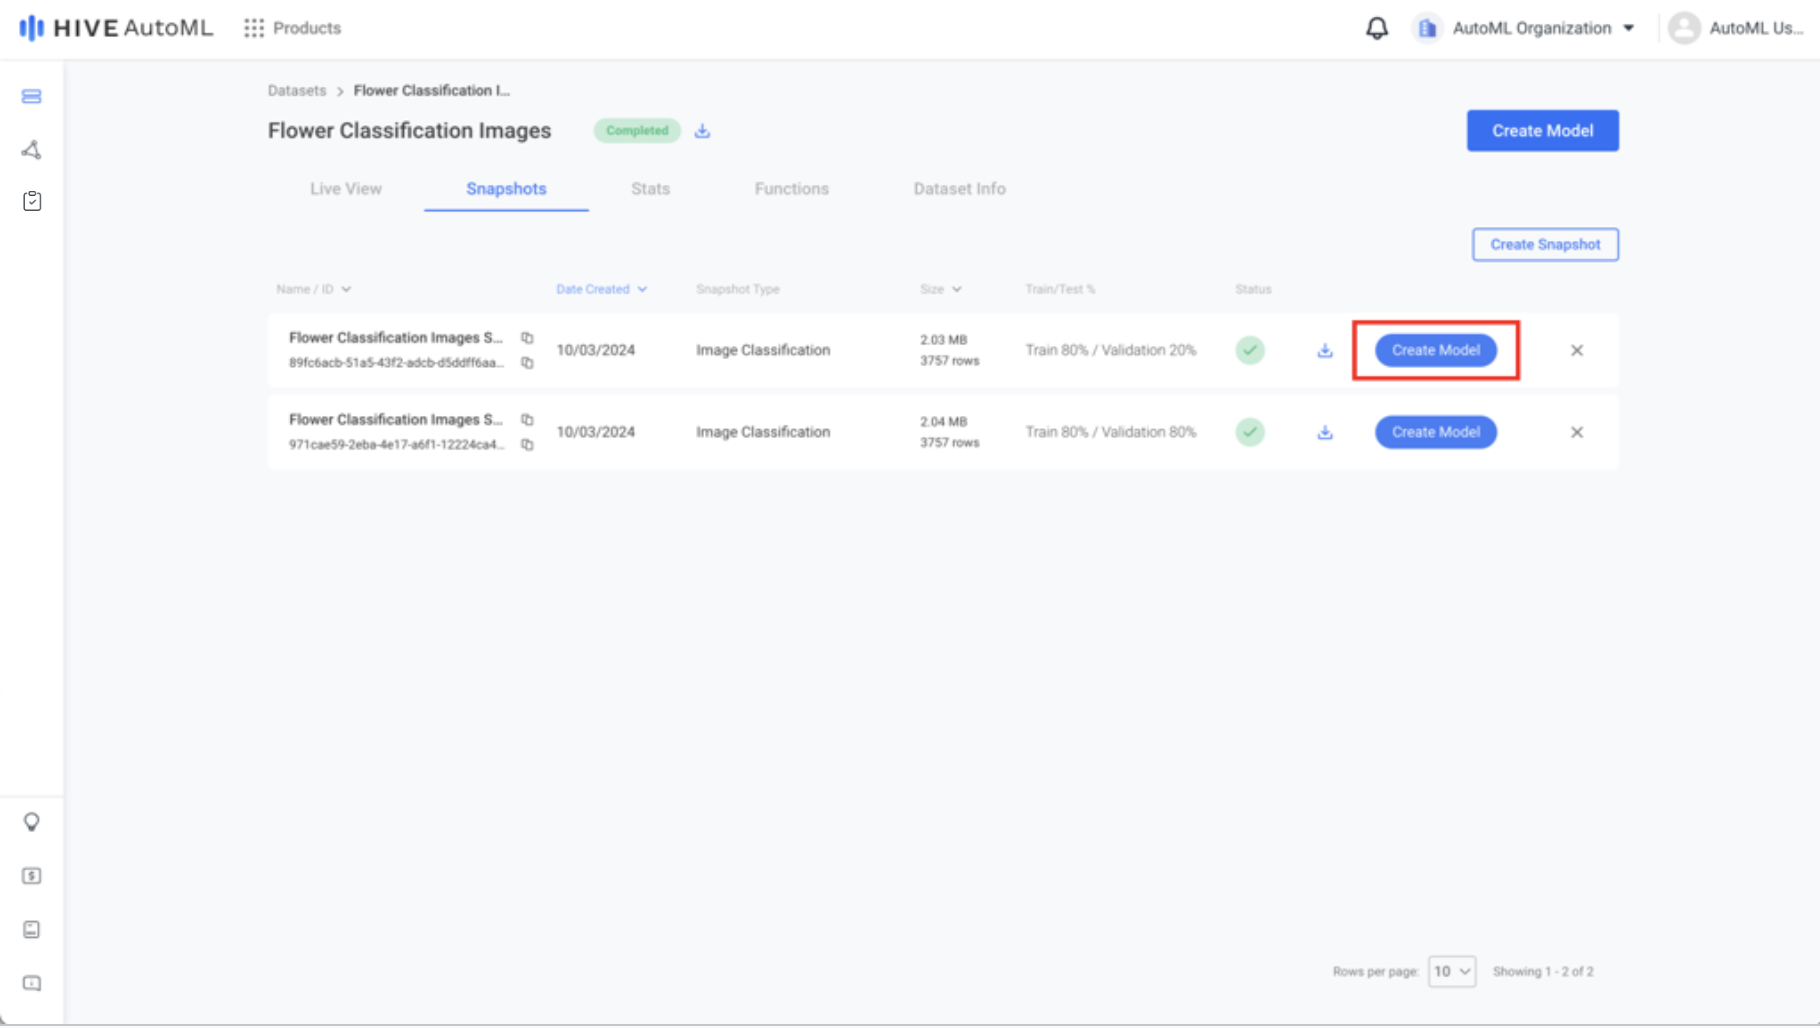
Use the Create Snapshot button in the Snapshots tab of your newly created dataset to create a snapshot, which will be used in the next step to train your AutoML model. Snapshot creation validates your dataset to ensure it can be used for model training and splits your model into train, validation, and test partitions.
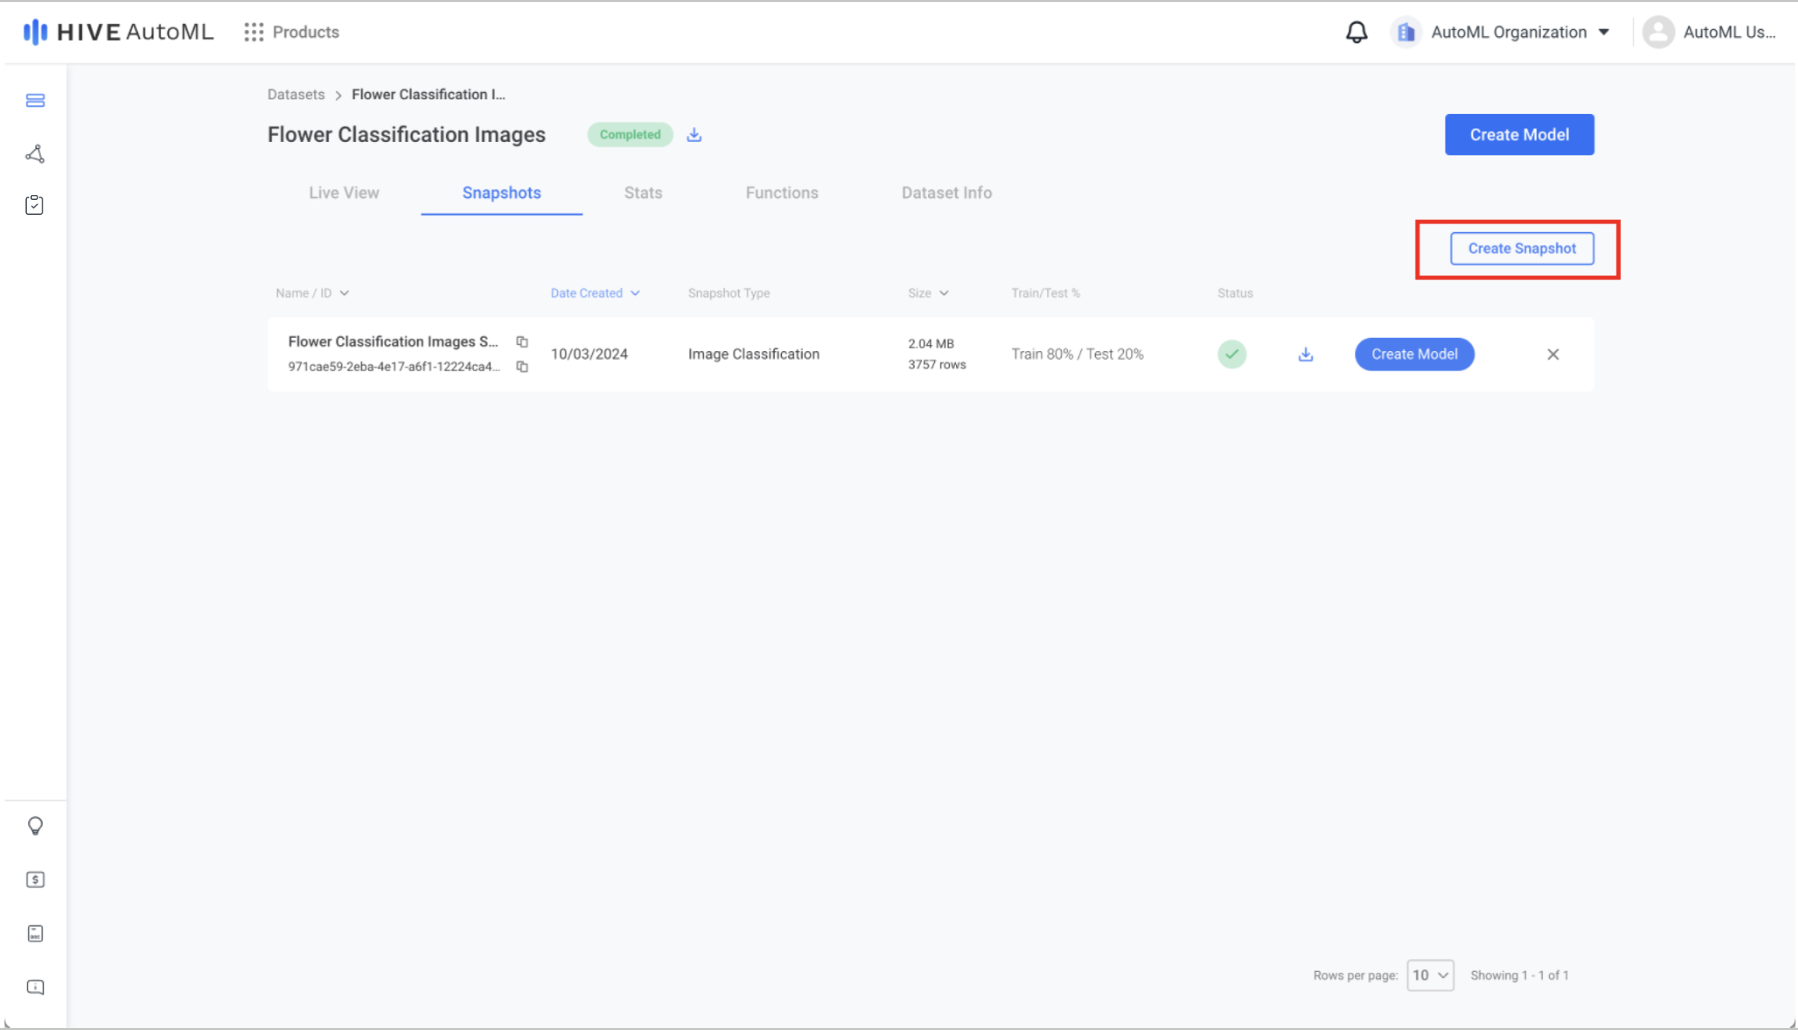
Flower Classification Images Dataset Snapshot Page
Step 3. Train a Model
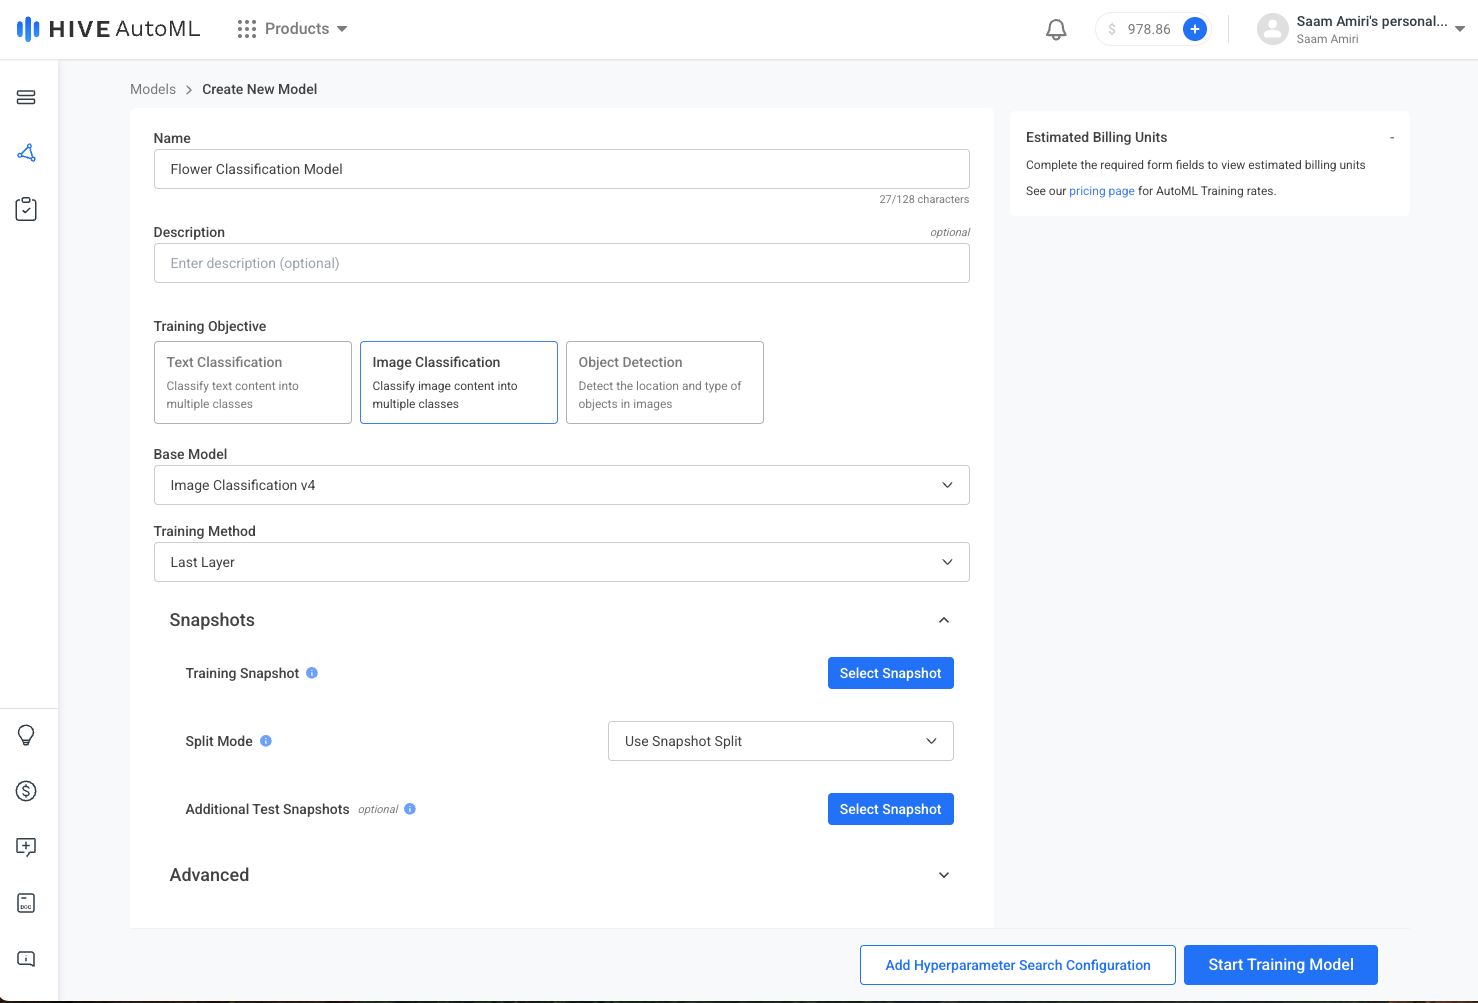
Once your snapshot is created, there are several ways to train a model with it. The simplest is to click the Create Model button on your newly created snapshot in the dataset Snapshots tab. The model creation form is pre-filled with default training options that have been thoroughly tested by our team to perform well on most datasets.
Customize the training options as desired and click Start Training Model to begin training. If you would like to quickly try different model configurations, create a Hyperparameter Search to easily kick off multiple trainings at once.
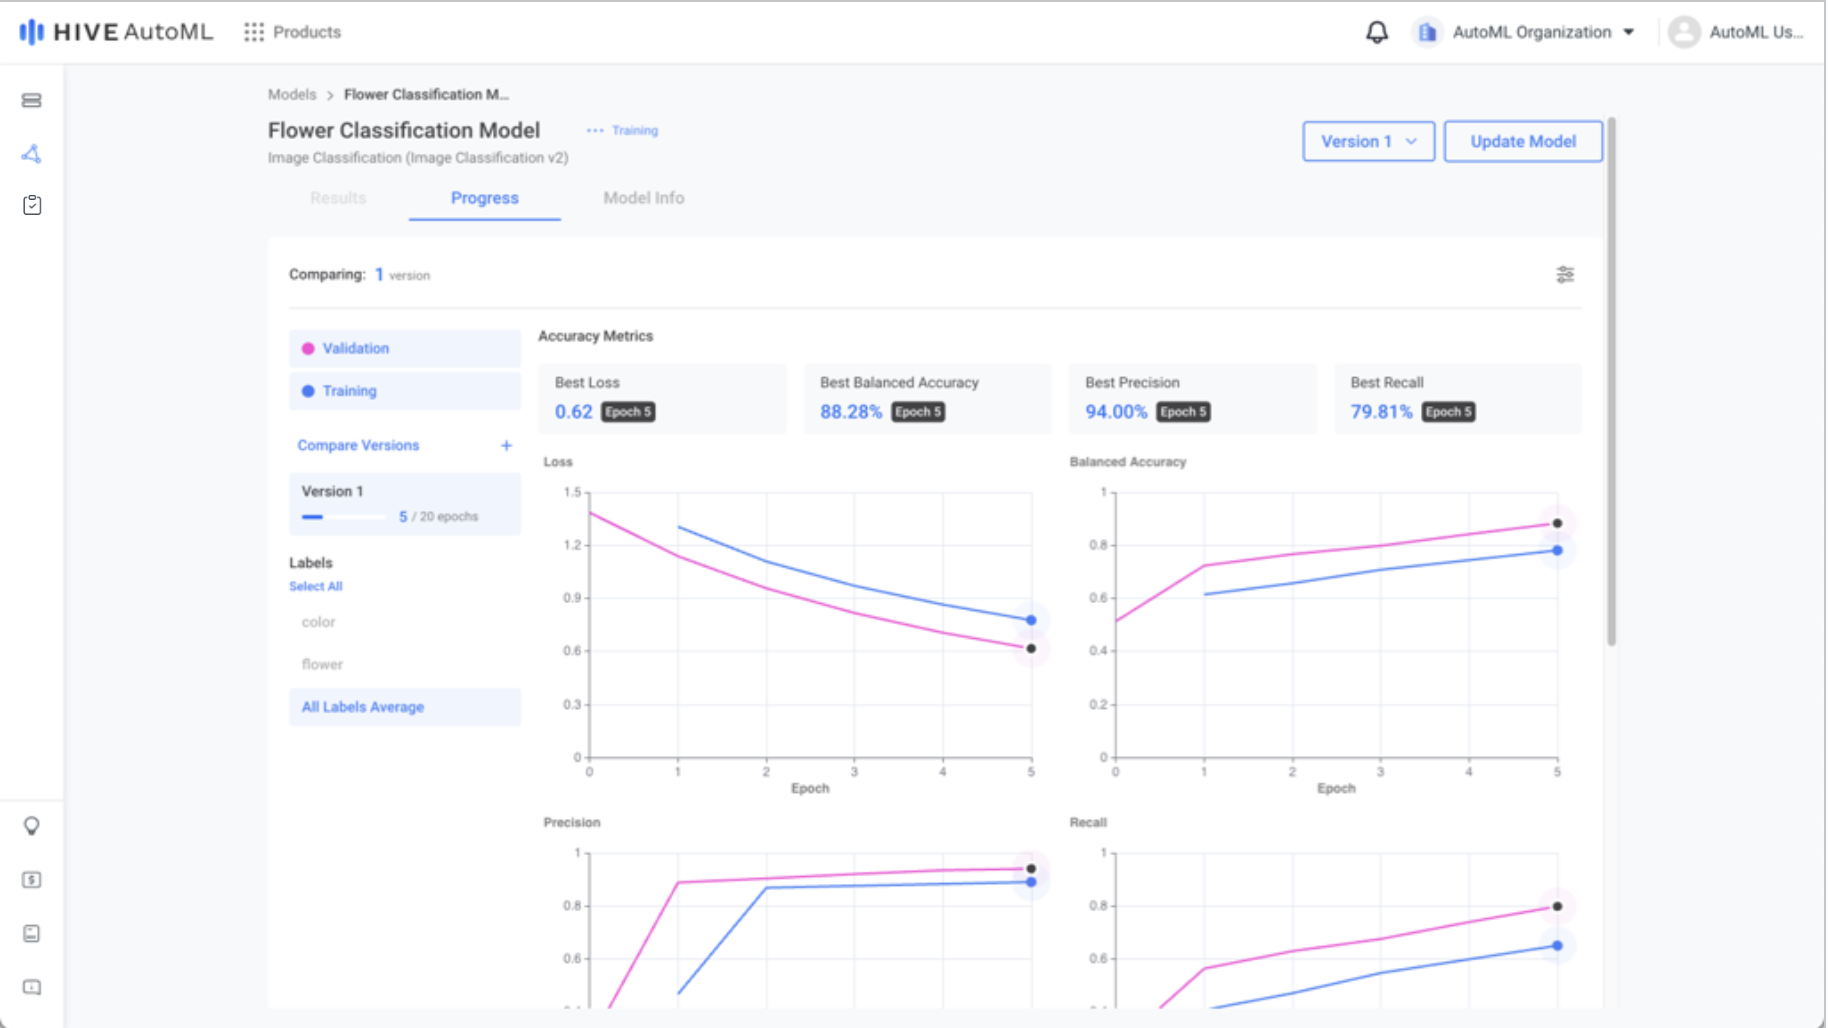
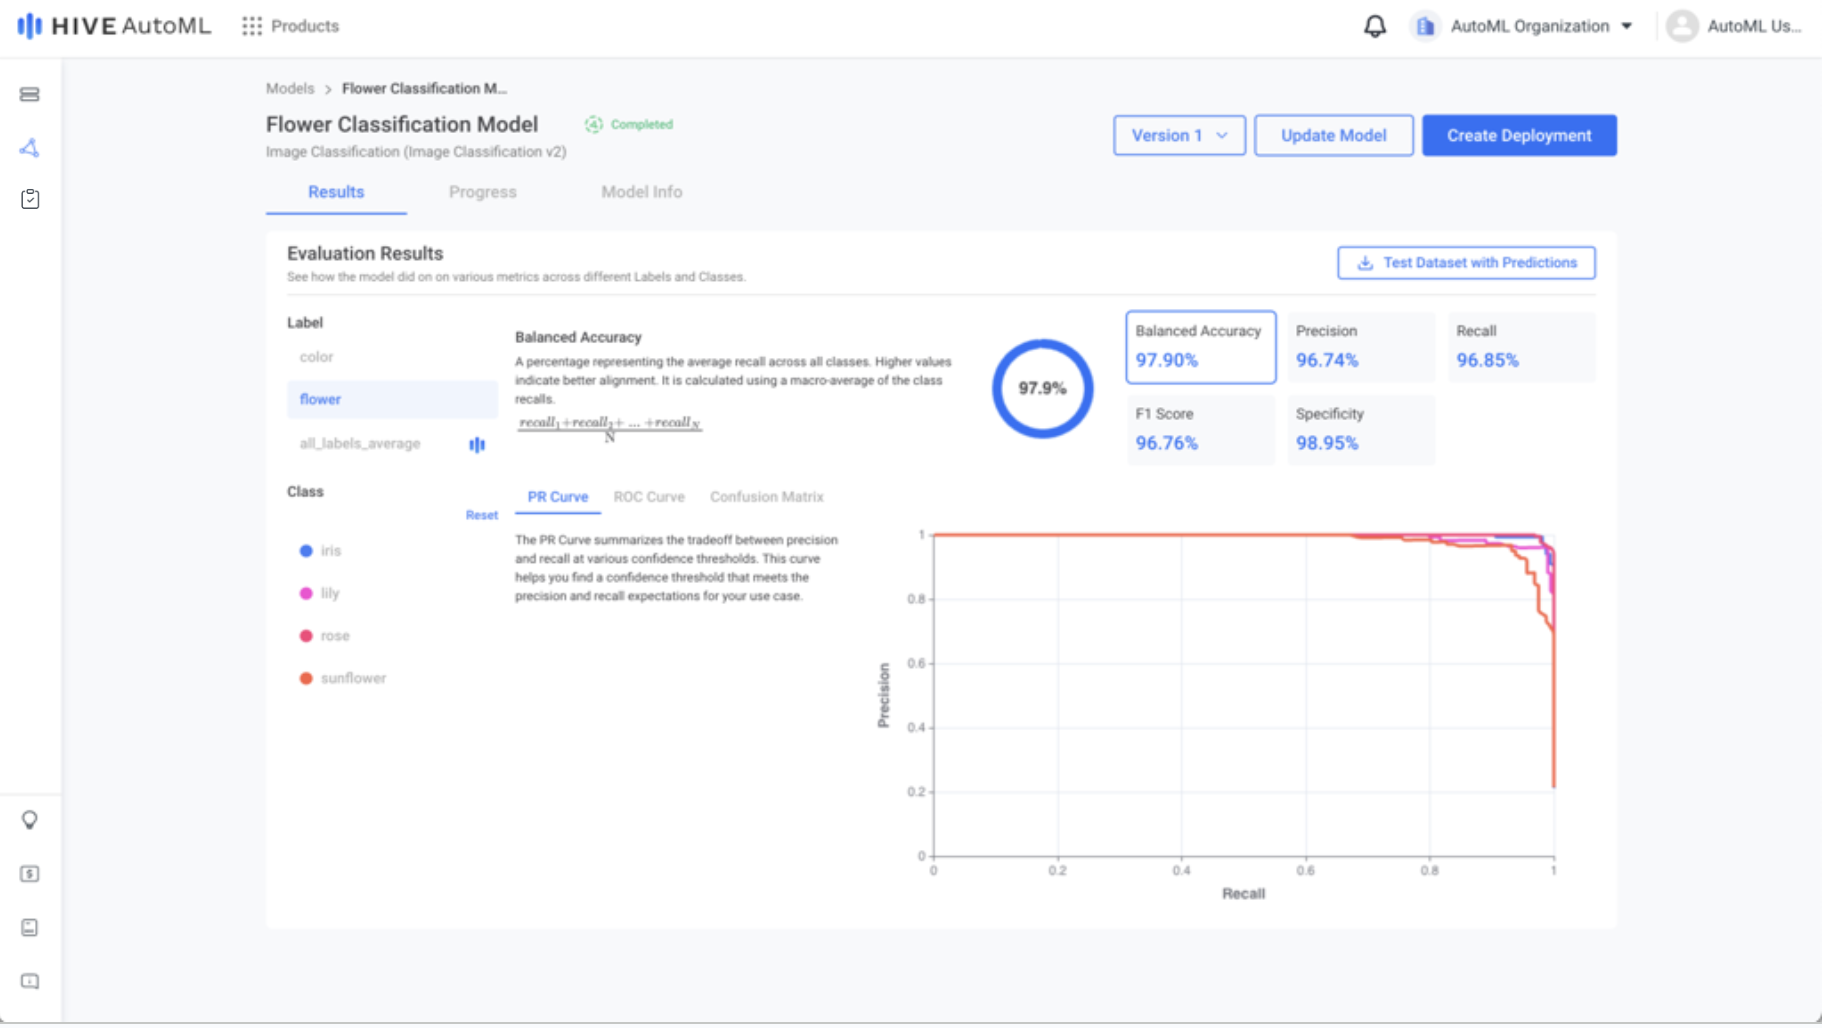
When your model begins training, you can follow along in the Progress tab, where you can also compare multiple model versions if applicable. Once your model trains for the set number of epochs or converges and early stops, you can view the finalized metrics for your model in the Results tab.
Dataset Snapshot Page | AutoML Model Creation Form |
|---|---|
|
|
Model Progress Page | Model Results Page |
|
|
Step 3. Evaluate a Model
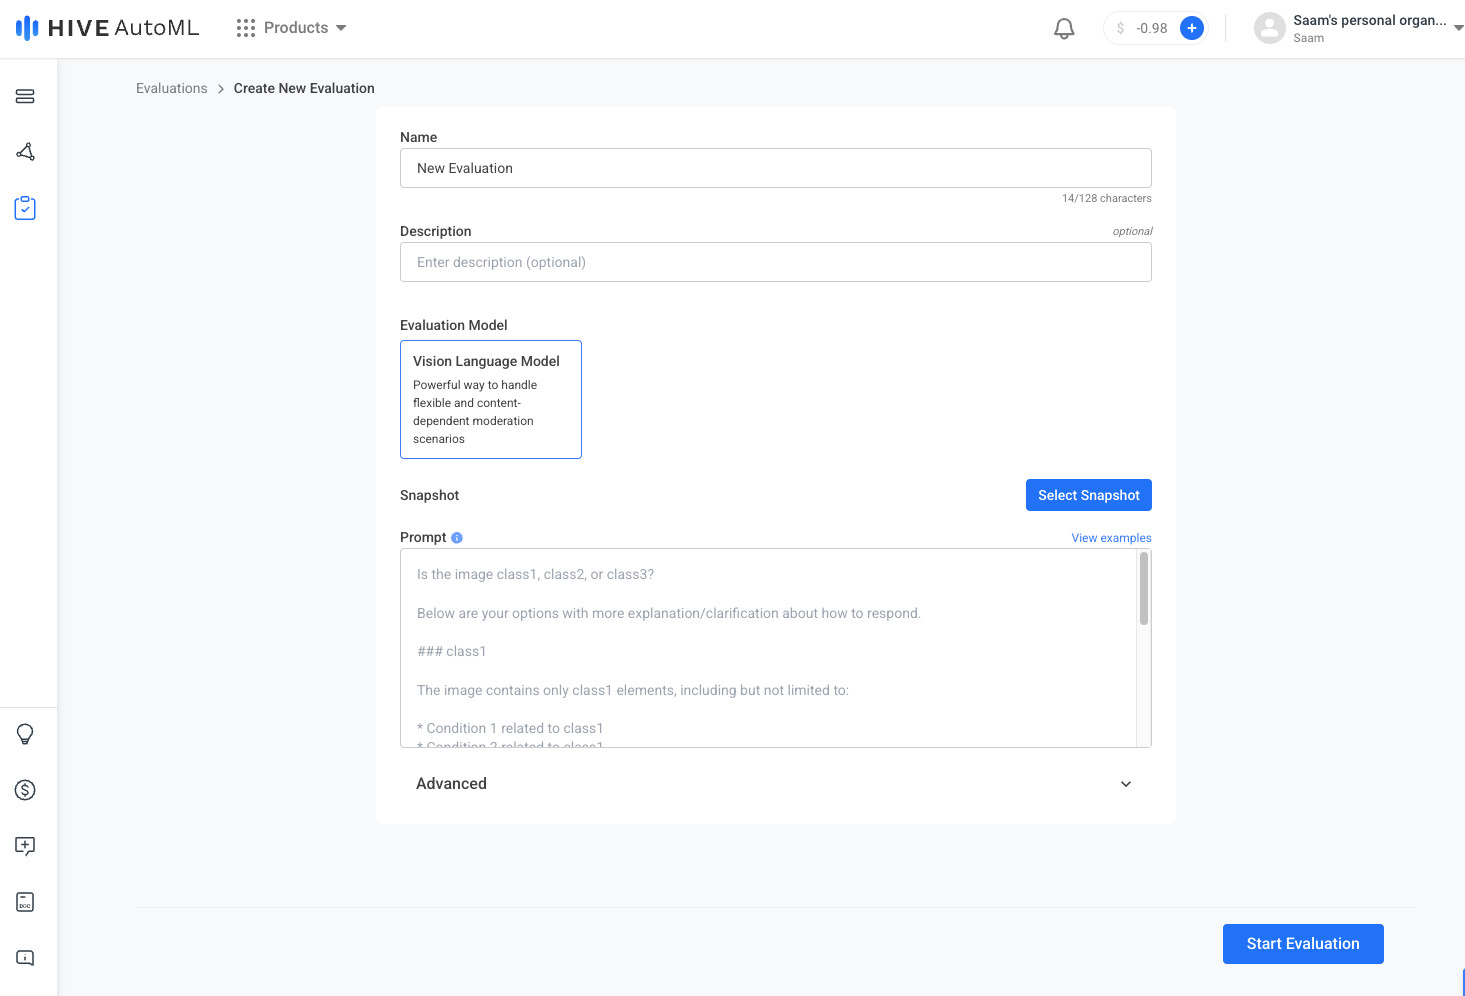
Once your snapshot is created, there are several ways to evaluate a model with it. The simplest is to click the Create Evaluation button on your newly created snapshot in the dataset Snapshots tab. The model creation form is pre-filled with default training options that have been thoroughly tested by our team to perform well on most datasets.
Customize the training options as desired and click Start Evaluation to begin evaluating.
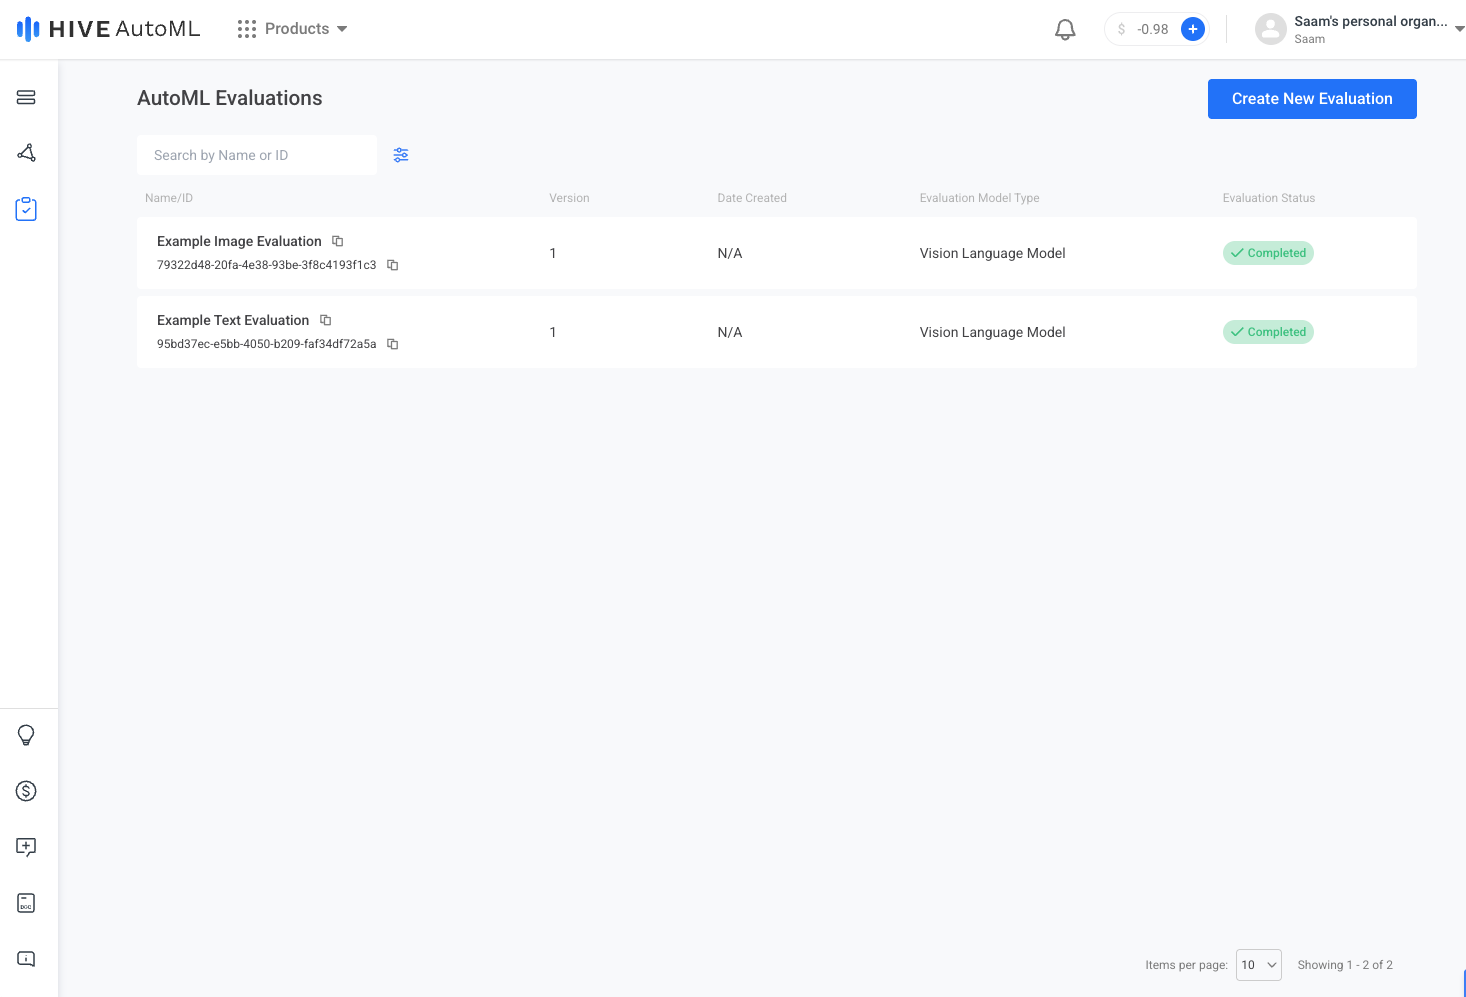
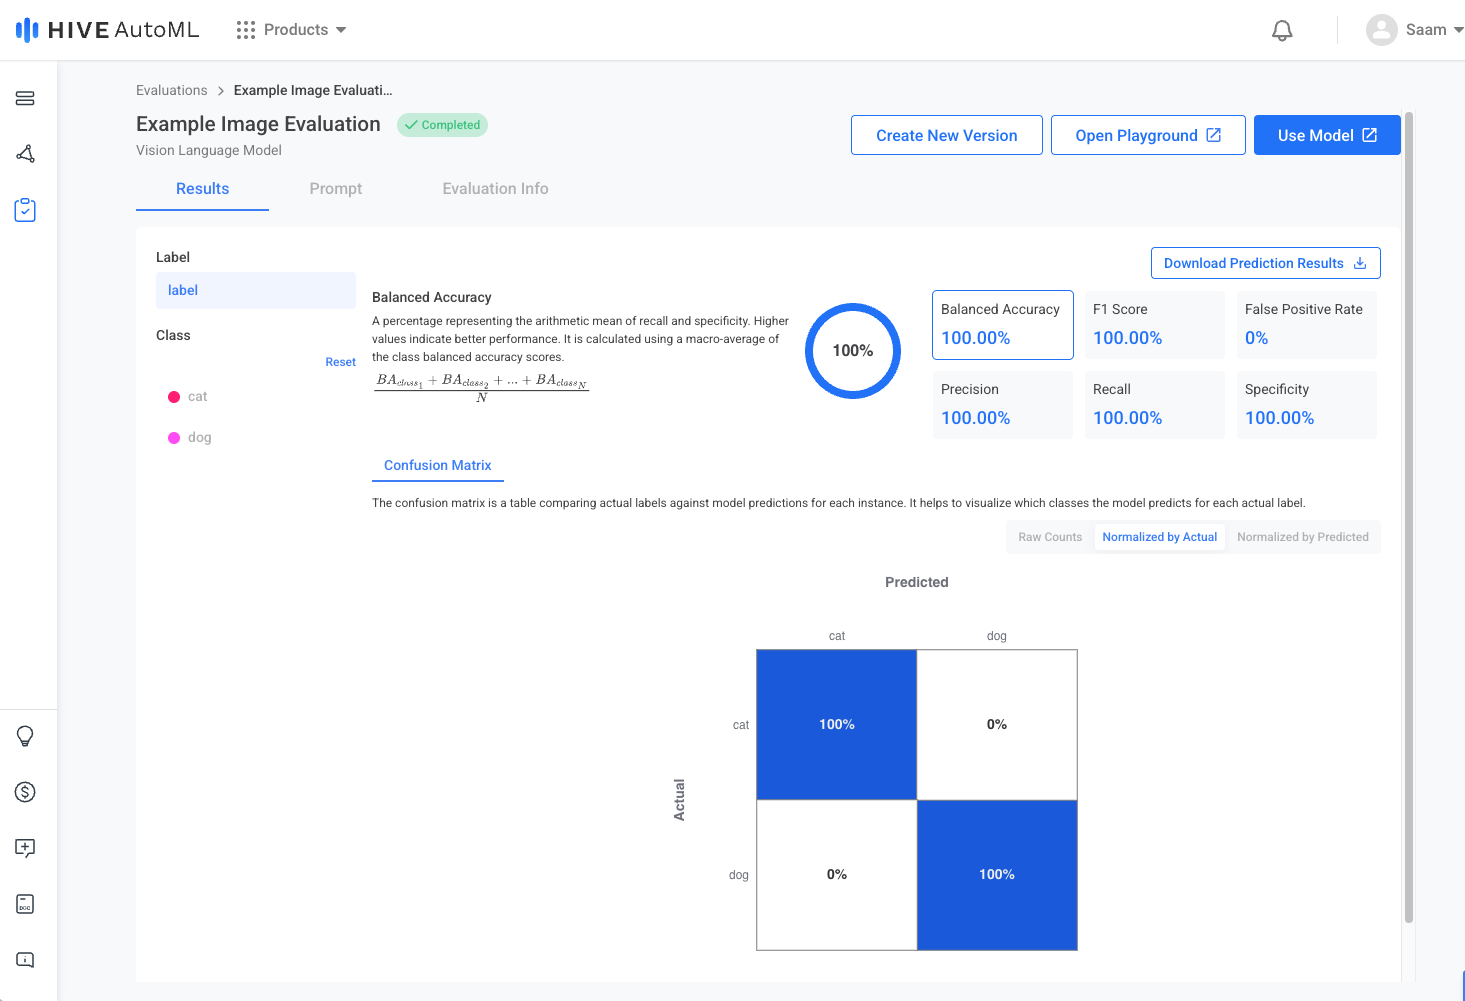
When your model begins evaluating, you can follow along in the Progress tab, where you can also compare multiple model versions if applicable. Once the evaluation completes, you can view the finalized metrics for your evaluation in the Results tab.
AutoML Evaluations Page | Create New Evaluation Page |
|---|---|
|
|
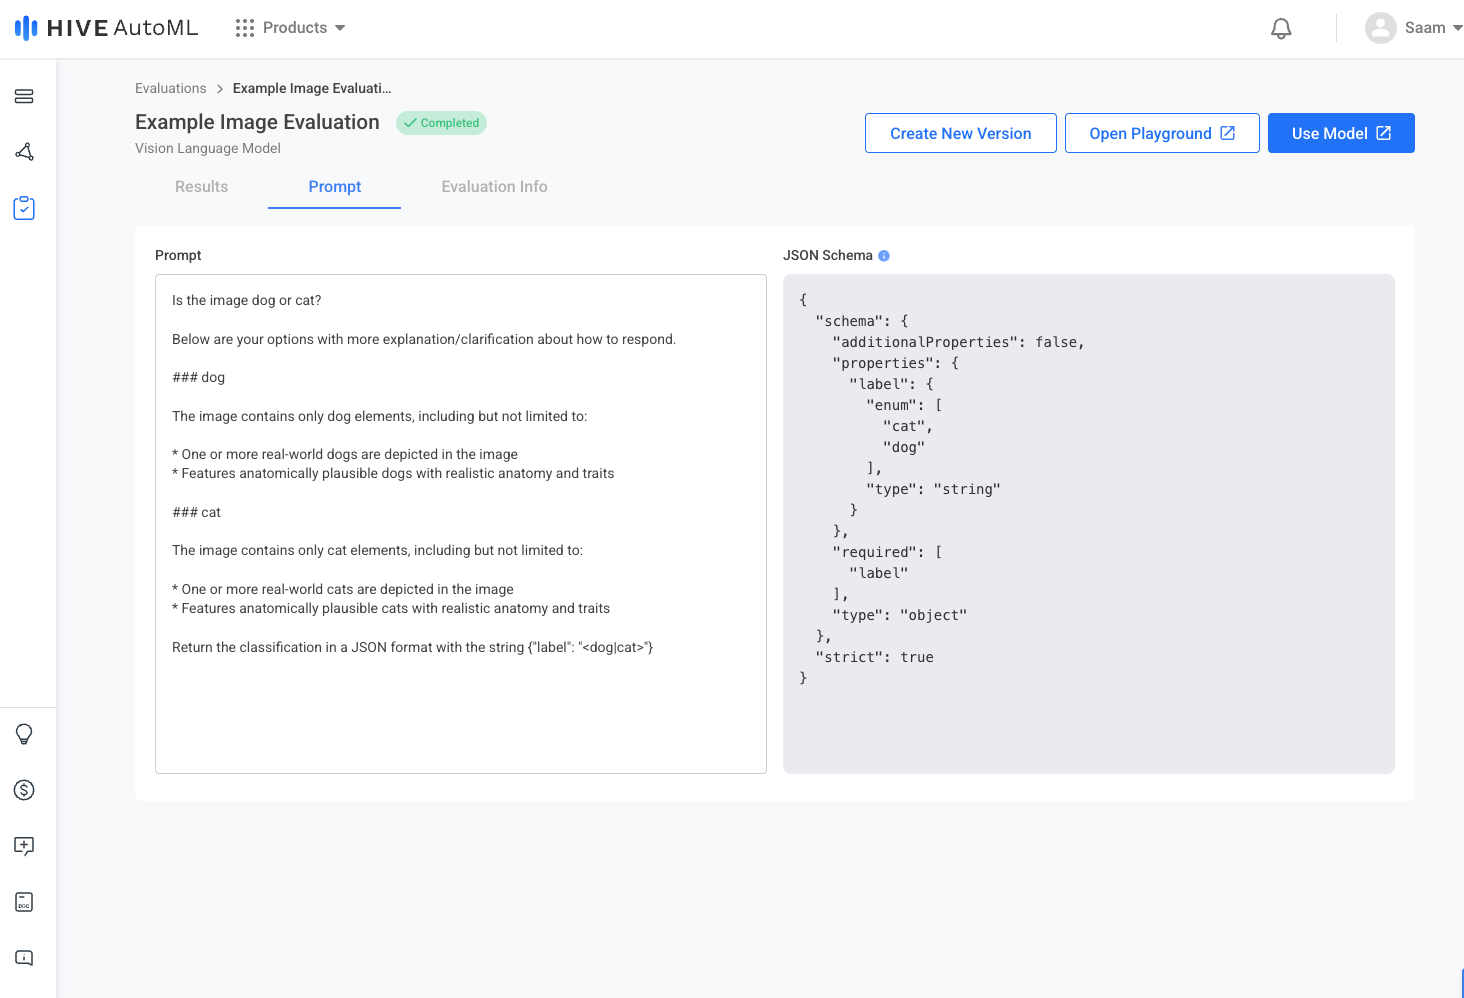
Evaluation Results Page | Evaluation Prompt Page |
|
|
Step 4. Deploy a Model
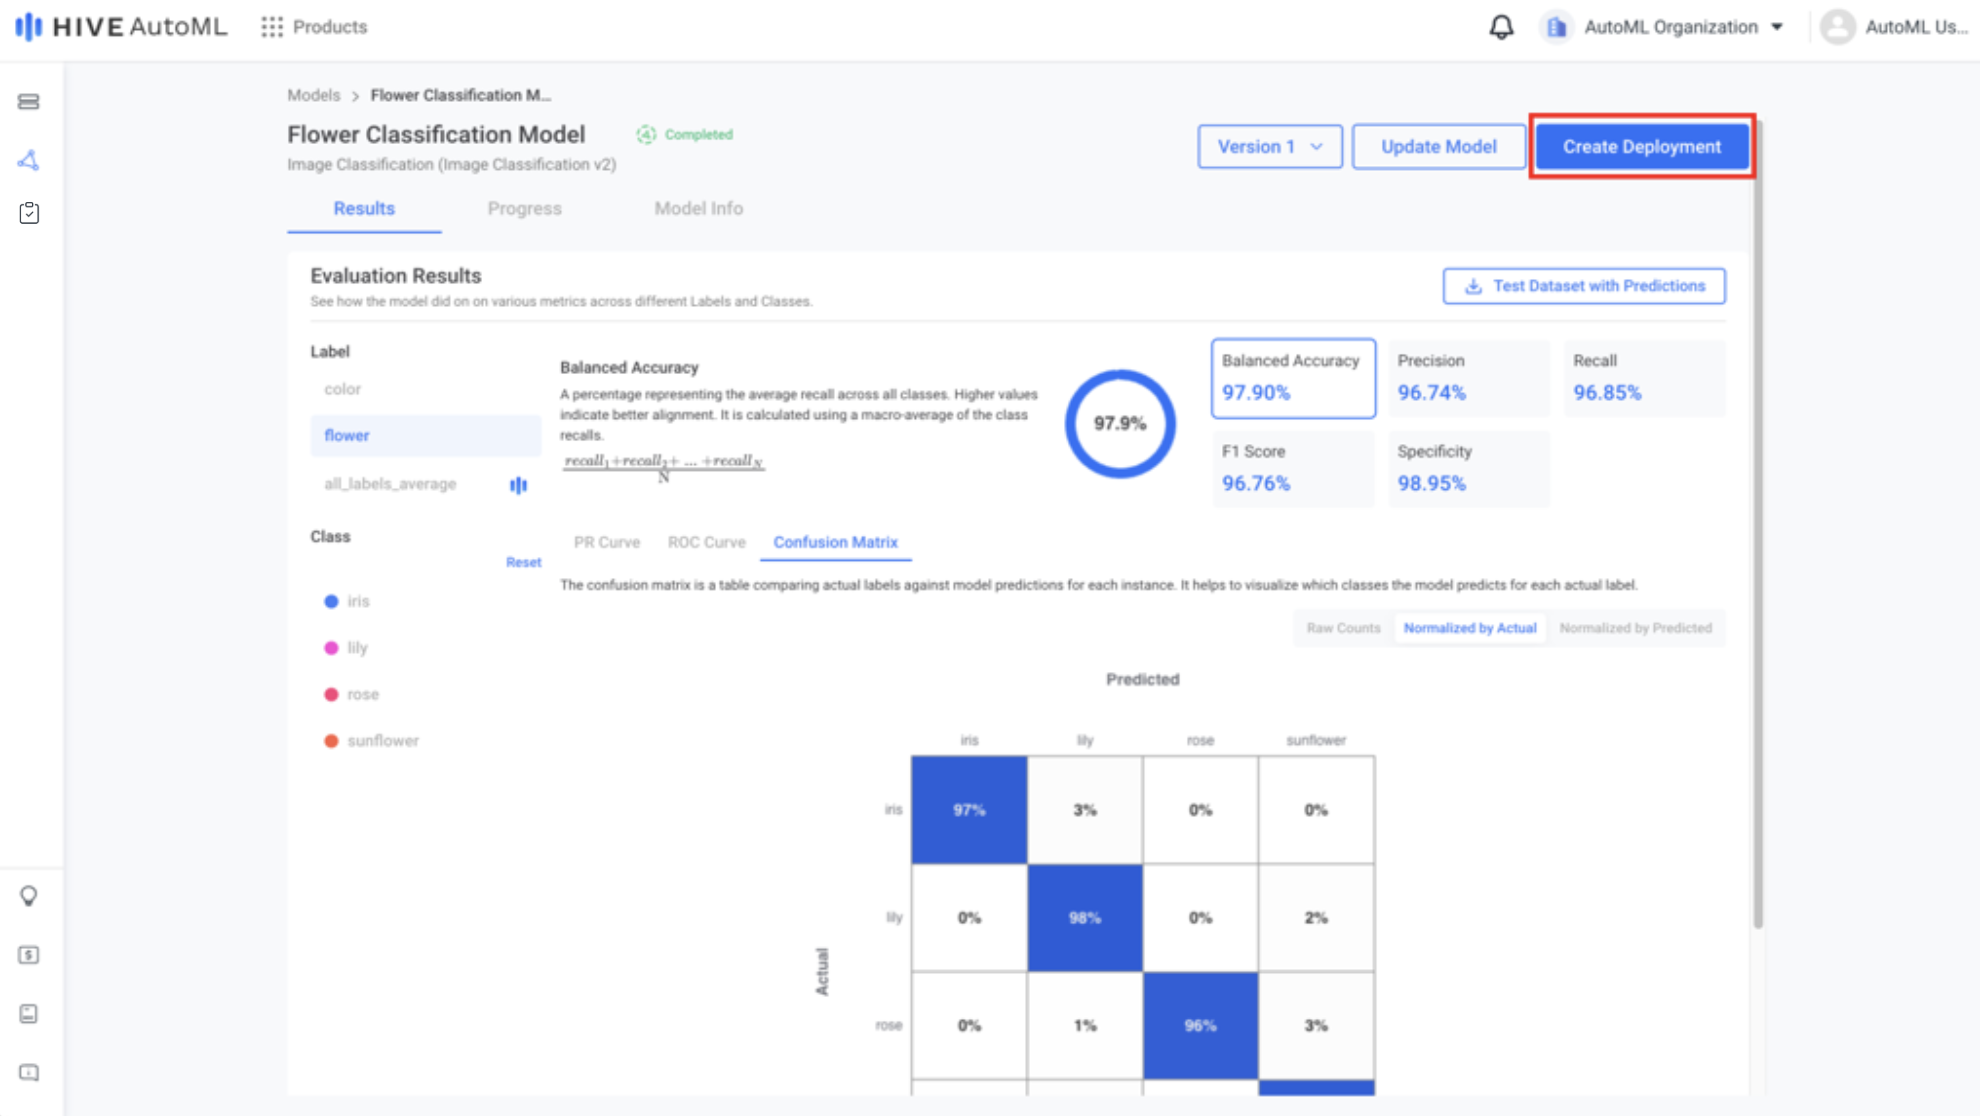
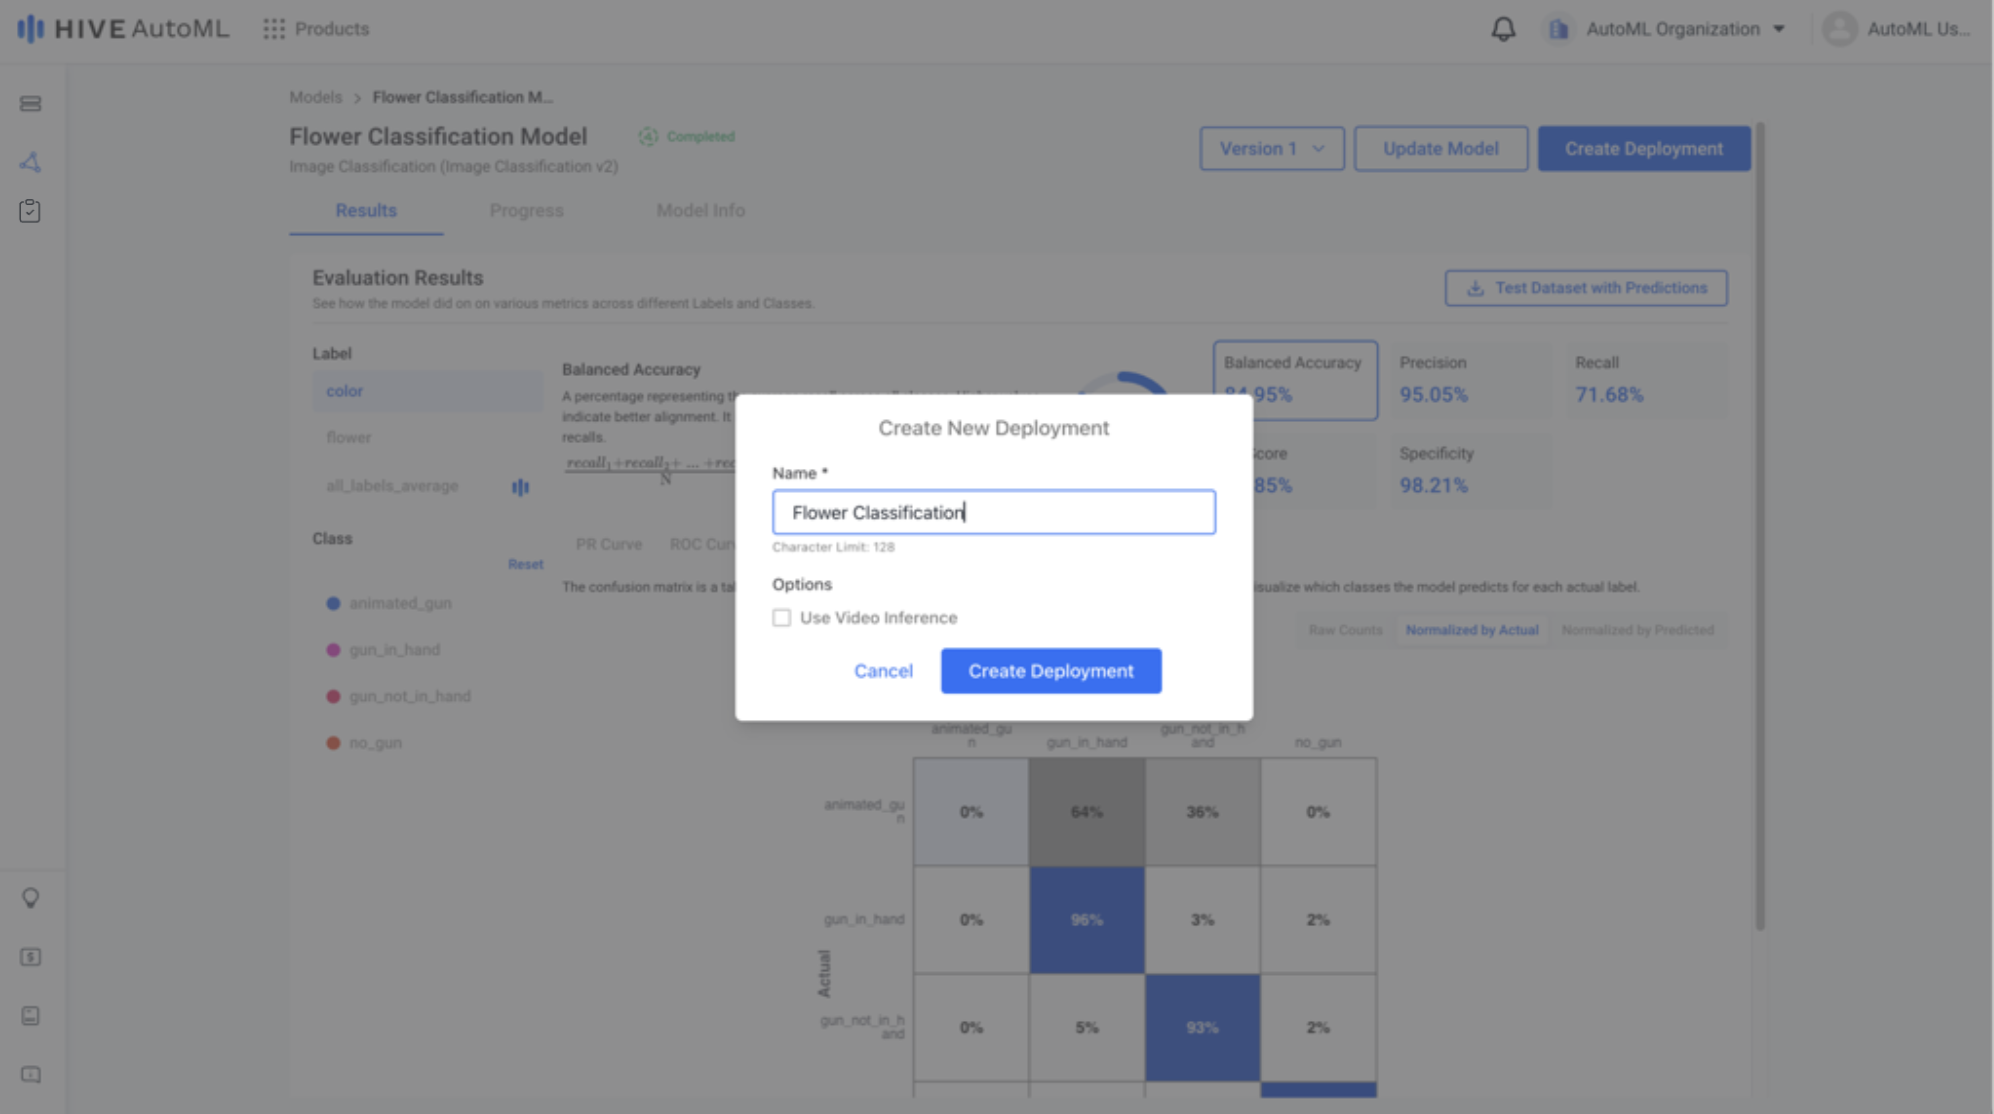
Easily prepare your model for inference by clicking the Create Deployment button. Simply provide a name and confirm the creation. Your model will be deployed to a Hive Models project, where organization admins can access the API keys and any user can begin submitting tasks.
| Model Deployment Button | Model Deployment Form |
|---|---|
 |  |
Step 5. Submit Tasks for Inference
View the project associated with your new custom model in Hive Models to begin submitting inference tasks. Just like any Hive pre-trained model, you can submit tasks via the UI or the API. Your newly created project shares the same amazing features Hive Models offers for pre-trained models—view tasks, track your inference volume, and more.
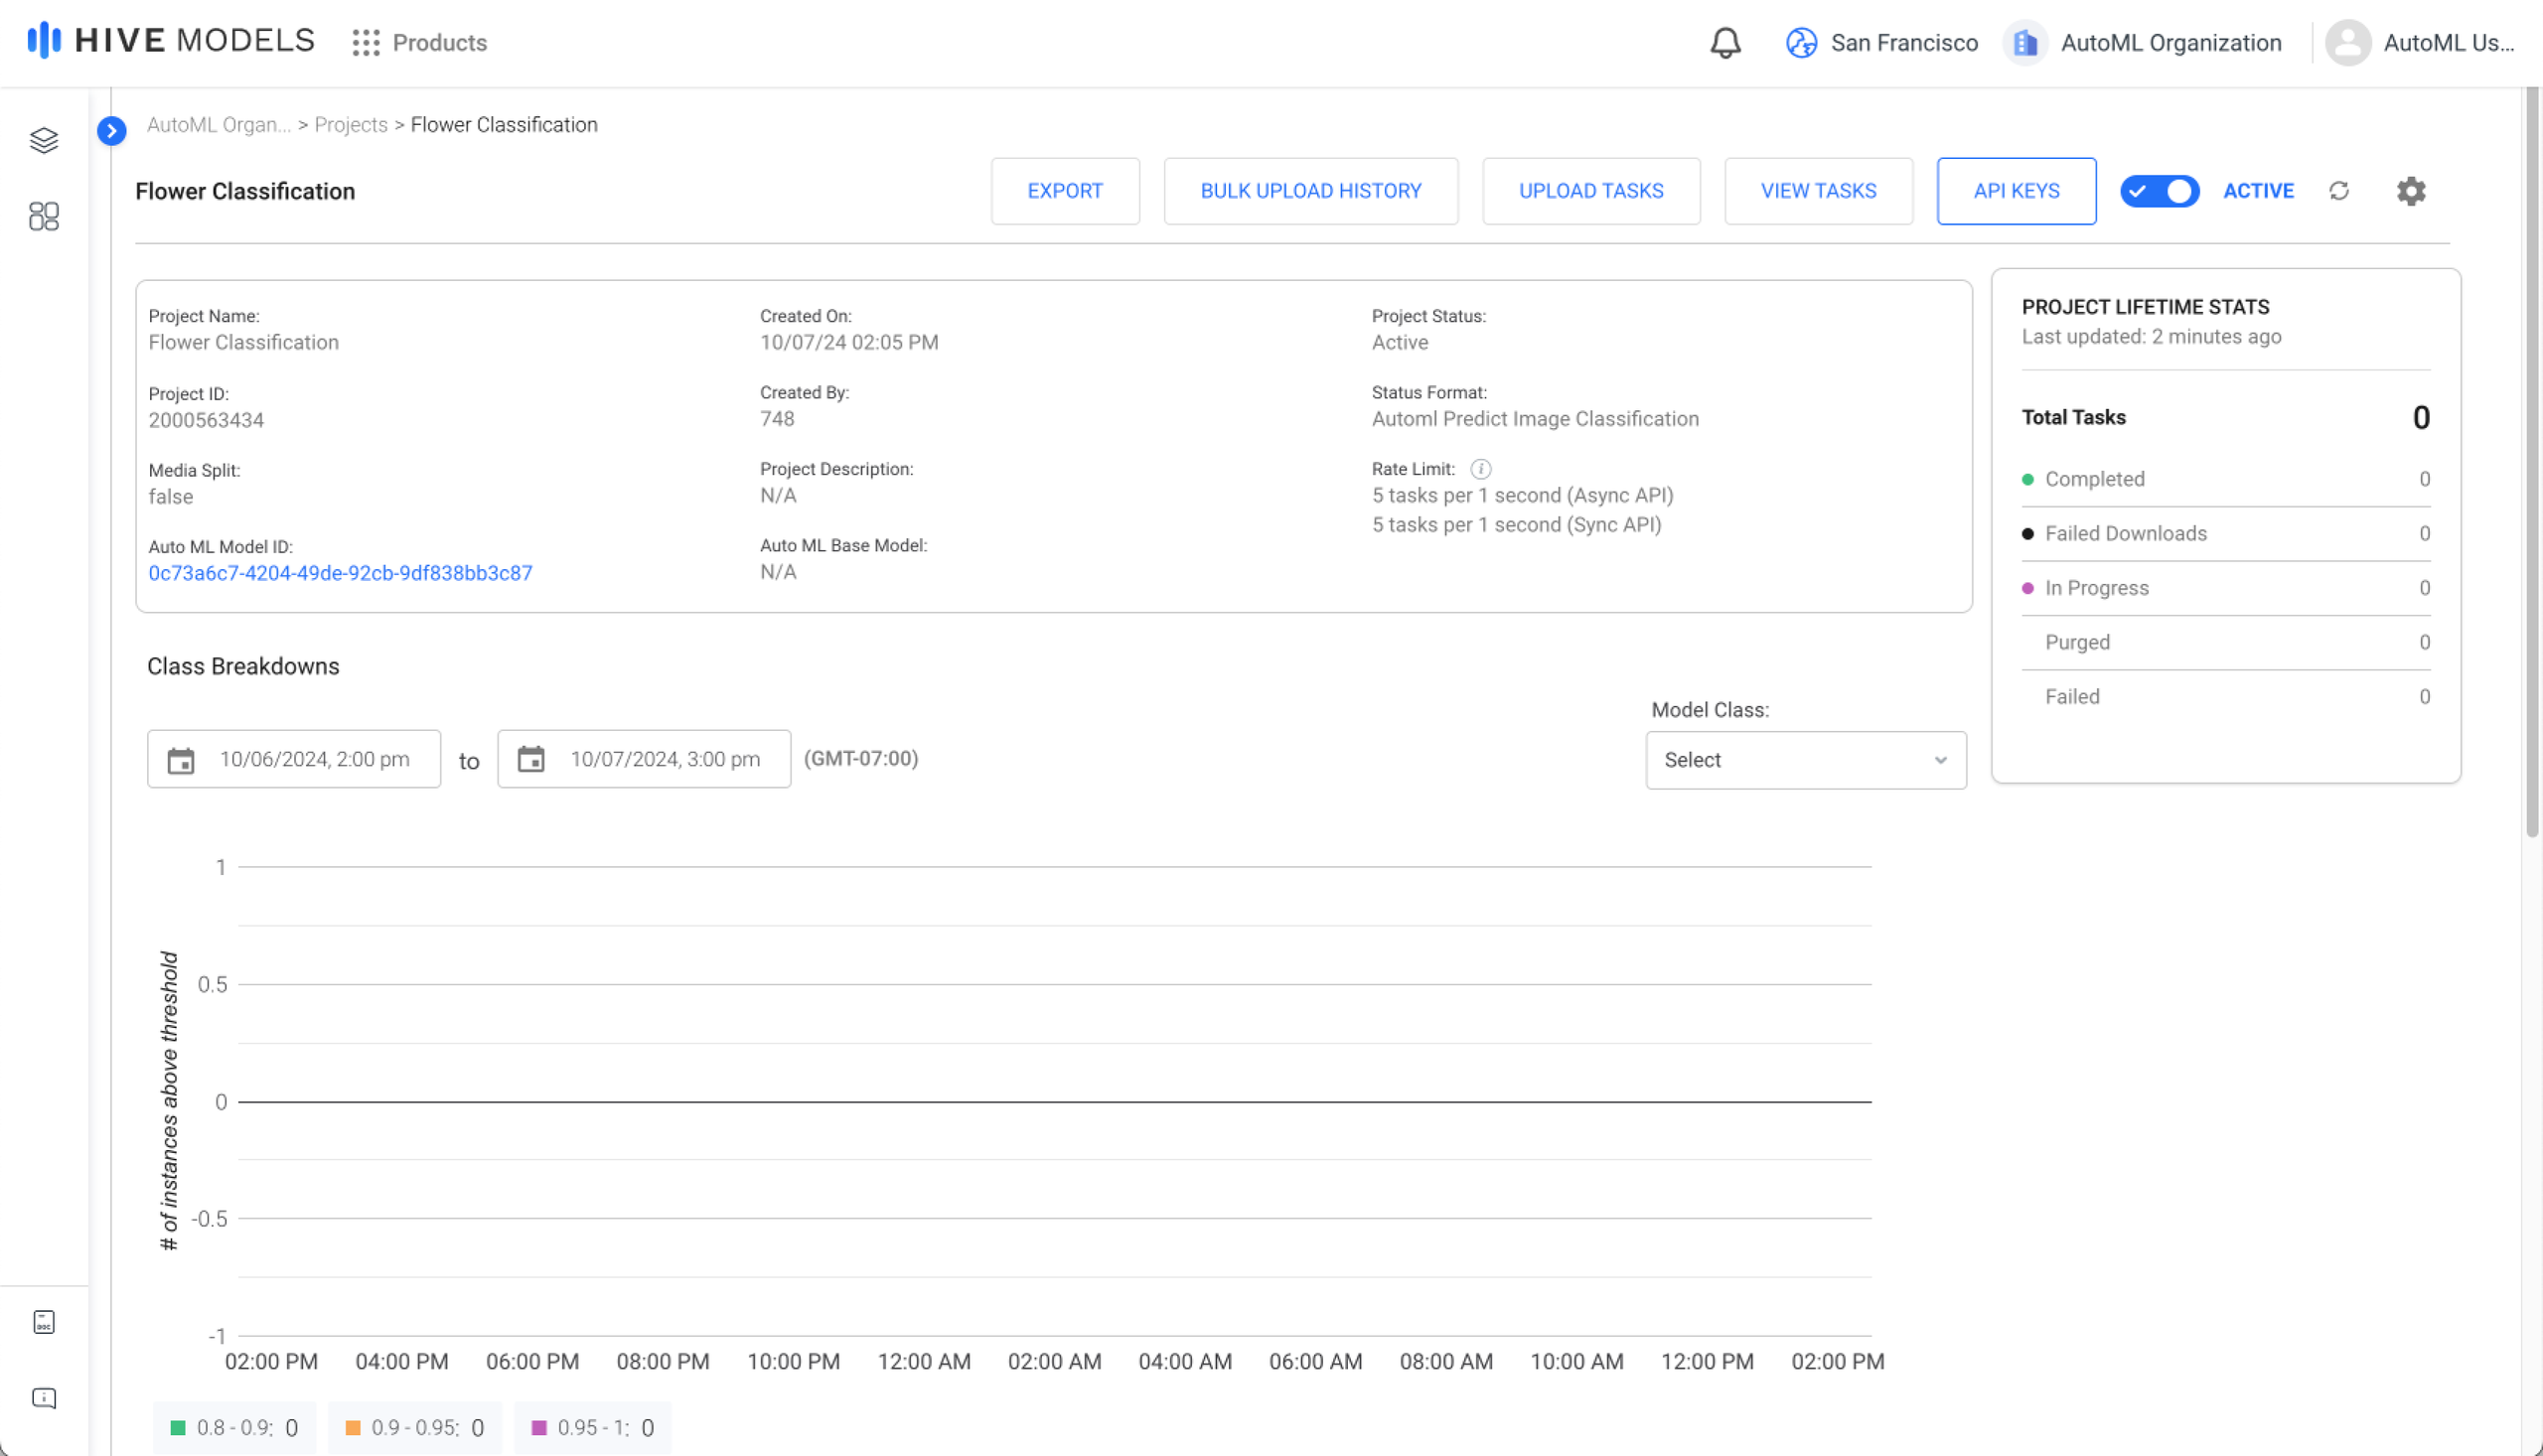
Hive Models Project Page
Updated 3 months ago

