Onboarding Okta SAML with Hive
A guide to setting up an Okta SAML application to integrate SSO with Hive
Thank you for choosing Hive. This guide explains how to set up a Security Assertion Markup Language 2.0 (SAML 2.0) application on Okta to provide your employees with Single Sign-On (SSO) capabilities for Hive. This is intended for employees with admin-level permissions on your company's Okta organization tasked with managing employees' access to Hive.
Creating the Okta Application
To get started setting up a SAML integration on Okta with Hive:
-
Login to your company's Okta Admin Console.
-
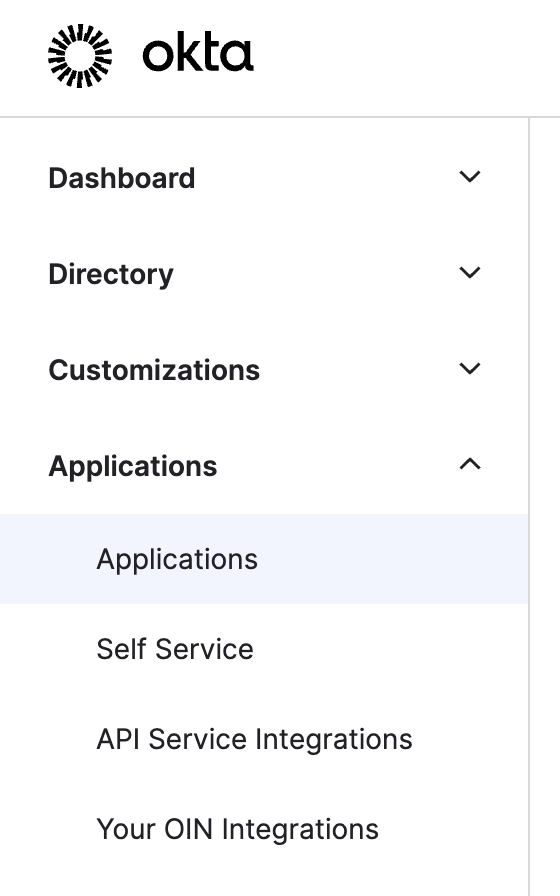
Navigate to the Applications tab on the left sidebar.
-
Click on Create App Integration.
-
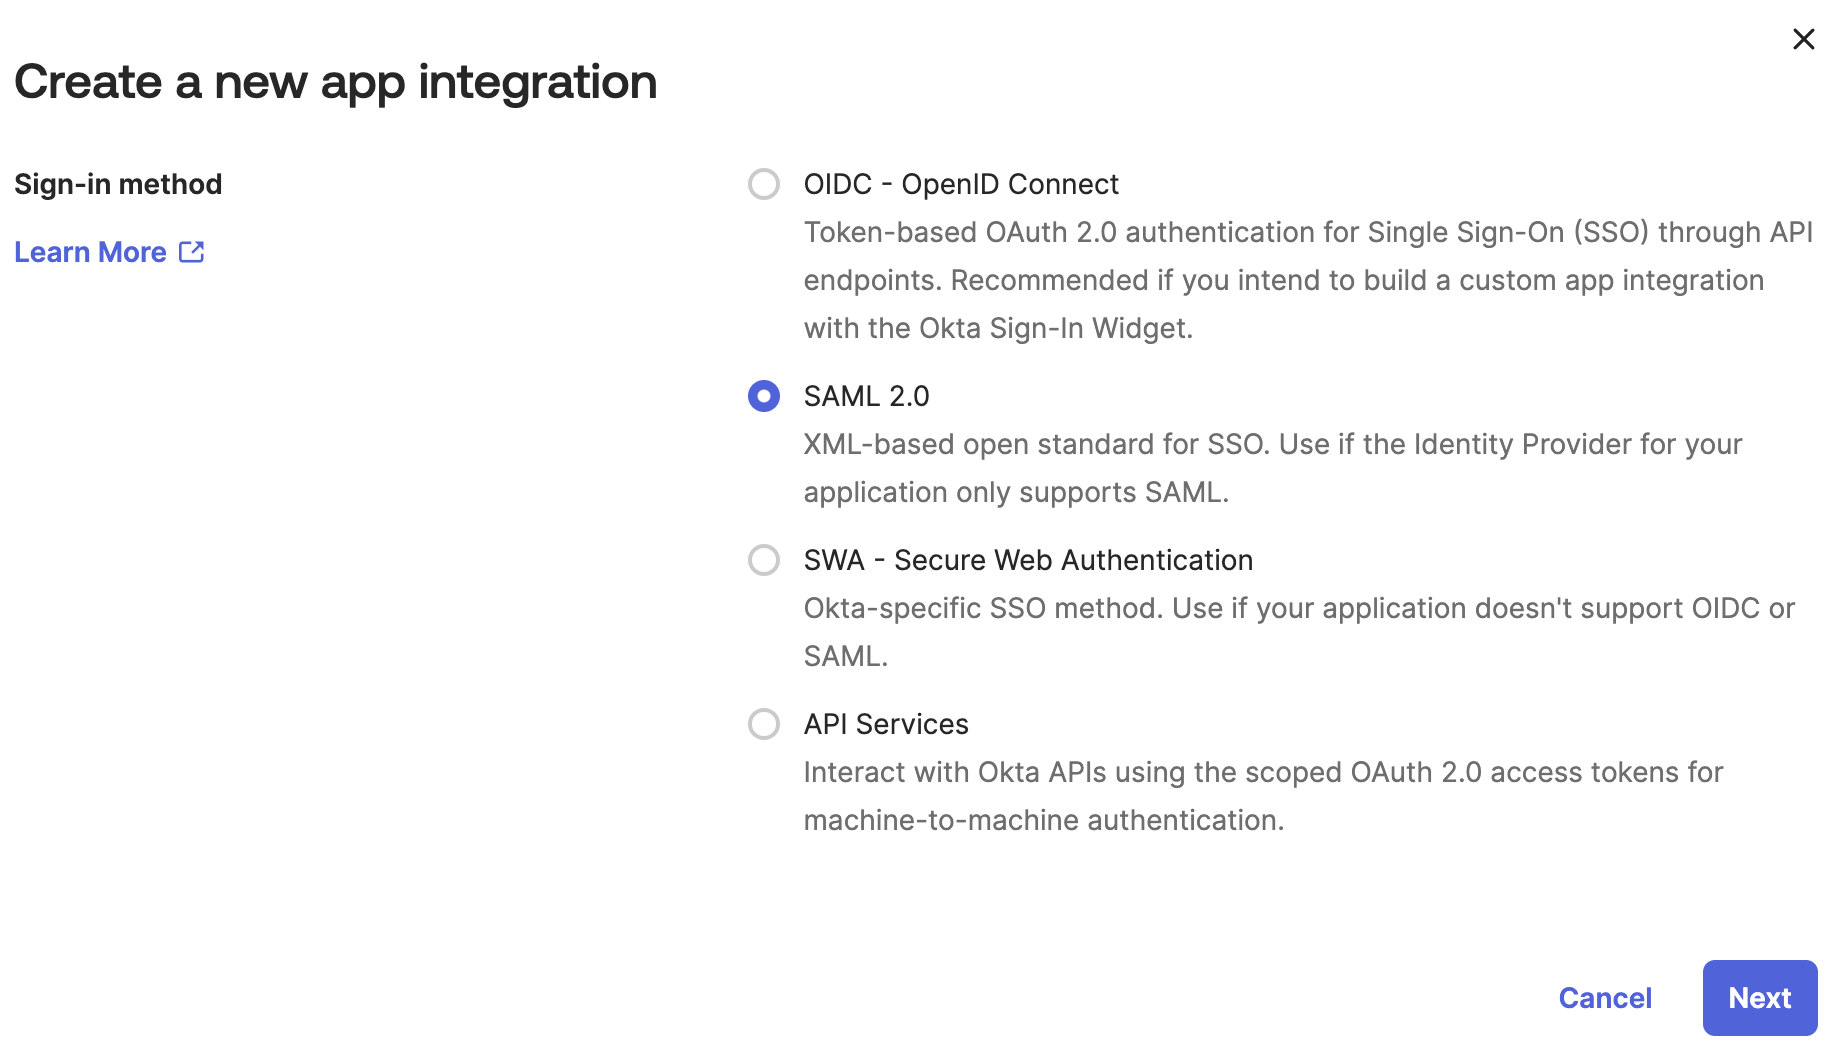
A pop-up window should appear. For Sign-in method, select SAML 2.0 and click Next.
-
A three-part setup screen should appear. Nothing is required by Hive under General Settings. Choose any suitable name for your application. Your employees will see this name on their application dashboards. When everything has been properly configured, click Next.
-
A new screen named Configure SAML should load, allowing you to configure multiple attributes of the new application. Feel free to configure and change settings according to your needs. All default values should work except for a few required attribute changes listed here:
-
Single sign-on URL
- Please input
https://portal-customer-api.thehive.ai/sso/saml/acs. - Please make sure the checkbox next to Use this for Recipient URL and Destination URL is checked.
- Please input
-
Audience URI (SP Entity ID)
Please inputhive. -
Name ID format
Please leave the dropdown value as Unspecified (this should already be done by default).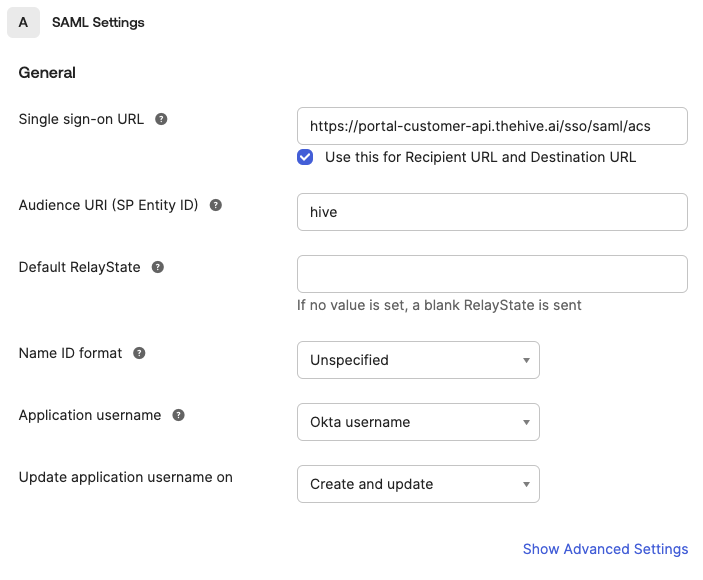
-
-
Click Next. A final Feedback screen should appear. Click Finish. The application should now be created.
This completes the setup needed on Okta for integration with Hive. However, Hive requires some additional information before SSO is fully configured.
Completing Integration with Hive
The Metadata URL is the last piece of information needed by Hive to complete SSO integration. Here are the steps to find this:
-
After your application has been created, Okta should automatically direct you to the application's settings page. If you are not redirected, navigate to this page by clicking the Applications tab on the left sidebar and then clicking on your newly created application.
-
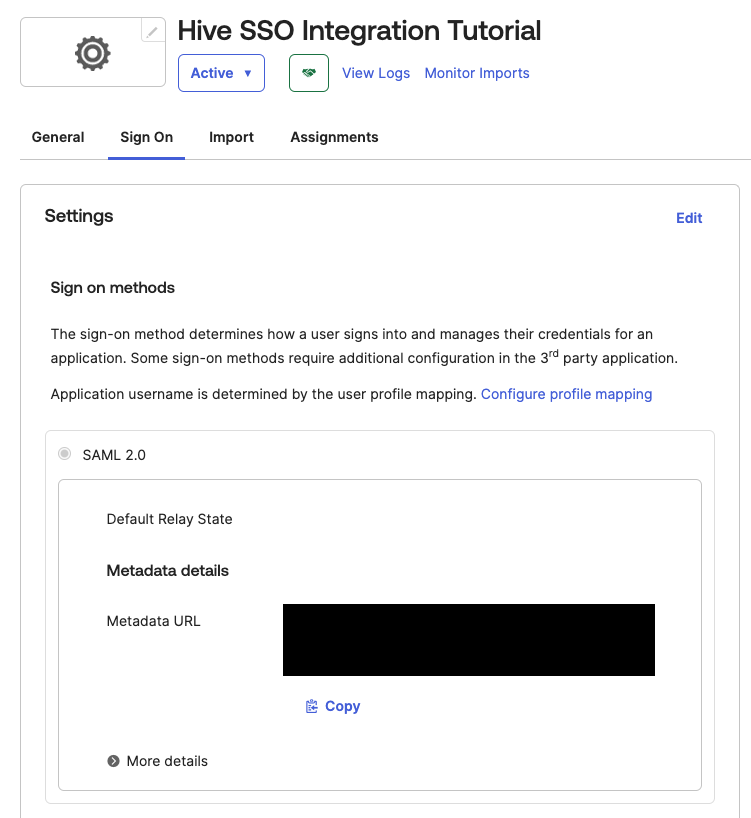
Navigate to the Sign On tab of your application.
-
Under Settings and SAML 2.0, a Metadata URL should be displayed. Use the adjacent button to copy this value to your clipboard.
Once you have found the Metadata URL:
- If you do not have Self Serve SSO enabled, please send the Metadata URL value to your Hive representative. Shortly afterward, SSO with Hive will be fully set up. If you would also like to enable Self Serve SSO to further simplify integration with Hive in the future, please follow the instructions on the Enabling Self Serve SSO document to get started.
- If you do have Self Serve SSO enabled, please follow the instructions below.
-
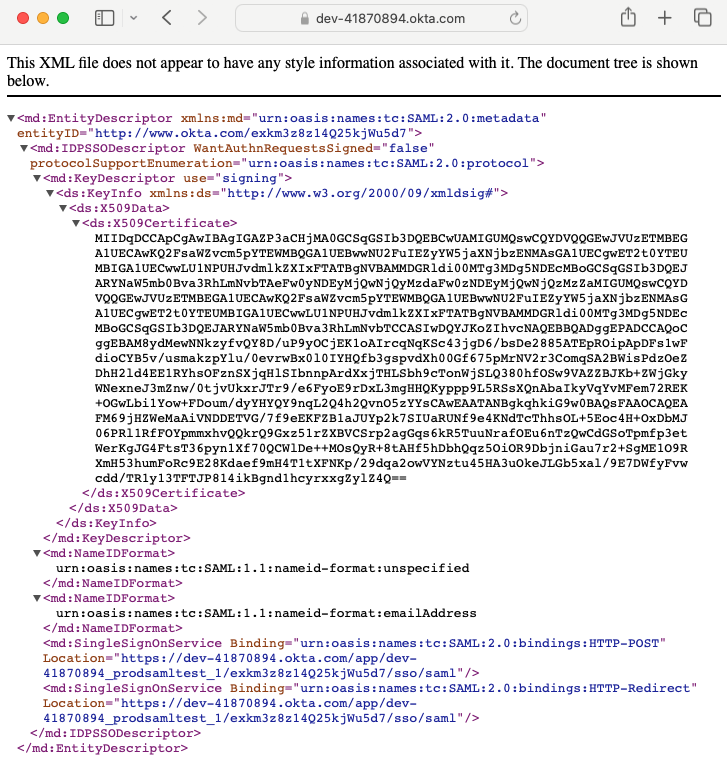
Using any kind of program that can make HTTP GET requests, please send a HTTP GET request to the Metadata URL value to view the XML Metadata document. You will need to inspect the contents of the XML document for the following steps. Find more detailed instructions below explaining how to accomplish this step using a normal web browser or Postman.
-
Using a Browser
-
Open up a new tab in your preferred web browser. Input your Metadata URL into the URL search bar and hit enter.
-
Some links entered into the browser will open up the XML document in the browser itself. If this is your case, you can immediately skip to step 2. Otherwise, please follow step c.
-
Other links entered into the browser will prompt the browser to download the XML document instead. You may see the following pop-up:
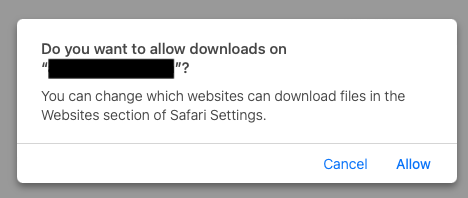
Click Allow to download the file to your computer. Alternatively, you may see a download screen pop up directly:

-
-
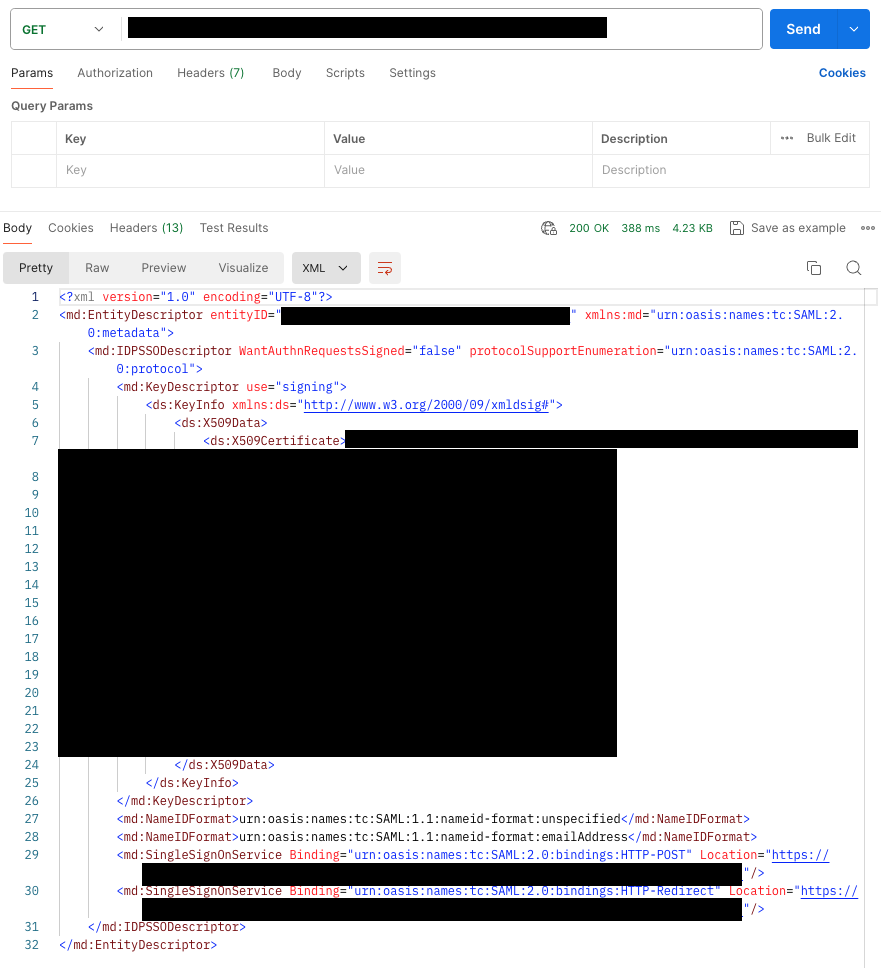
Using Postman
-
Enter your Metadata URL into the URL text field and click Send.
-
The XML document should appear in the response body.
-
-
-
Next, we will inspect the XML document to find the Entity ID. This can be found as an attribute in the <md:EntityDescriptor> tag. Look for the value following "entityID" (not to be confused with "ID", which also appears sometimes).

-
Navigate to the Manage SSO tab on your Hive organization dashboard.
-
Click the Add button next to the Manage SAML Integration header.

-
A pop-up window should appear. Enter the following values:
-
For Identity Provider, select Okta.
-
For Issuer, please enter the entityID found above in step 2.
-
For Metadata, please copy and paste the entire XML Document contents from step 1 into the text box.
-
For Audience, please enter your Audience URI (SP Entity ID) that you entered when creating the application. If you followed the guide above, then this should simply be
hive.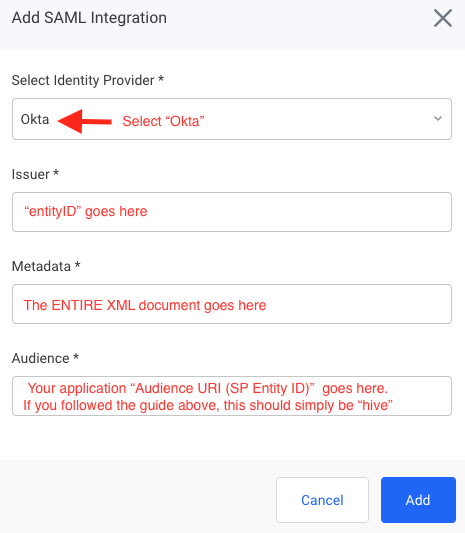
-
-
Click Add. SSO with Hive via SAML should now be fully set up.
Managing Groups
Hive offers Group-Based Permission Mapping for Okta SAML. To create a group and include its information in the SAML assertion, follow the instructions below. Note: You can send multiple groups' information in one assertion.
- Login to your company's Okta Admin Console.
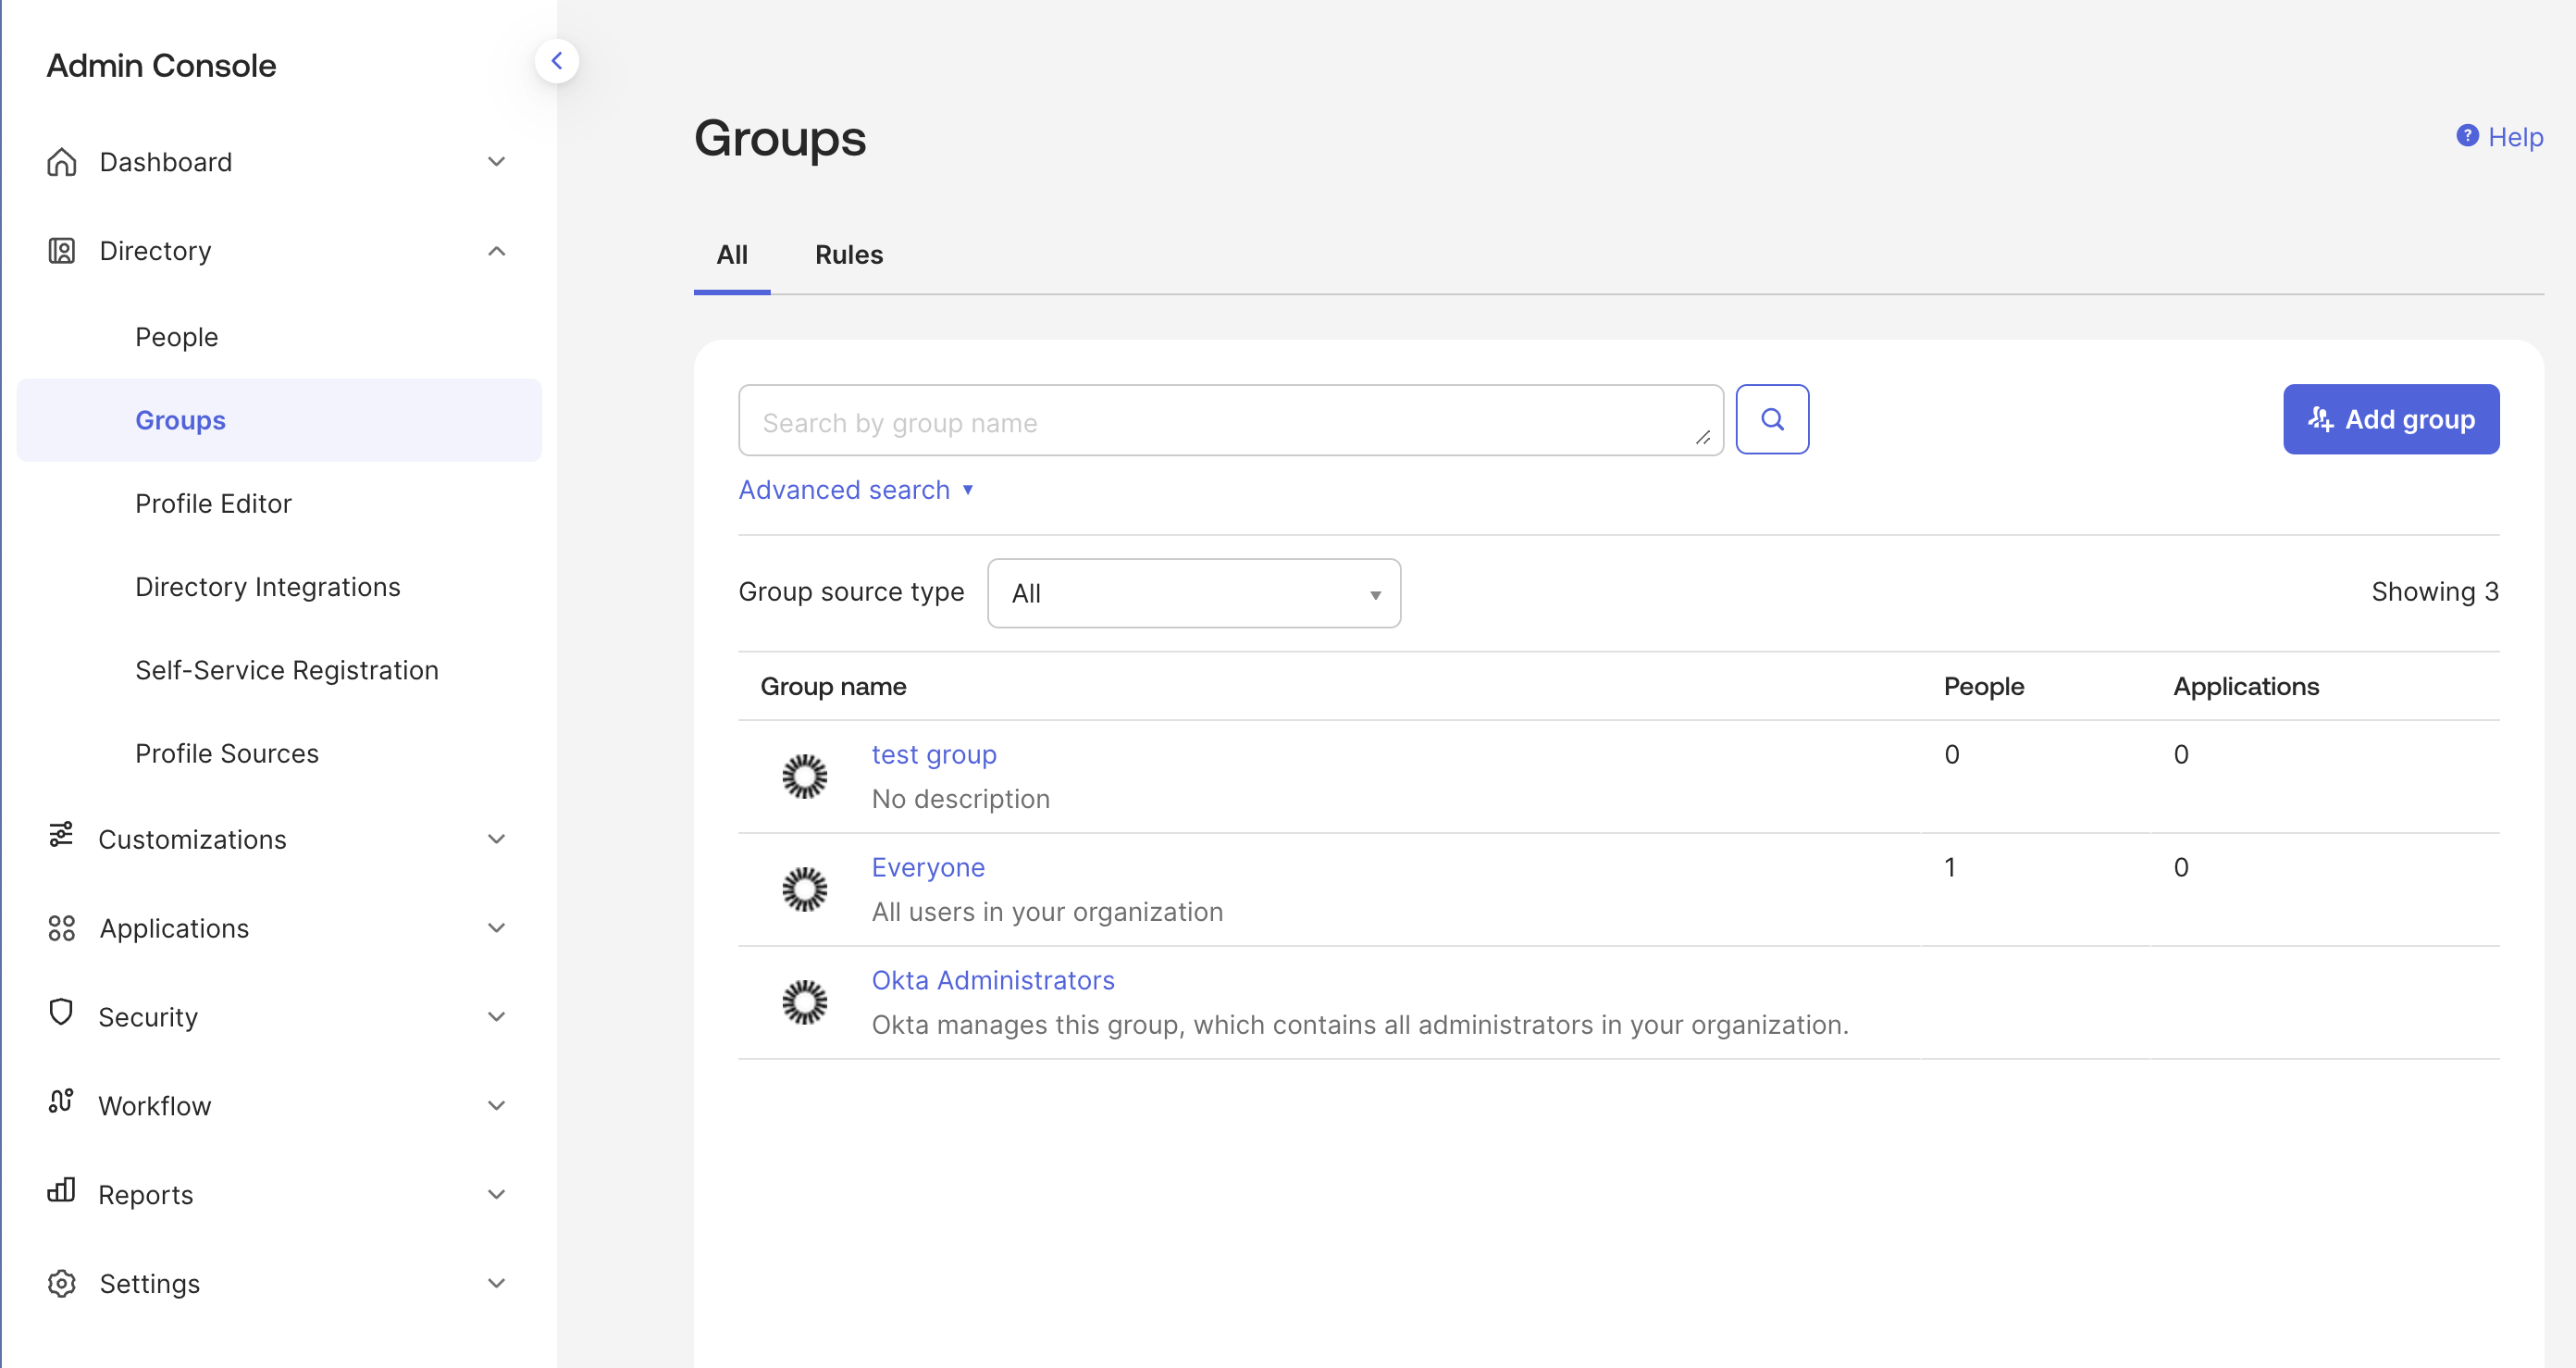
- Navigate to the Directory tab on the left sidebar. Click on the Groups tab within.
- Here, you can create groups and add members by clicking the Add group button.
- Next, navigate to the Applications tab in the left sidebar and click on the Applications tab nested within.
- Click on your SAML SSO application.
- Click on the General tab, where you will see the SAML settings section. Click on Edit in the top right of that section.

- Click Next to go to the Configure SAML tab.
- Scroll until you see the Group Attribute Statements section.
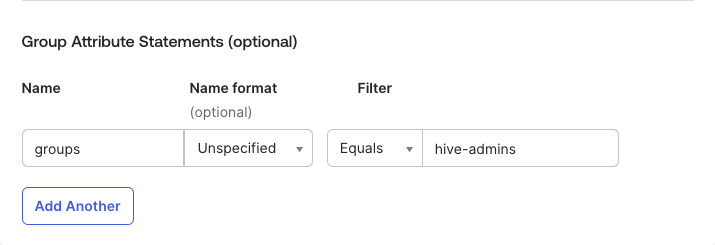
- The Name of the attribute must be groups. Set the Name format to Unspecified. From there, choose the appropriate filter to return all relevant groups for this SAML application. Note: Okta does not allow attributes with duplicate names. Thus, any groups that you would like to return must be covered by one filter.
Updated 2 months ago