Enabling Self-Serve SSO
A guide to integrating Single Sign-On with Hive
This guide explains how to set up your company's Identity Provider to provide employees with Single Sign-On (SSO) capabilities for Hive. This is intended for employees with admin-level permissions on your company's Identity Provider platform tasked with managing employees' access to Hive.
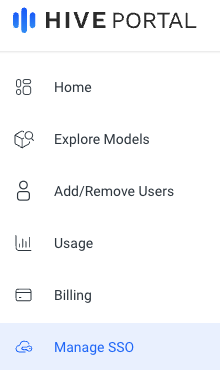
On the Hive website, on your organization's home dashboard page, the left sidebar has a Manage SSO tab.
If you do not have access to this page, please contact [email protected] to enable self-serve SSO capabilities to your Hive organization and company email domain. To do so, you will need to provide Hive with your organization's email domain (i.e. the most commonly used email domain among users in your organization, such as domain.com). If you would like to add multiple domains, please reach out to us with the relevant domain names.
If your Hive organization has enabled self-serve SSO capabilities, you should see the following page.
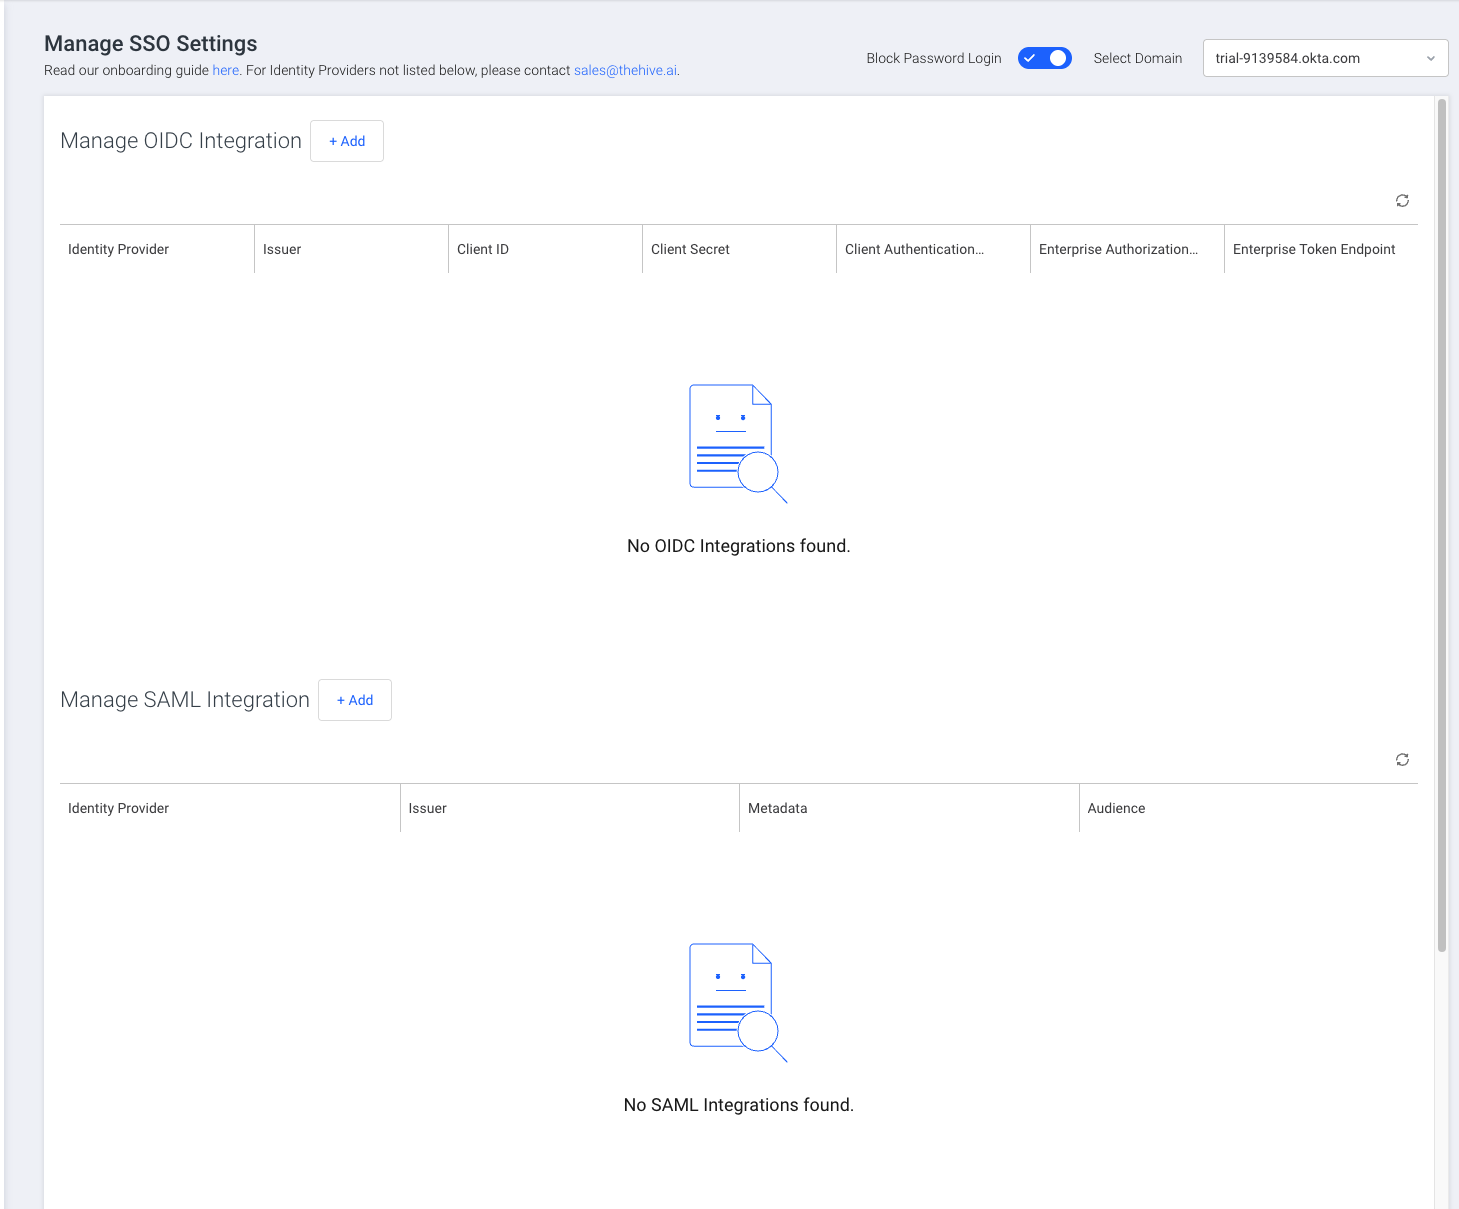
Block Password Login can be used to switch to SSO login only after SSO integration has been properly setup and tested. Please only do this after you have ensured SSO login is fully working for your team.
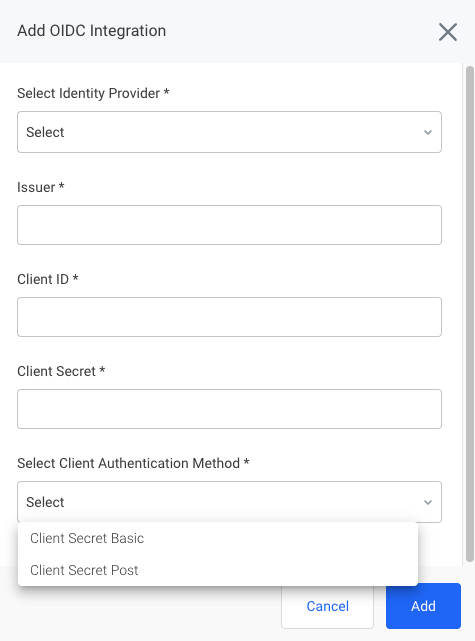
From the dashboard, you can directly add an OIDC or SAML integration by clicking the Add button next to the Manage (OIDC or SAML) Integration heading. Each domain can have up to one OIDC integration and one SAML integration.
You can also edit information associated with an existing integration. On the integration's row, hover over the right side to reveal the Edit integration button.

At this point, any new users who are not in your organization already will not get added automatically.
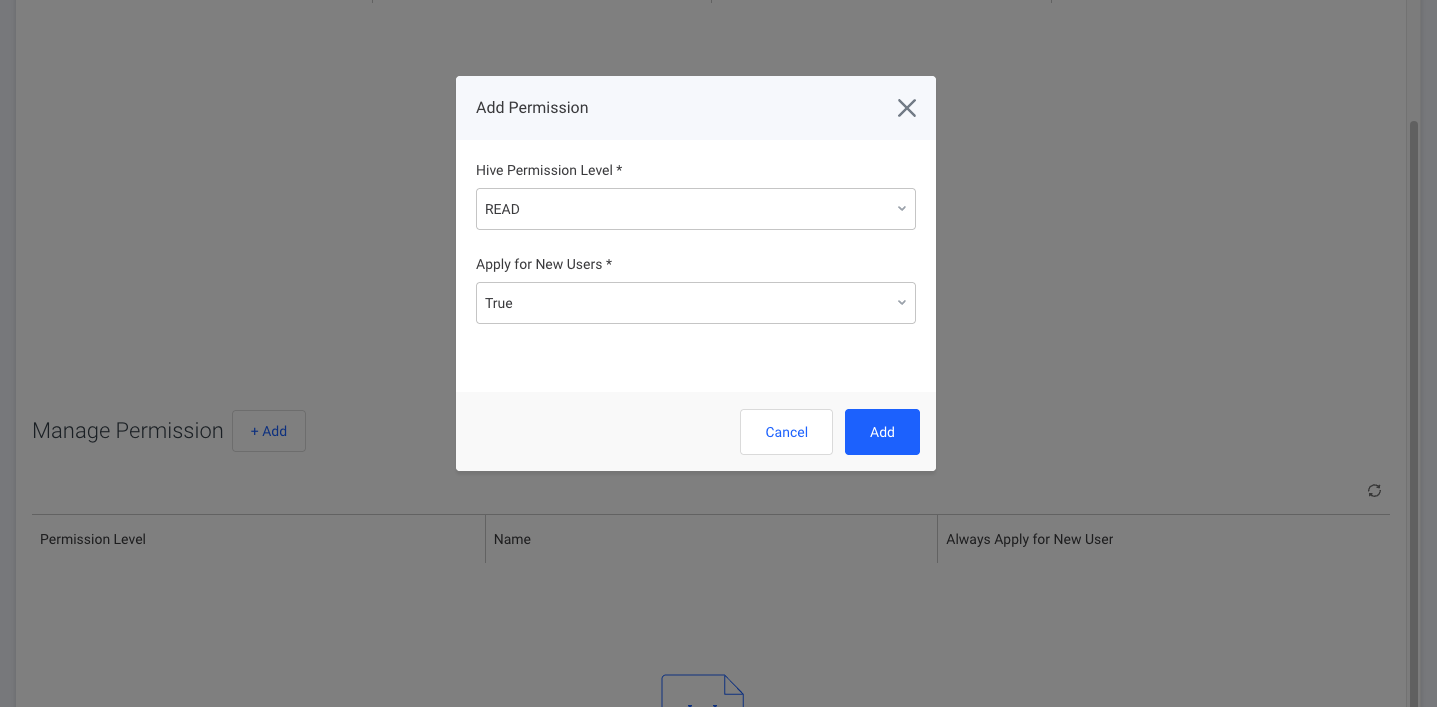
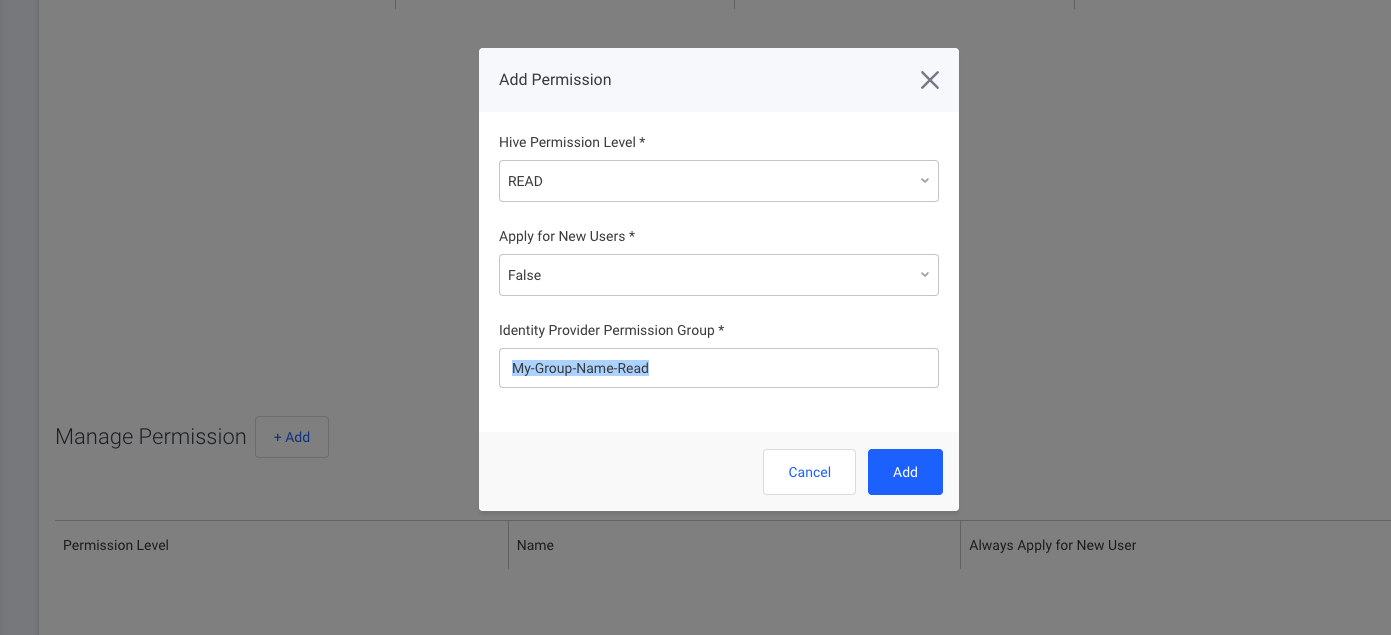
To enabled this feature, called Just In Time Provisioning (JIT), you must add a default permission in the "Manage Permission" section.
To do this, click + Add next to Manage Permission, select a default permission level such as Read, and set Apply for New Users to True.
You can also setup Permission Groups within your identity provider to automatically update the permission of any users. To do this, make sure your identity provider is set up to send Permission Group Info, and set the following permissions. You may check each Identity providers page for exact steps on how to set Permission Groups.
To edit an existing permission, hover over the right side of a given permission's row until the Edit permission button appears. A window should pop up, allowing you to edit the permission's details.
If no permissions are set, JIT provisioning will not occur.
Updated 3 months ago