Moderation Dashboard Quickstart Part 1: Auto-Moderation
A step-by-step guide to setting up Moderation Dashboard
Objectives
This page walks through the basic steps needed to set up Moderation Dashboard. This guide is intended for Trust & Safety members or developers with admin-level access. We'll present the core concepts needed to start sending content to the Dashboard API and setting up moderation rules and actions.
By the end of this guide, you'll learn:
- How to send content to the Dashboard API for model classification
- How to use callback URLs to set up enforcement actions for your platform
- How to define a basic content moderation policy through automatic post rules, and
- How to set up conditions to decide when human moderators review borderline content
We'll also provide links to sample content and any needed code snippets throughout. If you're an existing Moderation Dashboard user, you can follow along with these steps for a more hands-on tutorial.
BEFORE WE START:Note that we've divided this guide into two parts using the same examples. Part 1 will cover creating and testing auto-moderation rules. Part 2 will cover how to send posts and users to a human review feed for manual moderation.
Prerequisites
To get the most out of this guide, you'll need:
- Access credentials for Moderation Dashboard
- A Moderation Dashboard API Key
- Basic familiarity with Hive's visual moderation classes
Step 0: Hash out a basic content moderation policy
Different platforms naturally have different moderation requirements depending on their specific content policies and risk sensitivities. To keep this guide simple, we'll implement a basic visual moderation policy for a hypothetical new gaming service.
Let's say the platform has decided that animated guns like those in video games (FPS gameplay etc.) are fine BUT images of real guns are_not allowed under any circumstances_.
To implement this, this new gaming platform has decided to:
- Auto-delete all images classified as real guns with high model confidence
- Send possible-gun images that the model is less sure of to human review, and
- Send all images classified as animated guns to human review to be sure that no real guns get through
With a content policy in mind, we're ready to set up these rules in Moderation Dashboard and see which, if any, default settings we might need to change.
Step 1: Submit initial content to moderation dashboard API
Before worrying about moderation logic, let's first send a relevant image to the Dashboard and make sure it shows up properly.
https://d24edro6ichpbm.thehive.ai/demo_static_media/violence/violence_4.jpg
To send this image to Moderation Dashboard, run the following request syntax to submit a POST request to the Dashboard API. Be sure to replace the "authorization" placeholder with your actual Dashboard API Key.
curl --location --request POST 'https://api.hivemoderation.com/api/v2/task/sync' \
--header 'authorization: token xyz1234ssdf' \
--header 'Content-Type: application/json' \
--data-raw '{
    "patron_id": "12345",
    "post_id": "12345678",
    "url": "https://d24edro6ichpbm.thehive.ai/demo_static_media/violence/violence_4.jpg",
    "models": ["visual"]
}'
import requests
import json
url = "https://api.hivemoderation.com/api/v1/task/sync"
payload = json.dumps({
"patron_id": "12345",
"post_id": "12345678",
"url": "https://d24edro6ichpbm.thehive.ai/demo_static_media/violence/violence_4.jpg"
})
headers = {
'authorization': 'token xyz1234ssdf',
'Content-Type': 'application/json'
}
response = requests.request("POST", url, headers=headers, data=payload)
print(response.text)
NOTE:For this guide, we'll use placeholder values for patron_id and post_id throughout. In a real integration, though, you'd need to provide actual post and user IDs from your platform to target moderation actions to the correct posts/users. Otherwise, the rest of this guide aligns very closely with a real set-up.
Step 2: Verify in dashboard interface
Now that you've sent in an image, let's see how it shows up in the Dashboard interface. If you navigate to the user content feed using the menu bar on the left, you should see something like this:

Looking at the Top Moderation Categories column, you'll notice that the image we just submitted is categorized as "Violence" even though we haven't configured anything. This is due to Moderation Dashboard's default classification settings based on results from the visual moderation model.
If you navigate to the Thresholds interface and select Visual Moderation Categories > Violence, you'll see that Moderation Dashboard is set to categorize images scoring above 0.9 (model scores are between 0 and 1) in the gun_in_hand as "Violence."
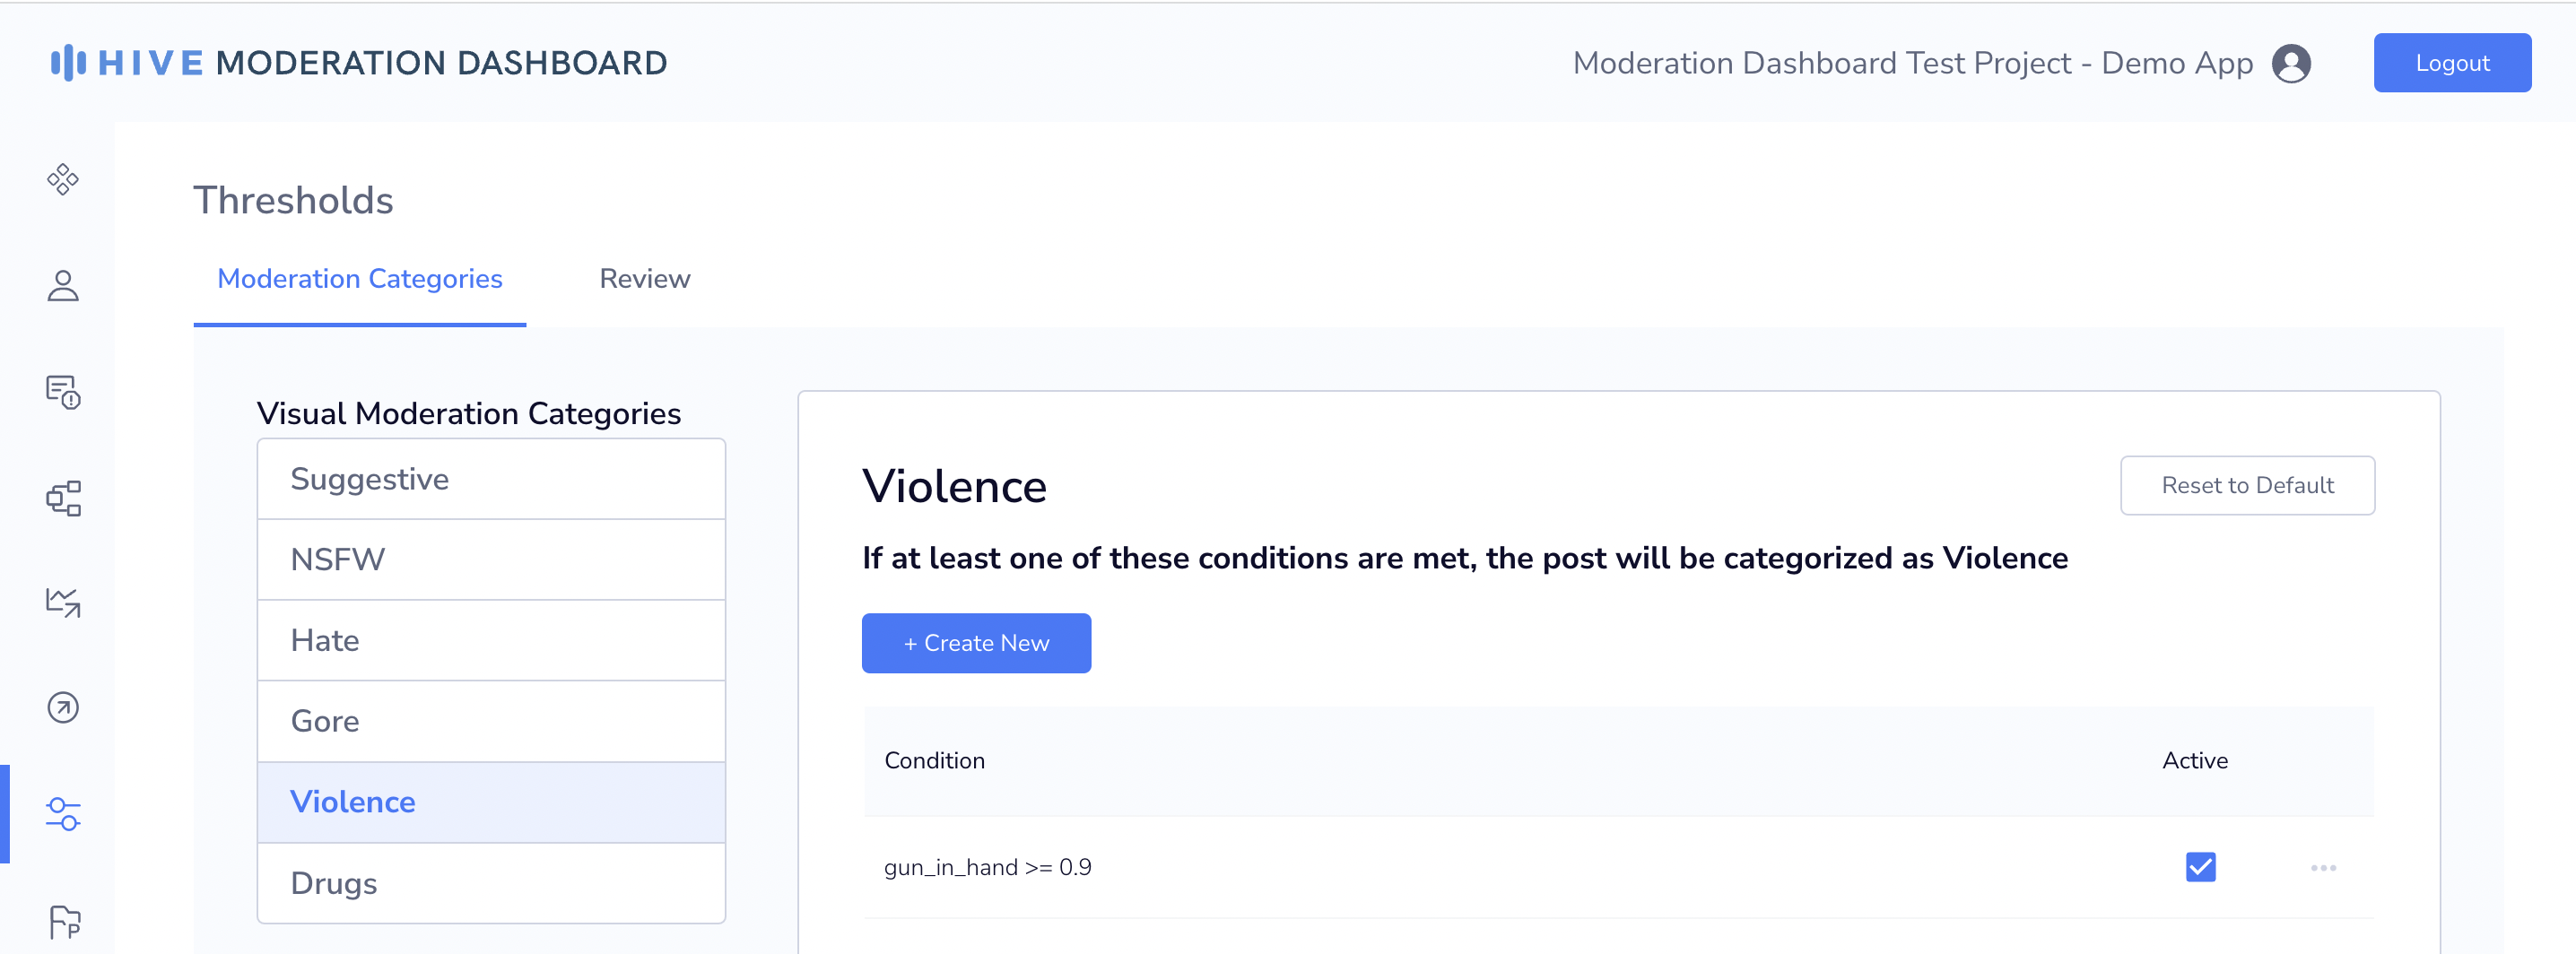
This is exactly what we want for our content policy: our visual model classifies this image as gun_in_hand with a confidence score of 1.0, so Moderation Dashboard categorizes the post as violence. Since we eventually want to auto-remove images of real guns, let's leave this default setting as-is.
Notice, though, that animated_gun does not appear in this list of classes. So, by default, Moderation Dashboard will not consider images of animated guns to be "Violence" or other moderation categories. We'll get to what we want to do about animated gun images in Part 2. For now, let's continue with our policy on real guns.
BUT WAIT:At this point, you might have noticed that Moderation Dashboard hasn't actually done anything with the "Violence" classification on our example image. If you return to the content feed, the image shows "Last Action Taken" as "None." Why? We haven't configured rule and actions that tell Moderation Dashboard what to do with these posts! Let's do that now.
Step 3: Create an action to enforce our content policy
To keep images of real guns off our platform, we need to define an action that removes or deletes individual posts. Then, Moderation Dashboard can trigger this action in response to both automated rules and review decisions by human moderators.
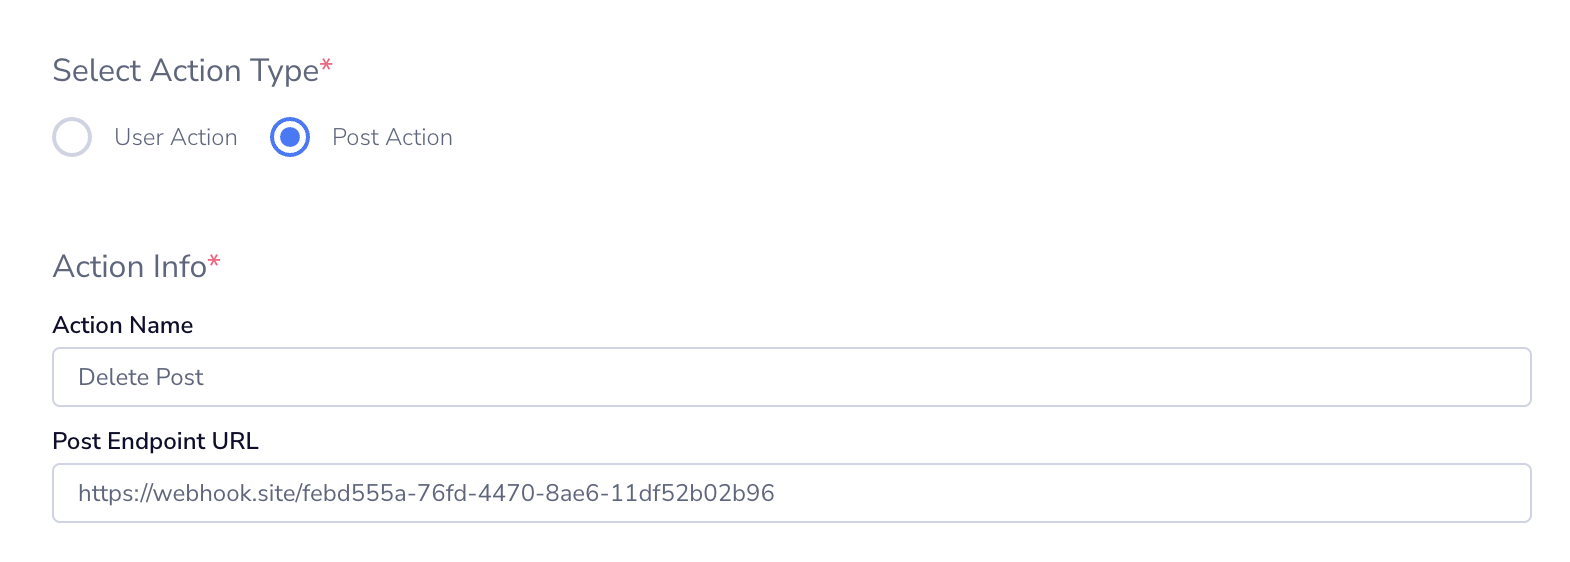
To do this, navigate to the Actions interface using the menu bar and select the Post tab. Then select "Create New" in the upper right. Let's name our action "Delete Post."
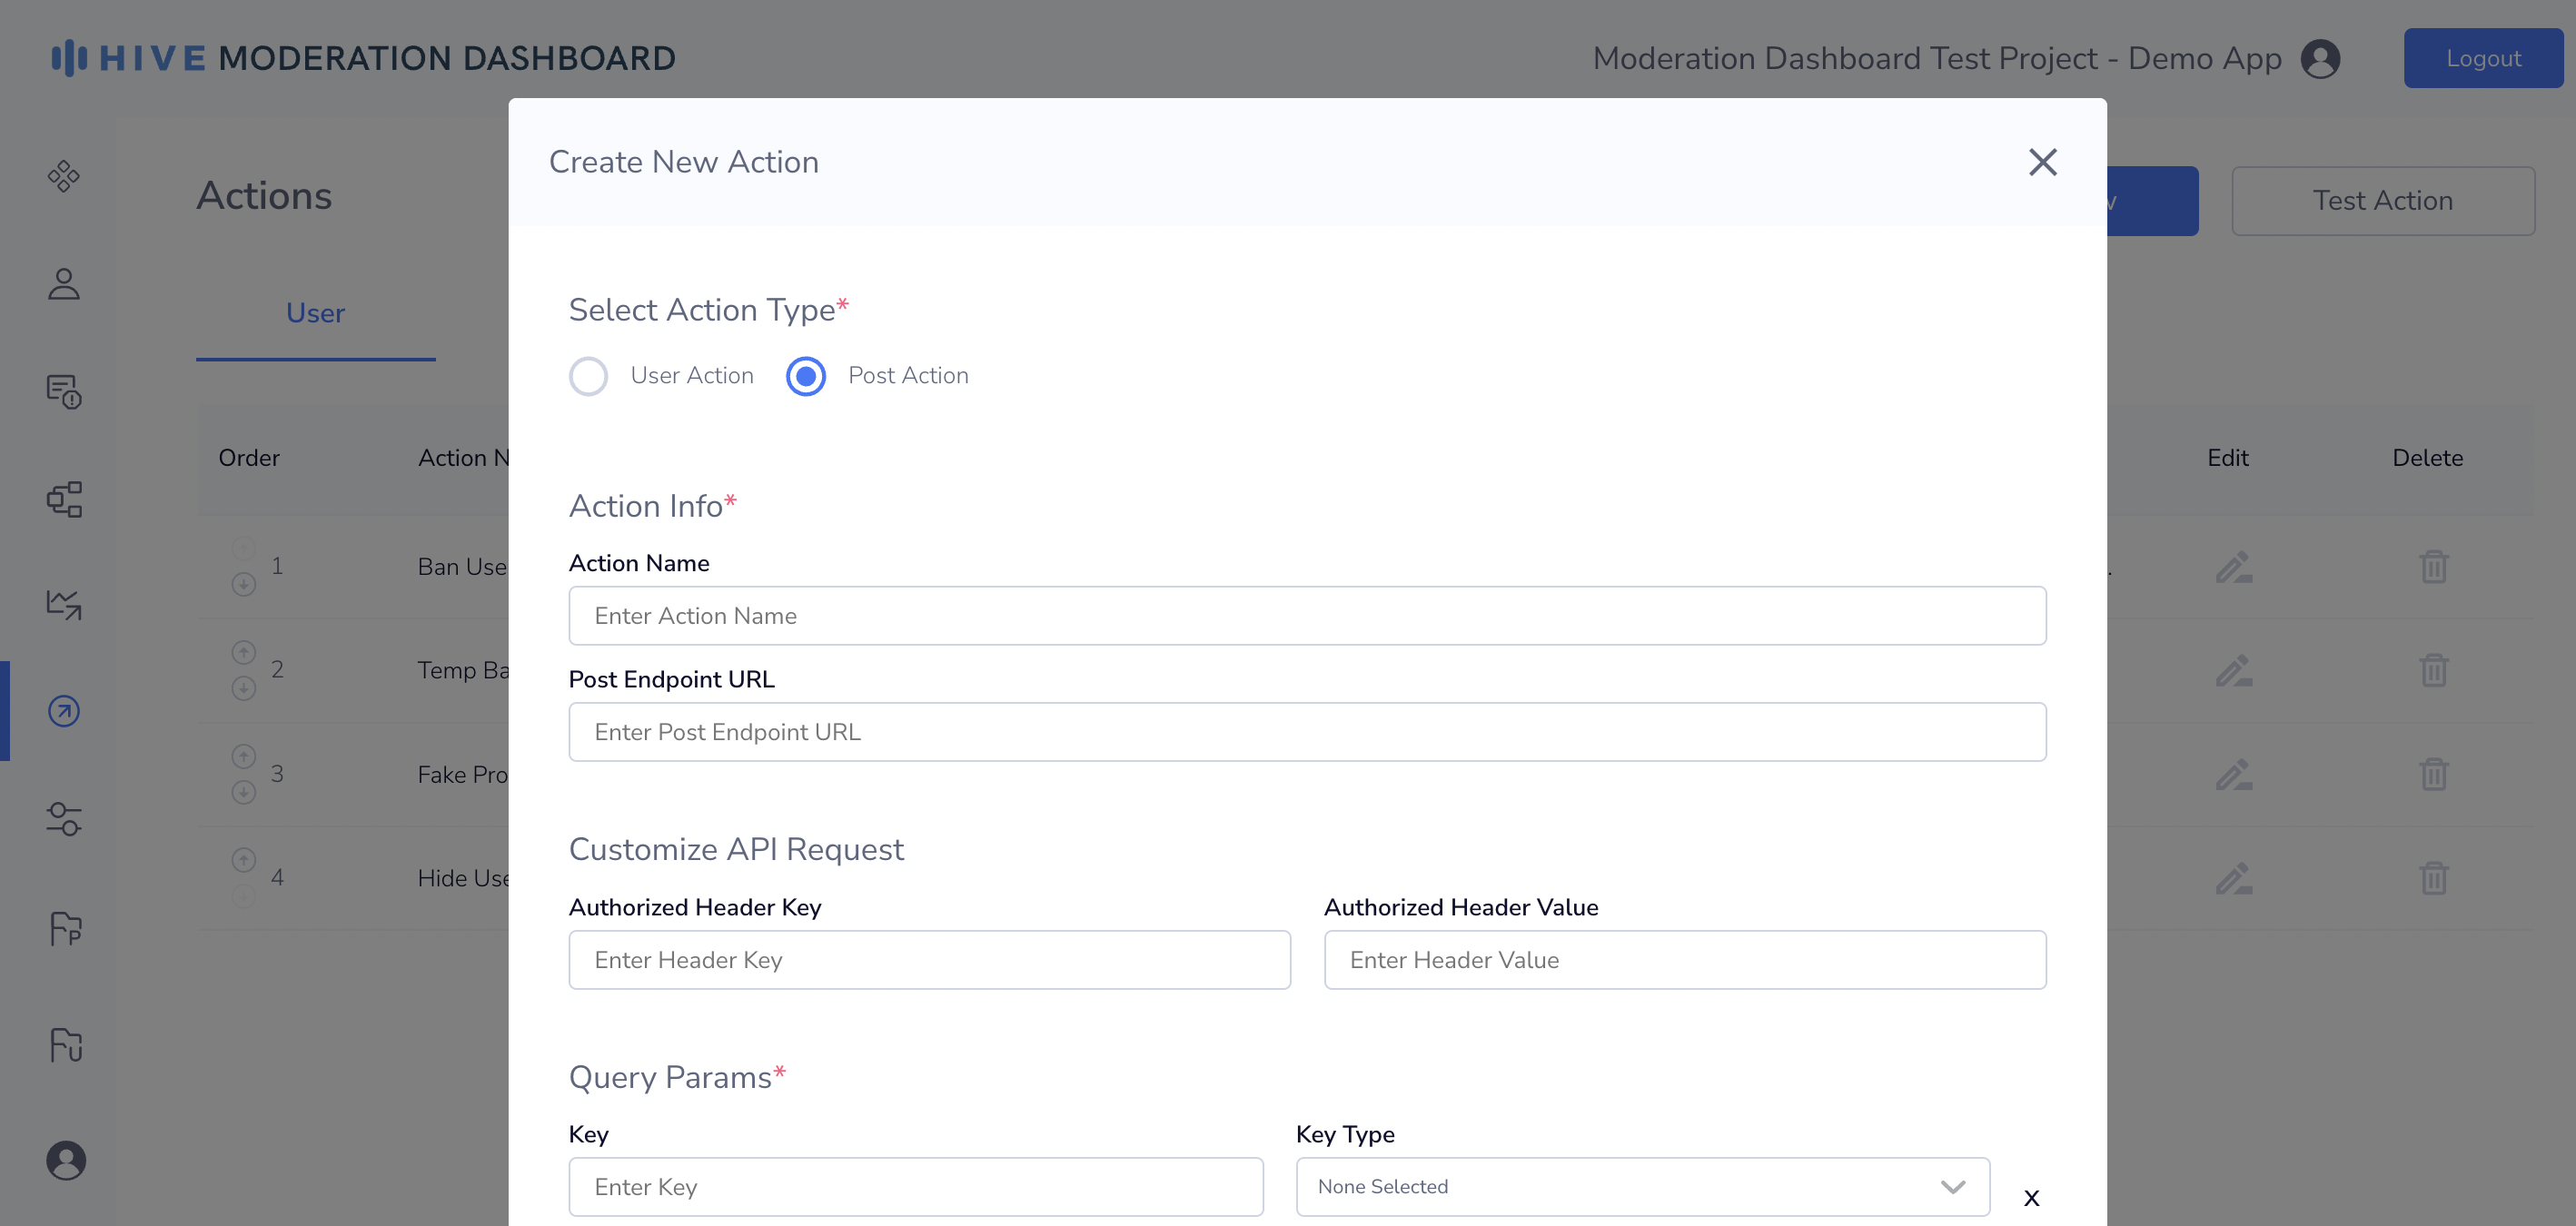
"Post Endpoint URL" is how Moderation Dashboard sends callback information to an application's server when the action triggers. If our hypothetical new gaming service was a real platform, they would need to create and supply callback endpoints that actually perform the enforcement (deleting a post, banning a user etc.) in their app when called.
For this guide, though, we can stick with a simple Webhook integration and still verify that our action functions correctly. To do this, copy and paste the following link into a new browser tab:
webhook.siteThis will generate a unique callback URL we can use to set up and test our example action. There, simply copy the webhook link shown on the landing page to your clipboard (note: yours will be different than the one shown here, that's ok!). Keep this tab open – we'll use it for tests later on.

Then, paste your Webhook URL into the "Post Endpoint URL" field in Moderation Dashboard. You should end up with something like this:
We'll also need to make sure that our action can target the correct post or user. To do this, we'll set up query parameters that Moderation Dashboard will send to the endpoint URL when the action triggers. Let's set Post ID, User ID, and a name description as required parameters. When finished, our action should look like this:

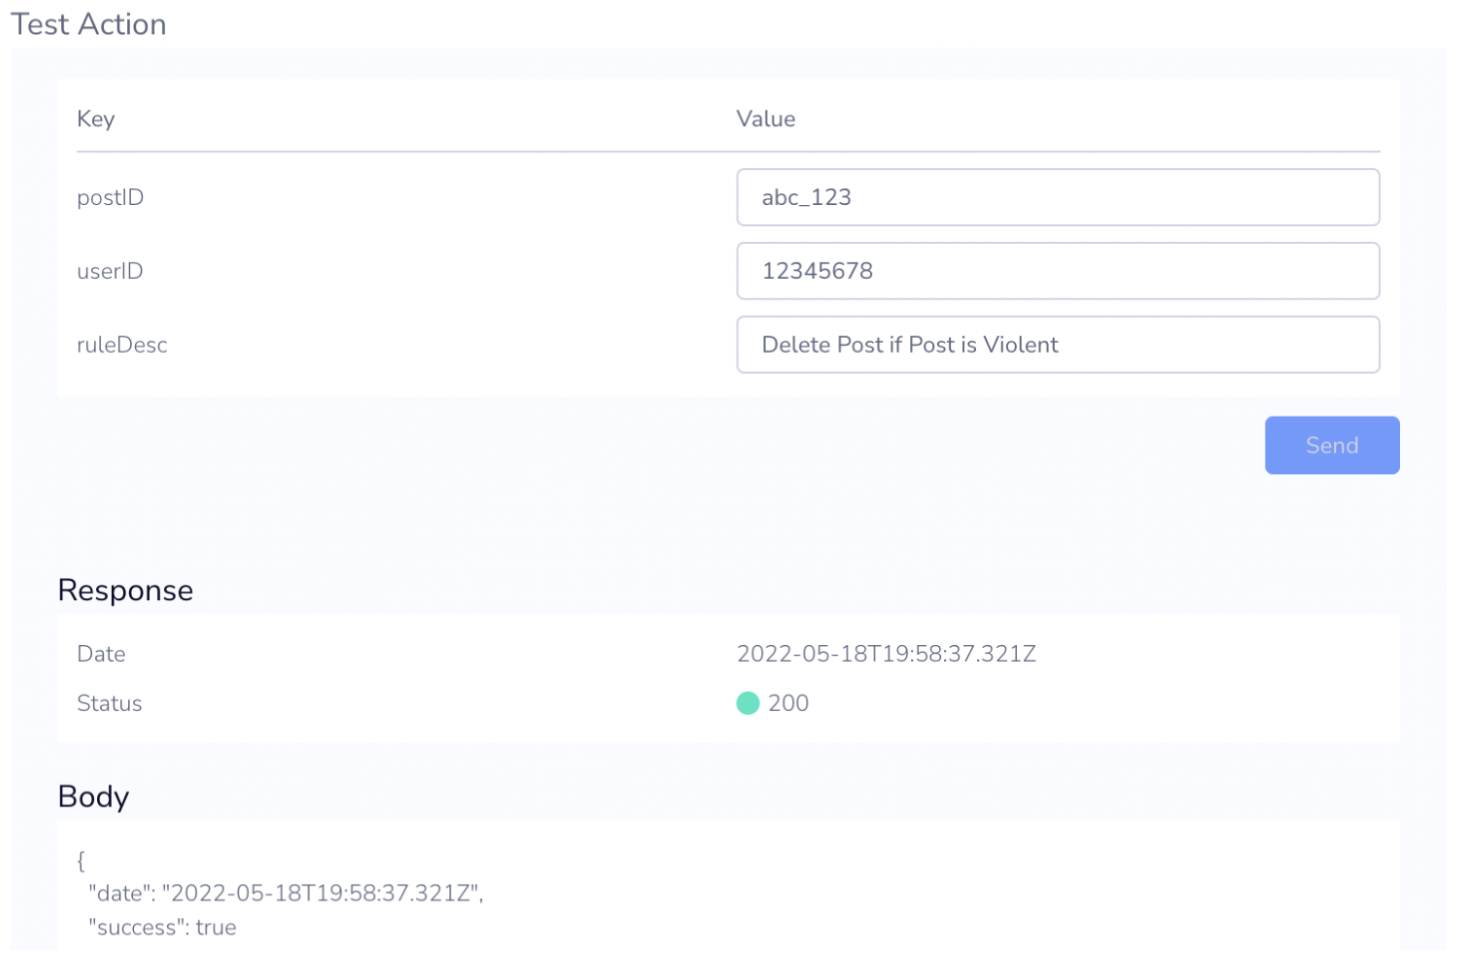
Now we're ready to do a basic test. Scroll down to the "Test Action" section of the menu and fill in test values for the query parameters. _UserID_and PostID can be any value, but let's fill out ruleName as "Delete Post if Post is Violent" for now (this will make more sense later).
Then hit "Send." If the Webhook is entered properly, you should see a green 200 status code pop up (note: Moderation Dashboard expects a 200OK response in order to consider the action successful).
Now, let's also check Webhook.site to confirm that Moderation Dashboard sent a proper callback response. If you switch back over to your Webhook tab, you should see a GET request sent to your callback URL with the parameters you entered.
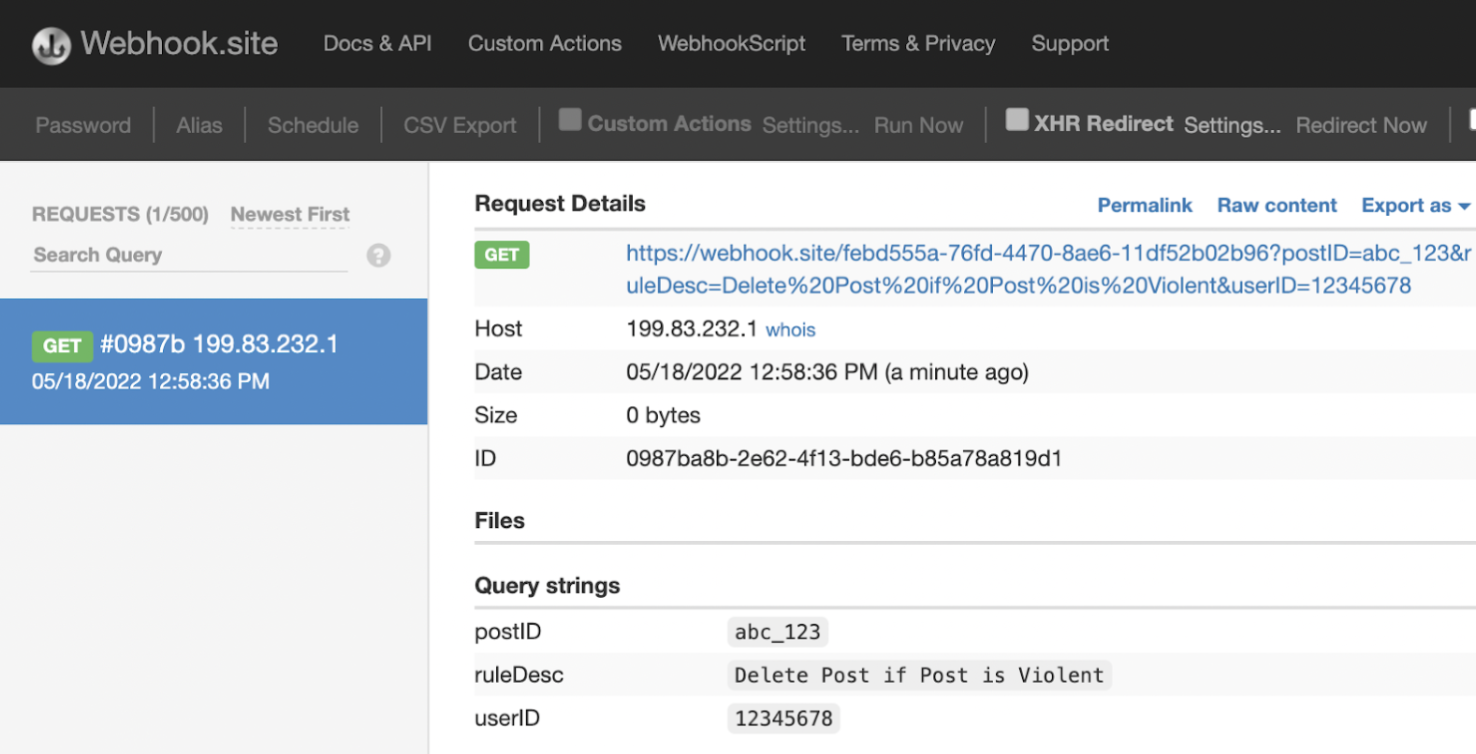
Now that we know our action works as intended, go back to Moderation Dashboard and select "Create" at the bottom of the pop-out menu. We can now use our new "Delete Post" action to create moderation rules for newly submitted content!
Step 4: Create an auto-moderation rule that matches our content policy
Now we're ready to put everything together into a ruleset that implements the content policy we decided on earlier. As a refresher, we want to:
- Automatically delete images classified by Hive as showing real guns
- Send images classified as animated guns for further review by human moderators
- Send images classified as real guns with lower confidence for human confirmation
We'll save the manual review conditions for later and focus on the automated rule for now. To configure this, navigate to the Rules interface using the sidebar and select "Create New" to bring up the rule creation modal. In theory, our rule name can be anything, but since the rule name shows up in the Actions Log and callback metadata, it is best to keep it descriptive and straightforward. Let's go with "Delete Post if Post is Violent."
Now create the logic: we want posts that the Moderation Dashboard classifies as violent based on model predictions to be deleted automatically.

When finished, select "Create" to implement our new moderation rule. Also confirm that this rule has a blue checkbox in the "Active" column on the right side of the interface. This indicates that the rule will be applied to any content submitted in the future.
Recall from Step 2 when we set our classification thresholds that gun_in_hand and gun_not_in_hand are both classified under "Violence" by default. So, this rule takes care of the first part of our content policy. It's worth noting here that some other default visual moderation classes (e.g., knives, nooses) will also be captured by this rule unless changed in the Thresholds menu.
Now the fun part: let's test our rule to confirm it works as intended for other images!
Step 5: Test auto-mod rule with new content
To test our rule, let's send in this frame from Scarface.
https://www.yardbarker.com/media/9/0/90d5b4a6d9efa052e34698a49837fb4f9d7a634f/600_wide/scarface.jpg
This image pretty obviously shows a real gun.
Hive's visual model classifies this images as gun_in_hand with the maximum confidence score, 1.0. According to the rules and conditions we set, Moderation Dashboard should trigger our "Delete Post" action automatically.
To confirm, run the following code snippet using your Dashboard API key as the authorization token just like Step 1.
curl --location --request POST 'https://api.hivemoderation.com/api/v2/task/sync' \
--header 'authorization: token xyz1234ssdf' \
--header 'Content-Type: application/json' \
--data-raw '{
    "patron_id": "abc_123",
    "post_id": "11223344",
    "url": "https://www.yardbarker.com/media/9/0/90d5b4a6d9efa052e34698a49837fb4f9d7a634f/600_wide/scarface.jpg",
    "models": ["visual"]
}'
import requests
import json
url = "https://api.hivemoderation.com/api/v1/task/sync"
payload = json.dumps({
"patron_id": "abc_123",
"post_id": "11223344",
"url": "https://www.yardbarker.com/media/9/0/90d5b4a6d9efa052e34698a49837fb4f9d7a634f/600_wide/scarface.jpg"
})
headers = {
'authorization': 'token xyz1234ssdf',
'Content-Type': 'application/json'
}
response = requests.request("POST", url, headers=headers, data=payload)
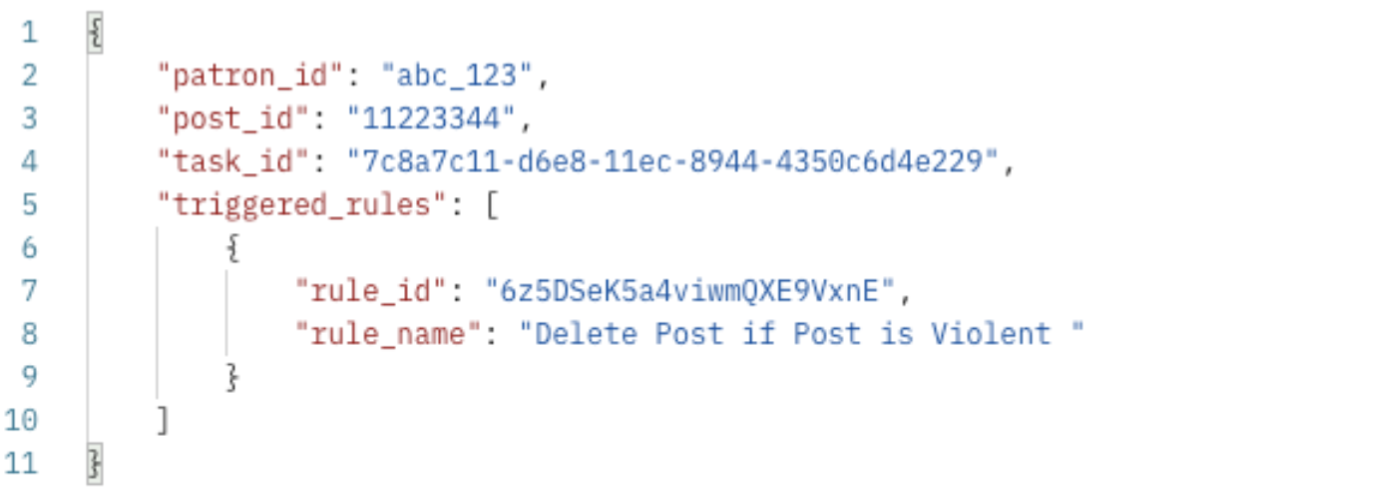
print(response.text)We should see that our auto-delete rule triggered from the API response object itself:
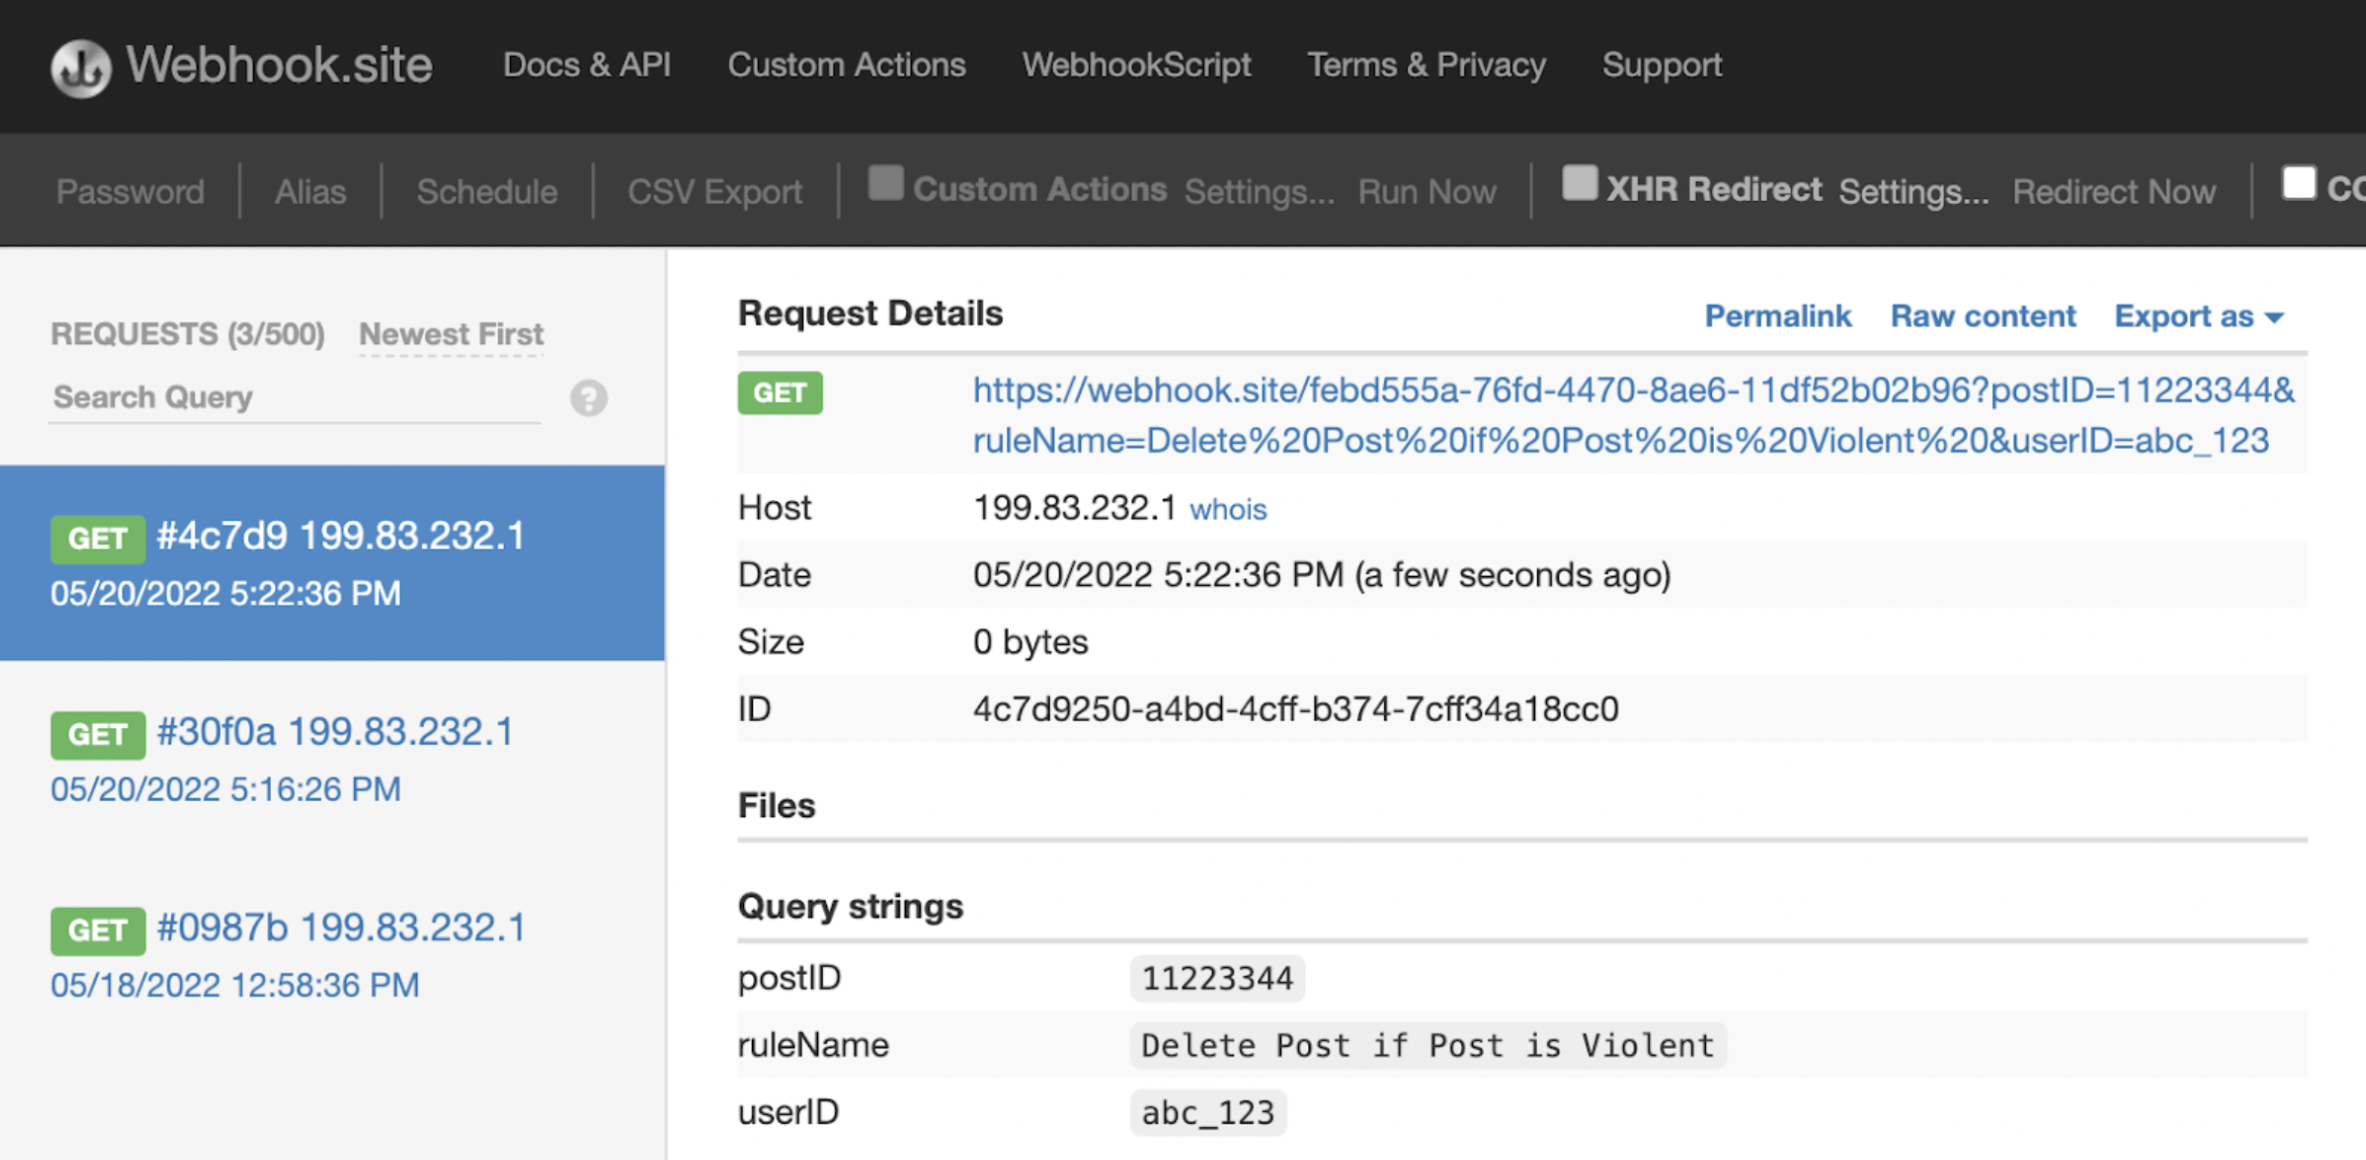
We should also confirm that Moderation Dashboard sent a callback to our Webhook address. If you switch back to your Webhook tab, you should see a GET request that includes the post and user IDs we submitted, as well as a description of the rule that triggered.
Now, if you return to Moderation Dashboard, you also should see our "Delete Post" action show up both in the Actions Log tab in the Actions interface and in the User Content feed.


This is exactly the behavior we wanted! If our hypothetical gaming service had sent this image to Hive (and provided a functional callback URL instead of a test webhook), Moderation Dashboard would have deleted it automatically without human moderator review.
Now that we've set up an action and created an automated rule successfully, we're ready to move on to the human review parts of our content policy in Part 2 (linked below).
Updated 3 days ago
