Onboarding PingOne OIDC with Hive
A guide to setting up a PingOne OIDC application to integrate SSO with Hive
Thank you for choosing Hive. This guide explains how to set up an OpenID Connect (OIDC) application on PingOne by PingIdentity to provide your employees with Single Sign-On (SSO) capabilities for Hive. This is intended for employees with admin-level permissions on your company's PingOne Organization. If your company uses PingOne for Enterprise or a different PingIdentity solution, please contact us at [email protected] for onboarding assistance.
Setting Up Your PingOne Environment
To get started setting up an OIDC integration on PingOne with Hive:
-
Login to your company's PingOne organization dashboard.
-
If you do not already have an existing PingOne environment, please complete the following steps.
-
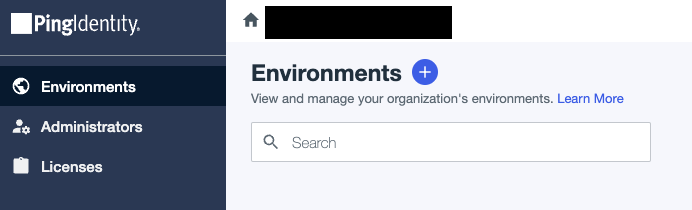
Under PingOne's Environments home page, click the Plus icon to create a new environment.
-
Select Build your own solution and select PingOne SSO before clicking Next.

-
Under Select how you want to deploy your services, please name your environment. Feel free to configure and change other settings according to your needs. Click Finish. You should be redirected back to the Environments home page with your newly created environment listed.
-
-
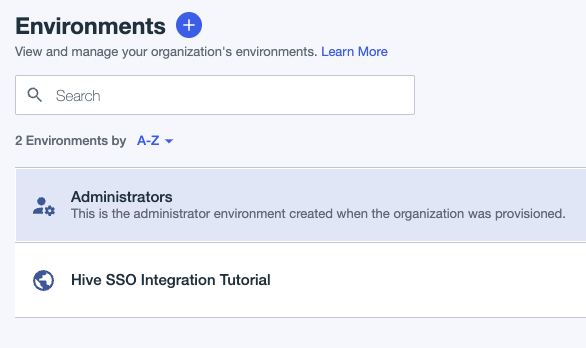
Click the desired PingOne environment you wish to create the Hive Application under. This will be the environment you created in step 2 or an existing environment you wish to use. Then, click Manage Environment.
-
If PingOne SSO has not been added as a service to your environment, please complete the following steps (this is not applicable to people who completed step 2).
-
Click the Plus icon under the Services section.
-
Click the Add button for PingOne SSO and click Finish to add PingOne SSO as a new service to this environment.

-
Creating the PingOne Application
After setting up your new or existing PingOne environment with PingOne SSO capabilities, follow these steps to create an OIDC integration with Hive on PingOne:
-
Click the Applications tab on the left sidebar.

-
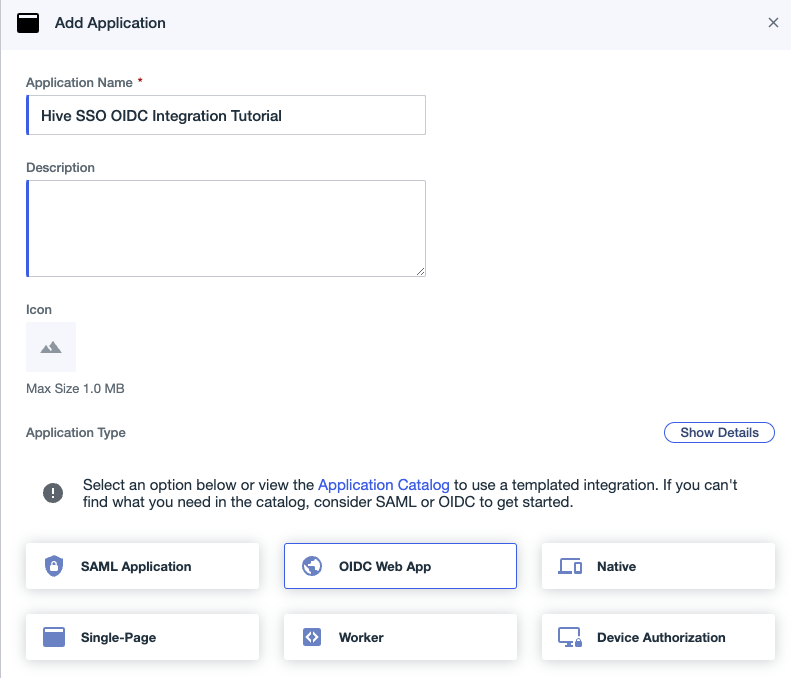
Click the Plus icon next to Applications to create a new application. A new window should slide in from the right. Fill in an appropriate Application Name and select the application type as OIDC Web App before clicking Save.
-
Your new application should appear in the applications list.
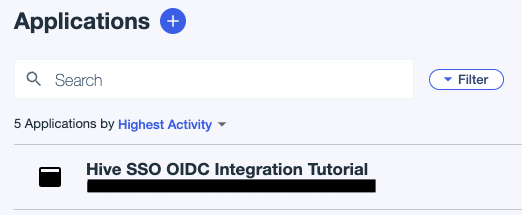
Select your newly created application (if not already selected) and click the Configuration tab. Then, click the blue pencil icon on the right.

Feel free to configure and change settings according to your needs. All default values should work except for one required change listed below:
-
Initiate Login URI
Please inputhttps://portal-customer-api.thehive.ai/sso/oidc/code.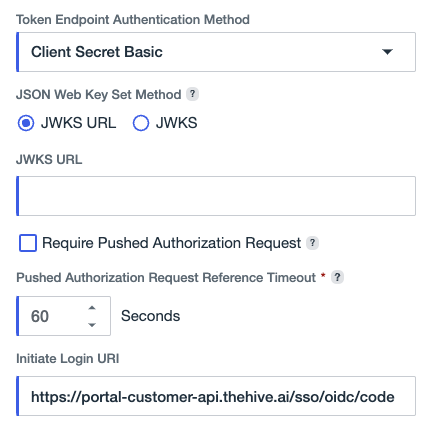
Additionally, make sure to double-check the following settings on the same page:
- Response Type
Please make sure Code is checked (this should already be done by default). - Grant Type
Please make sure Authorization Code is checked (this should already be done by default). - Token Endpoint Authentication Method
Please make sure Client Secret Basic is selected (this should already be done by default).
Click Save once you are satisfied with the configured values.
-
This completes the setup needed on PingOne for integration with Hive. However, Hive requires some additional information before SSO is fully configured.
Completing Integration with Hive
You will need to collect the following three pieces of information to complete integration with Hive. These can be found under the Overview tab of your newly created application.
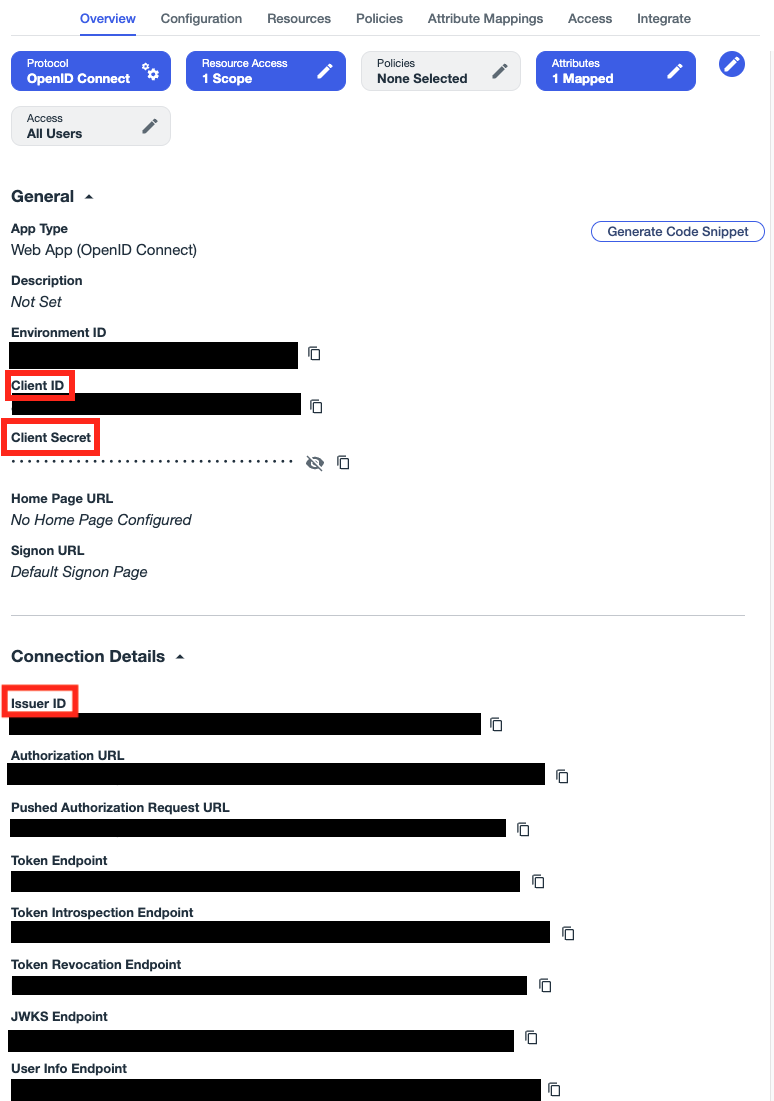
The following two pieces of information are under the General section.
- Client ID
Use the adjacent button to copy the Client ID to your clipboard. - Client Secret
Use the adjacent button to copy the Client Secret to your clipboard.
The last piece of information is under the Connection Details section.
- Issuer ID
Use the adjacent button to copy the Issue ID to your clipboard.
Once you have collected the following three pieces of information:
- If you do not have Self Serve SSO enabled, please send the Client ID, Client Secret and Issuer ID values to your Hive representative. Shortly afterward, SSO with Hive will be fully set up. If you would also like to enable Self Serve SSO to further simplify integration with Hive in the future, please follow the instructions on the Enabling Self Serve SSO document to get started.
- If you do have Self Serve SSO enabled, please follow the instructions below.
-
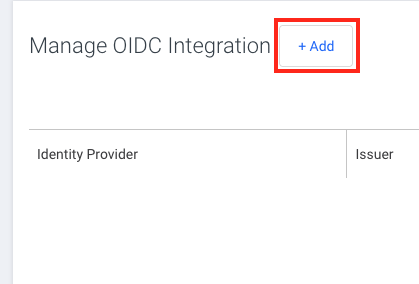
Navigate to the Manage SSO tab on your Hive organization dashboard.
-
Click the Add button next to the Manage OIDC Integration header.
-
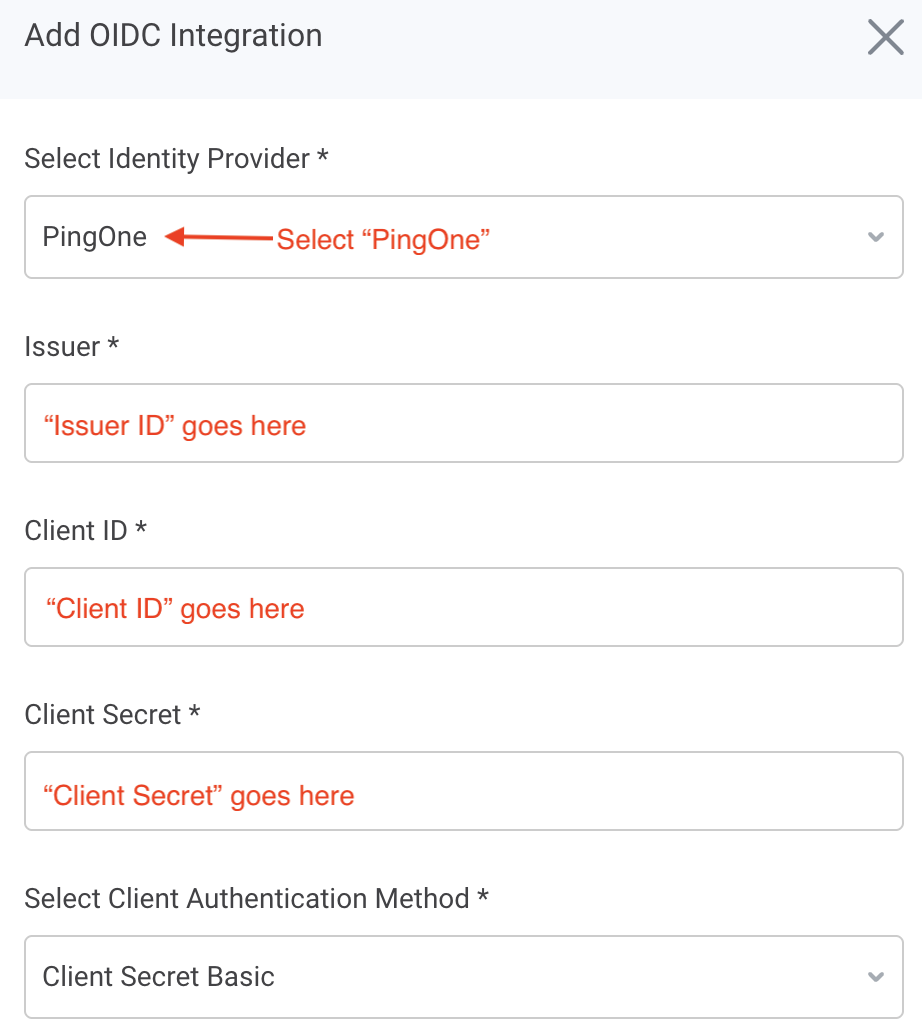
A pop-up window should appear. Enter the following values:
-
For Identity Provider, select PingOne.
-
For Issuer, please enter your Issuer ID found above.
-
For Client ID, please enter your Client ID found above.
-
For Client Secret, please enter your Client Secret found above.
-
For Client Authentication Method, unless you explicitly selected something different while setting up your application, the Ping default should be Client Secret Basic
-
-
Click Add. SSO with Hive via OIDC should now be fully set up.
Managing Groups
Hive offers Group-Based Permission Mapping for PingOne OIDC. To create a group and include its information in the OIDC assertion, follow the instructions below. Note: You can send multiple groups' information in one assertion.
- Login to your company's PingOne Admin console.
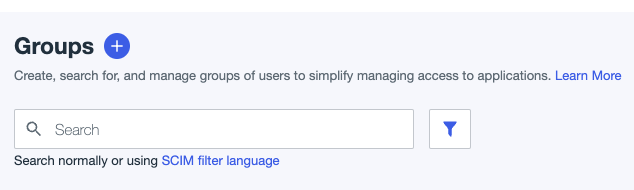
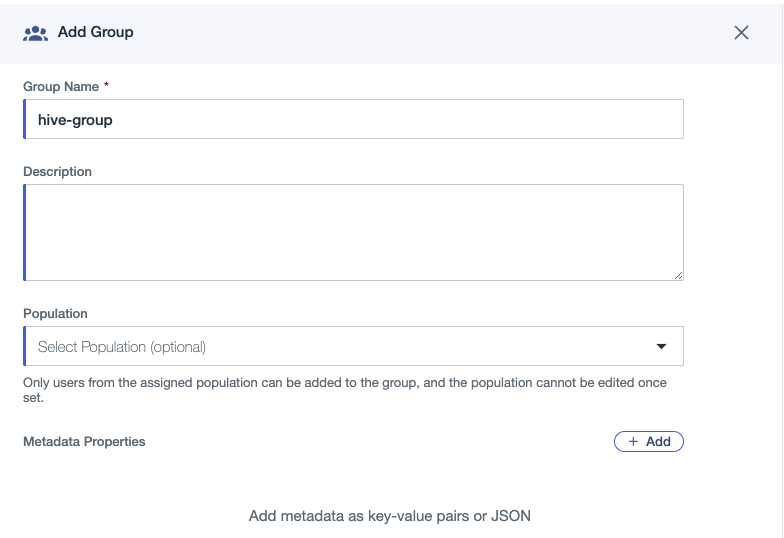
- Navigate to the Directory tab on the left sidebar. Click on the Groups tab within.
- Here, you can create groups and add members by clicking the Plus sign in the top left.
- Next, navigate to the Applications tab in the left sidebar and click on the Applications tab nested within.
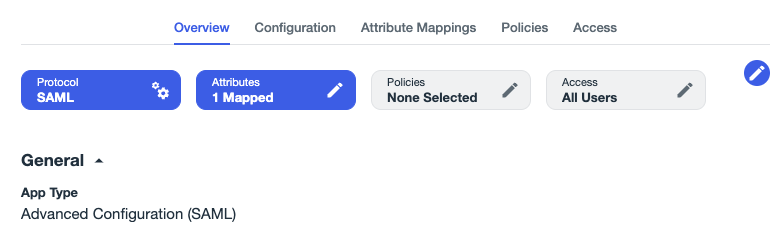
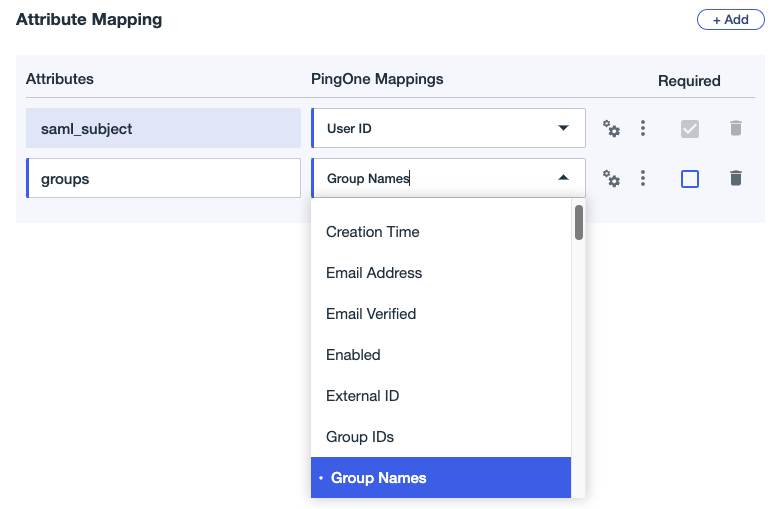
- Click on your SAML SSO application, then click on the Attribute Mappings tab.
- Click on the pencil icon in the top right to add attributes.
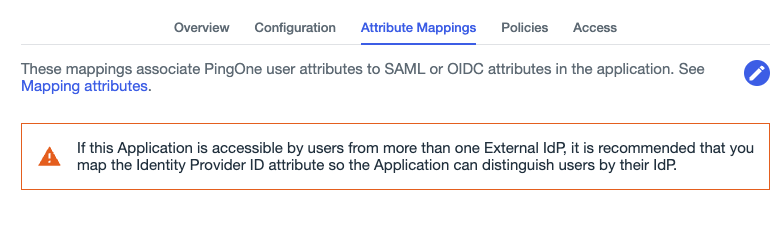
- Click on the + Add button in the top right. Then, fill in the attribute name as groups. From the drop-down menu under PingOne Mappings, select the option Group Names. Save your changes.
Updated 2 months ago