Defining Moderation Rules
How to use Moderation Dashboard to define and monitor custom rules.
The Rules tab on Moderation Dashboard allows you to map out your content moderation policies and tells Moderation Dashboard which of your Actions to take on particular types of posts or users. Moderation Dashboard will automatically trigger these rules based on model classifications and/or user post history, enabling automated moderation actions based on conditions you set.
When a post is submitted through the API, if all conditions in a rule are matched, Moderation Dashboard will trigger the rule and take any corresponding action. Moderation Dashboard will also return a description of each rule triggered within the API response (refer to the API reference page for an example).
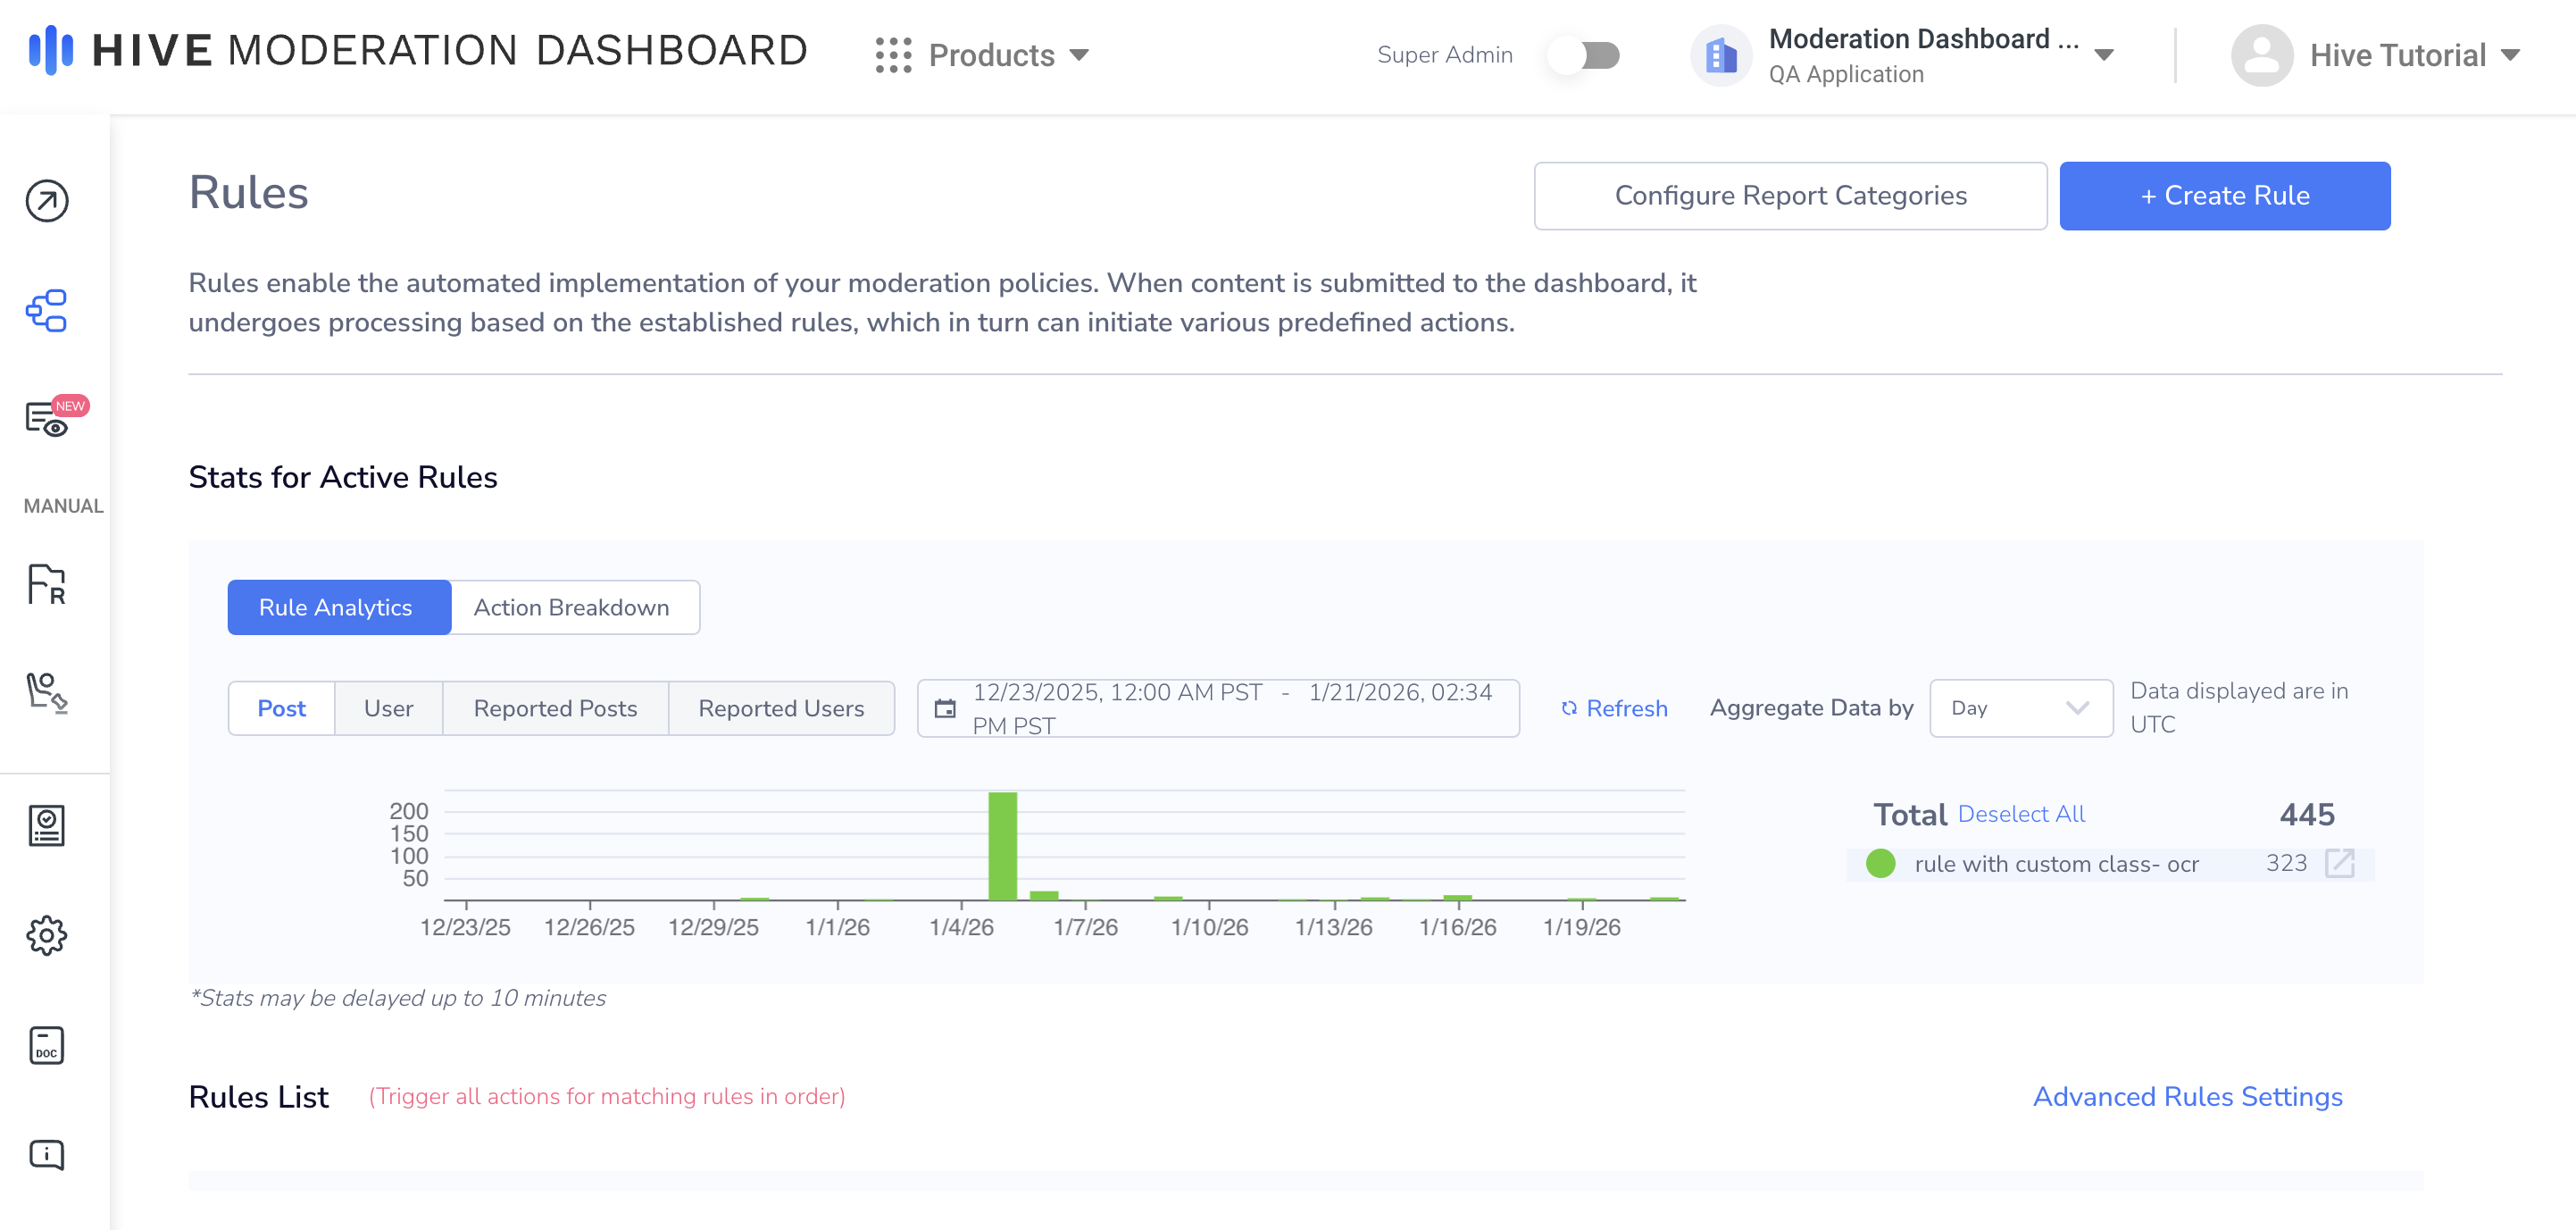
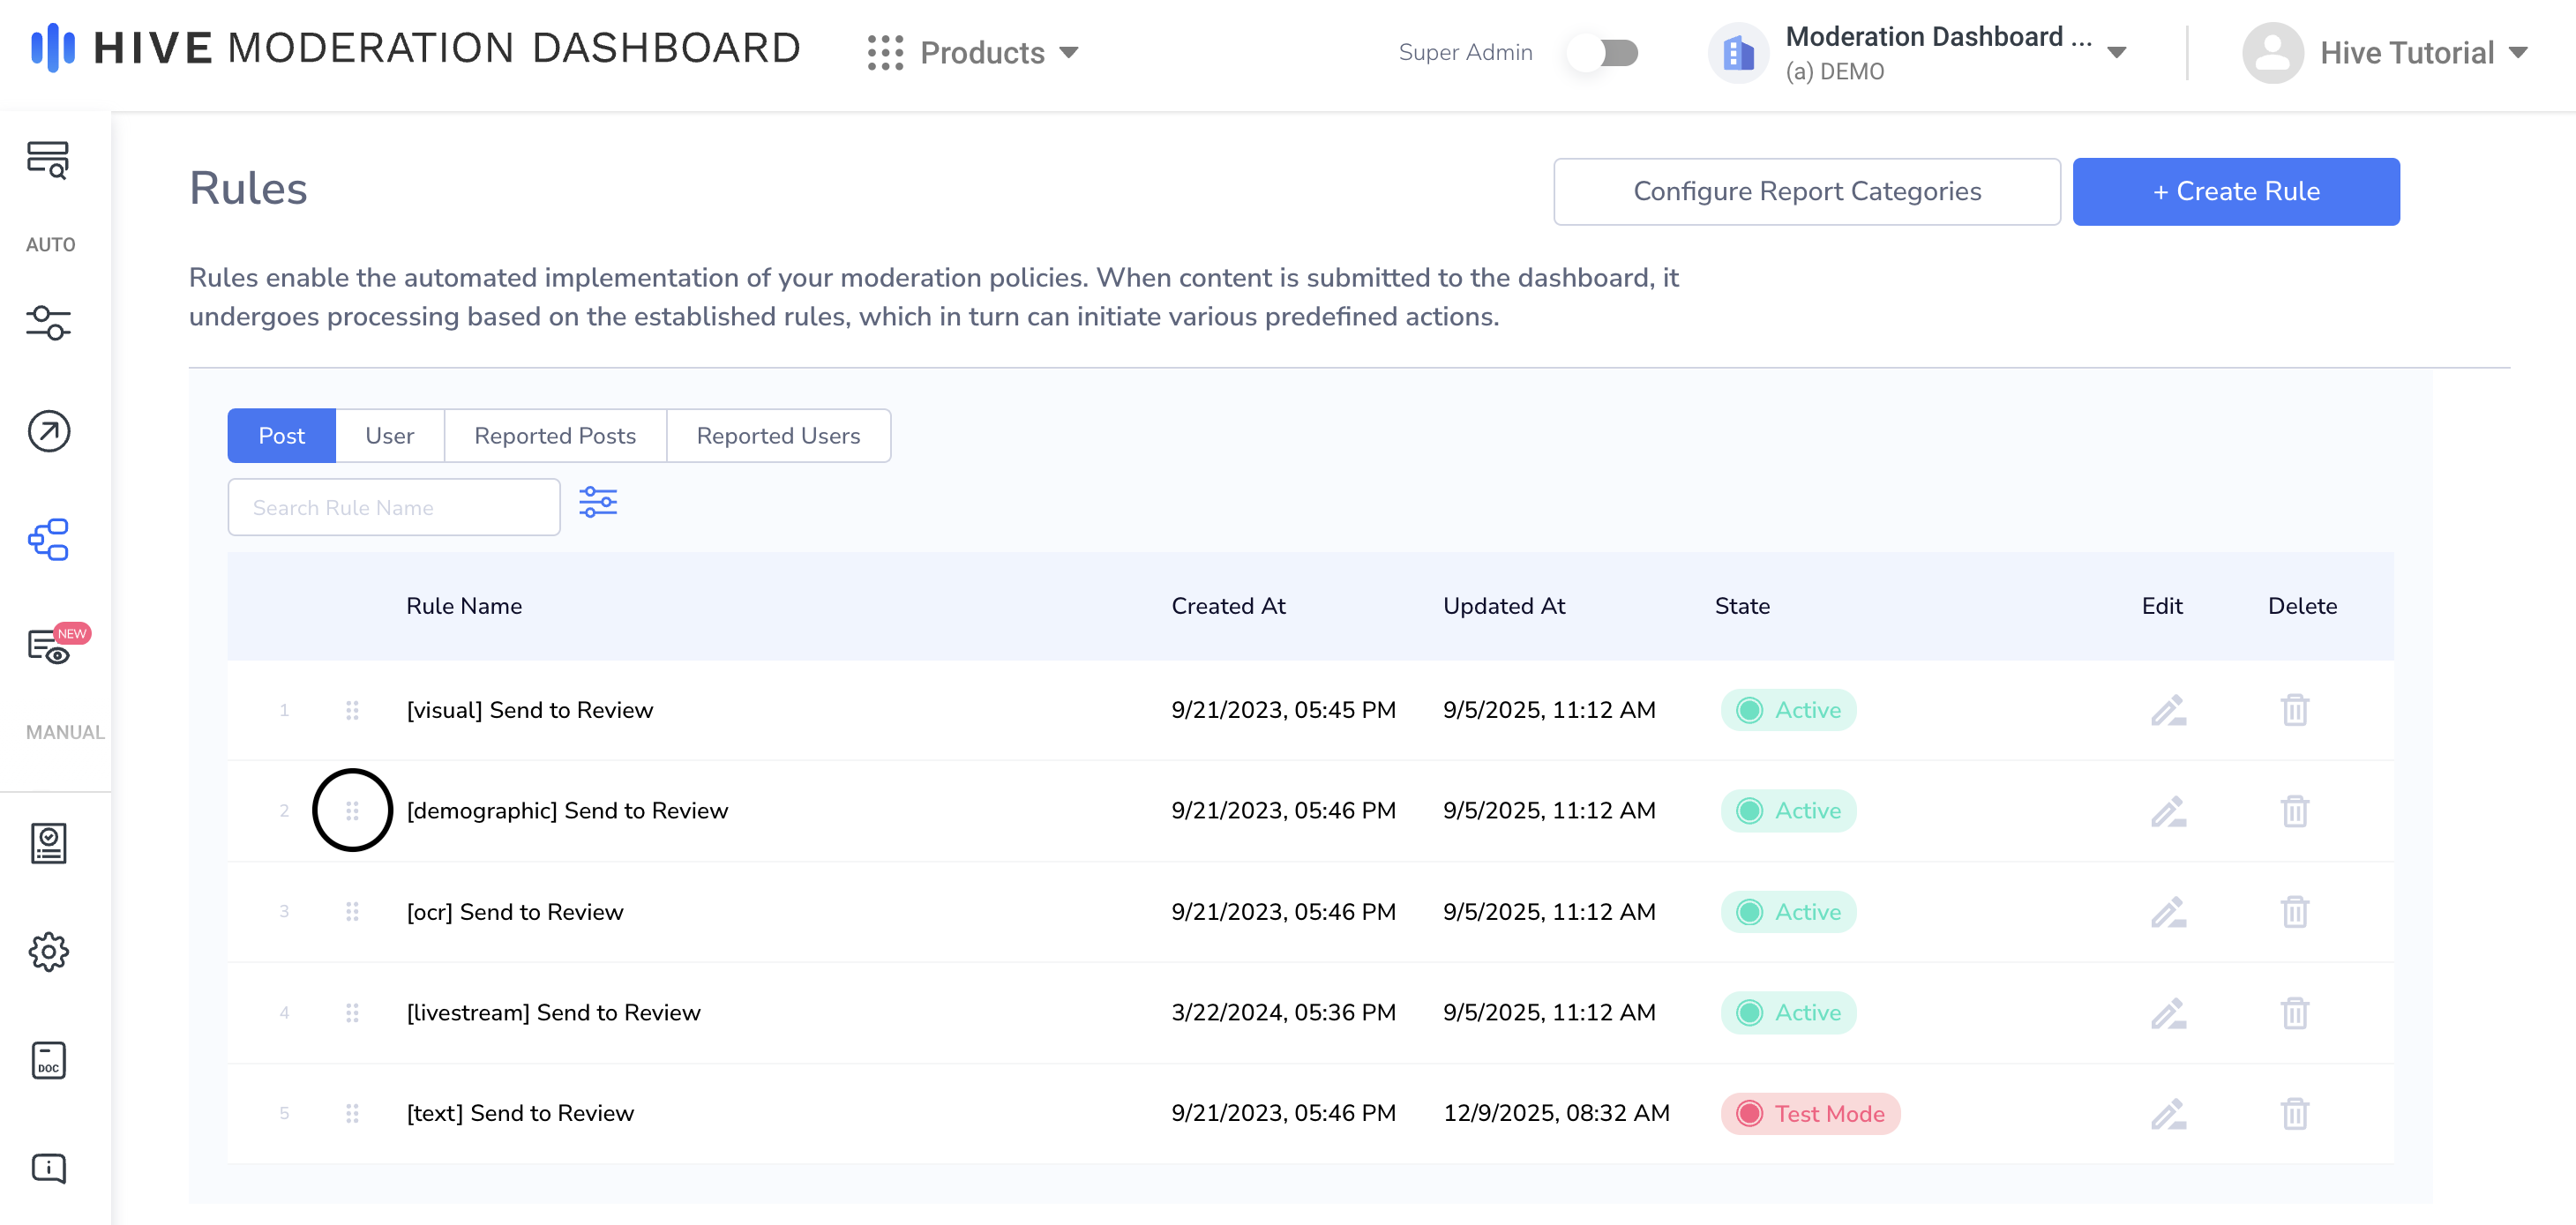
Rules tab
Rule Interface
When you click on a rule, a new interface pops up displaying additional information about the rule. Below are explanations for each section in this interface.
Rule Overview
Displays general information about the rule: its name, status, rule type, and conditions.
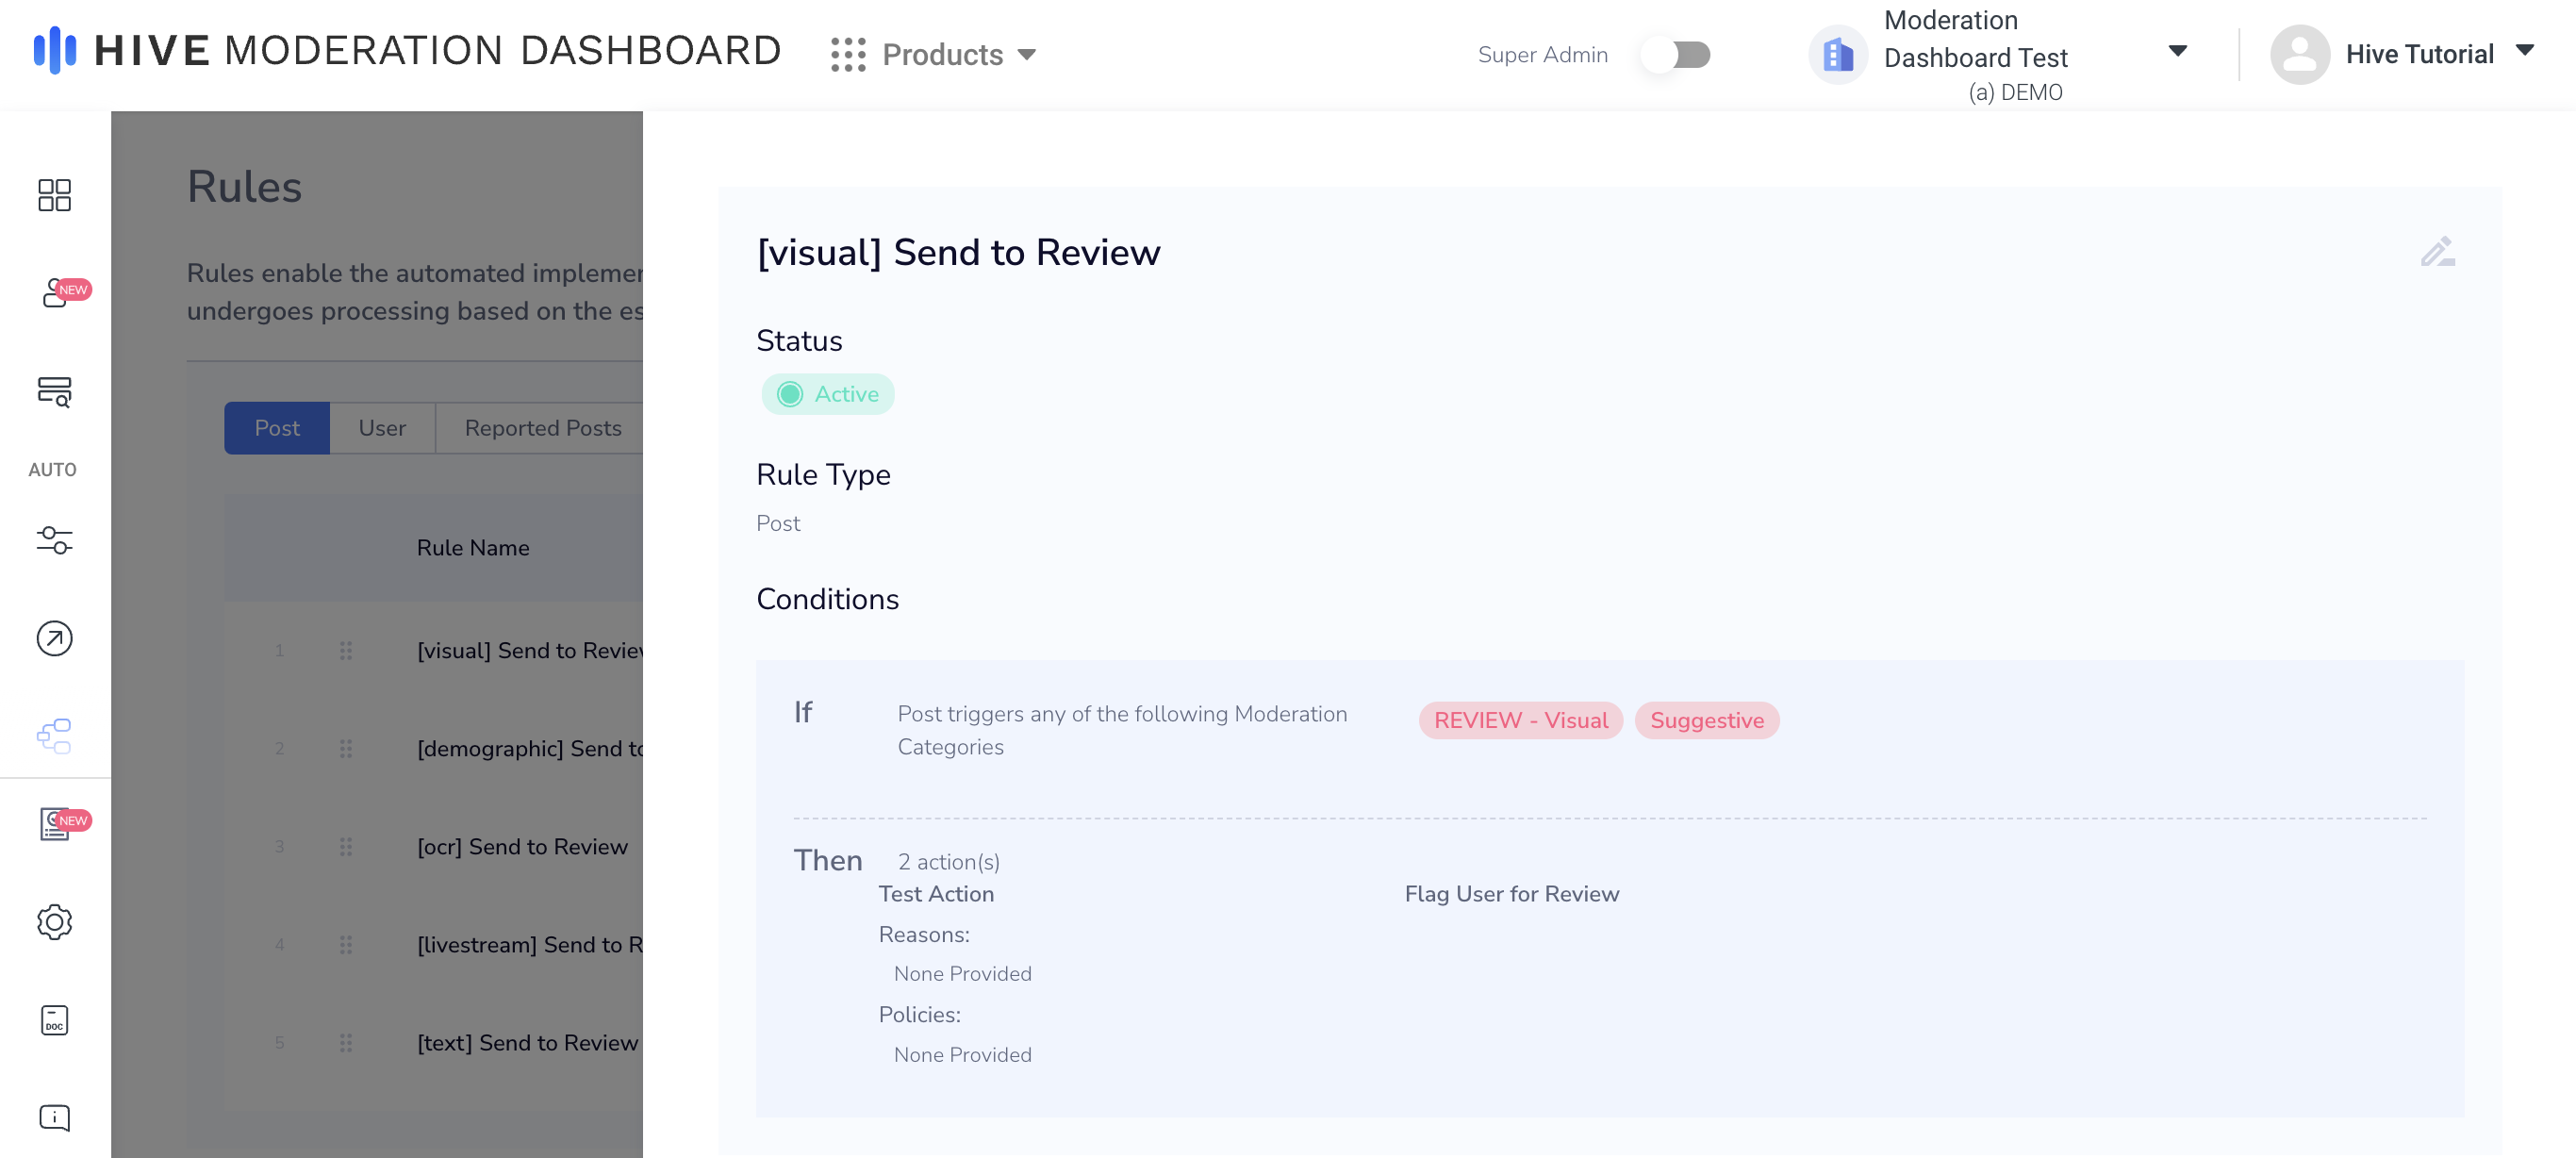
Rule Overview
Rule Triggers
Line graph displaying how often this rule was triggered over a user-defined time period. Activity is color-coded by the rule's state at the time it was triggered (Active v.s. Test Mode).
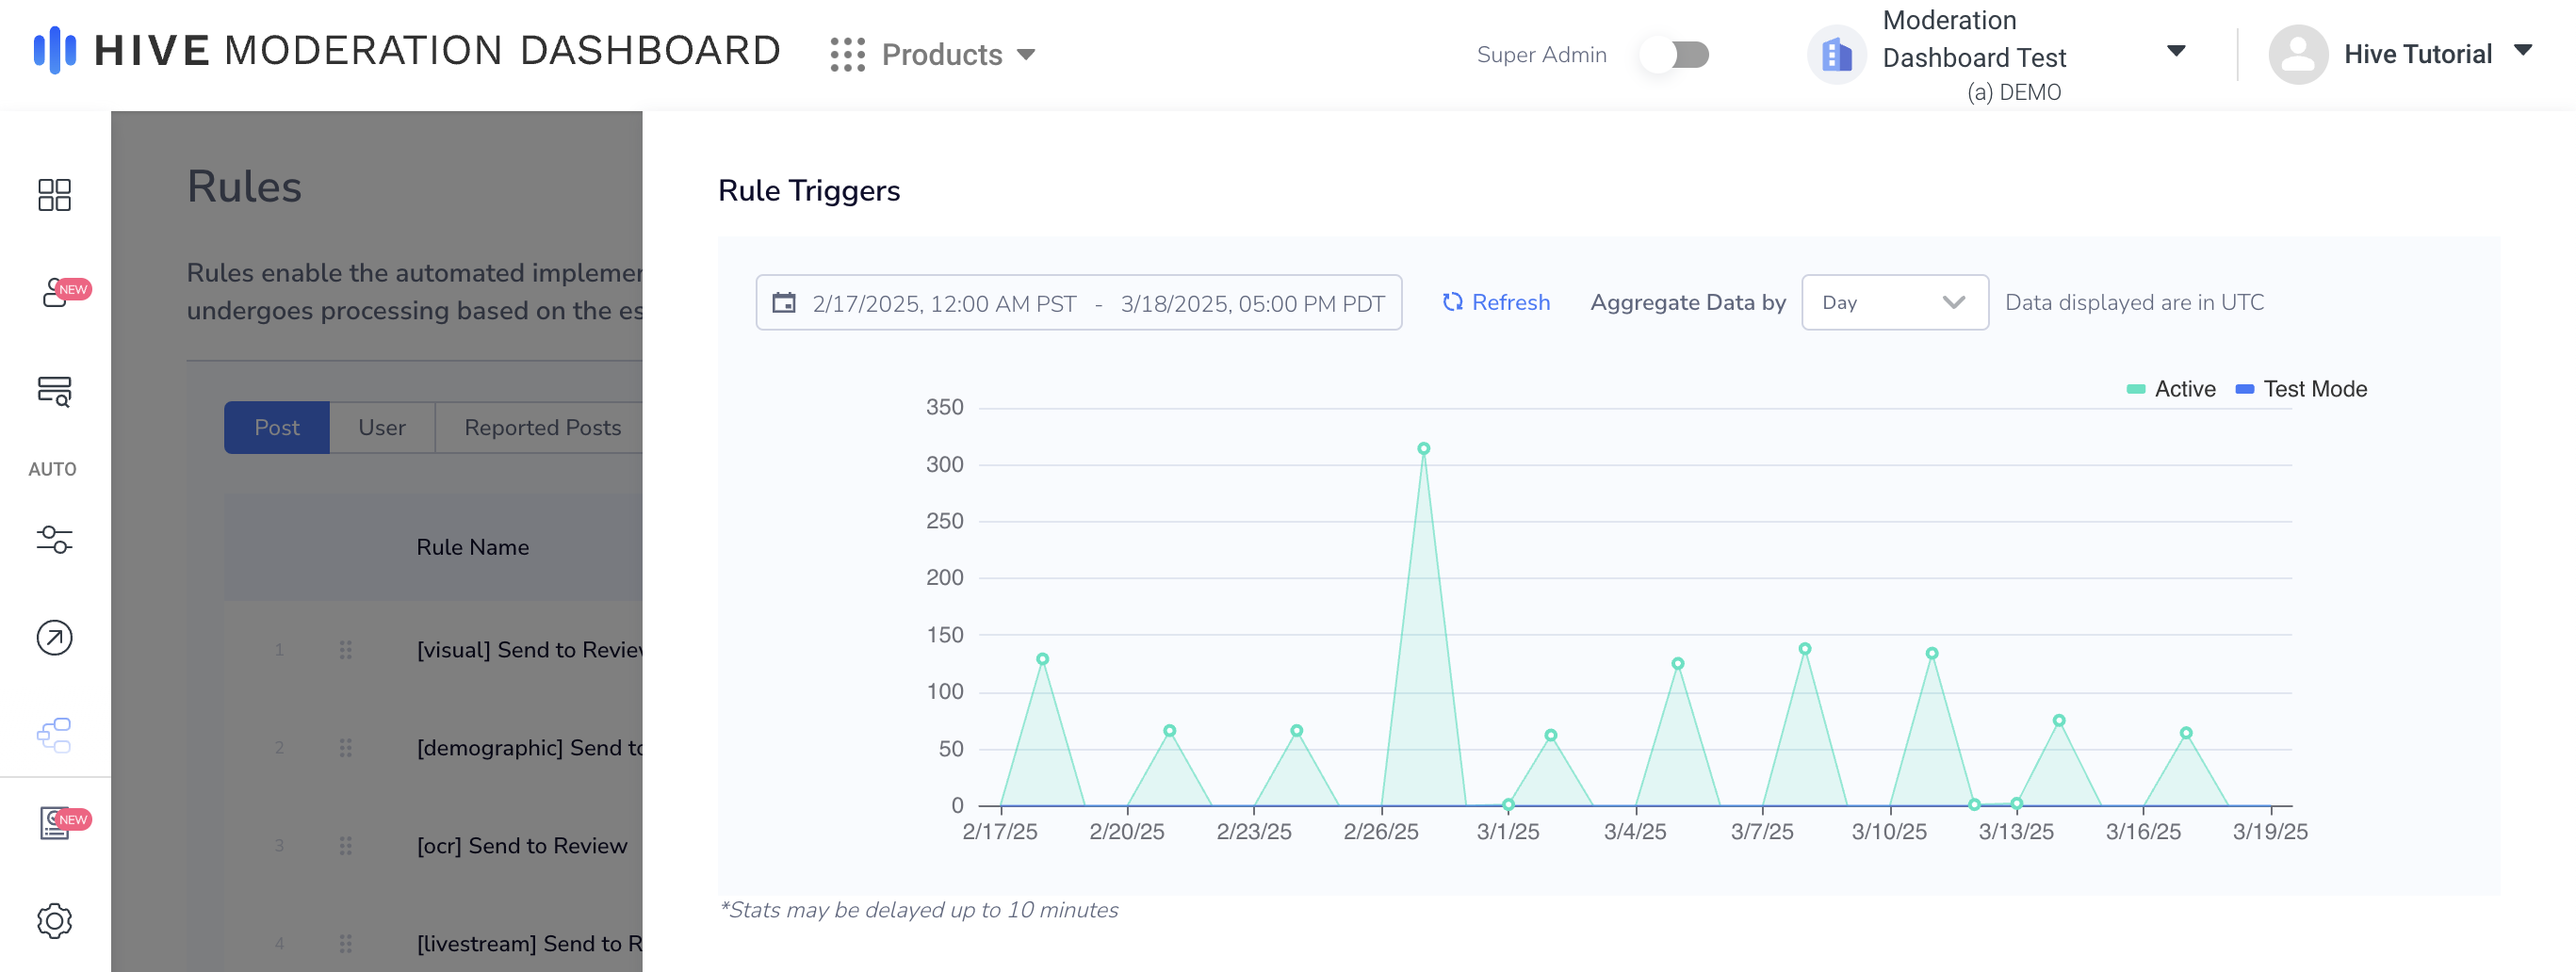
Rule Triggers
Triggered Content List
List of content that triggered the given rule, displayed in row format. Each row contains the following information: submission date and time, post ID, top moderation categories, last action taken, and the rule's status at the time it was triggered (Active v.s. Test Mode).

Triggered Content List
Creating a Rule
To create a rule, click the blue "Create Rule" button at the top right. A new window will pop up, allowing you to set various configurations for your rule.
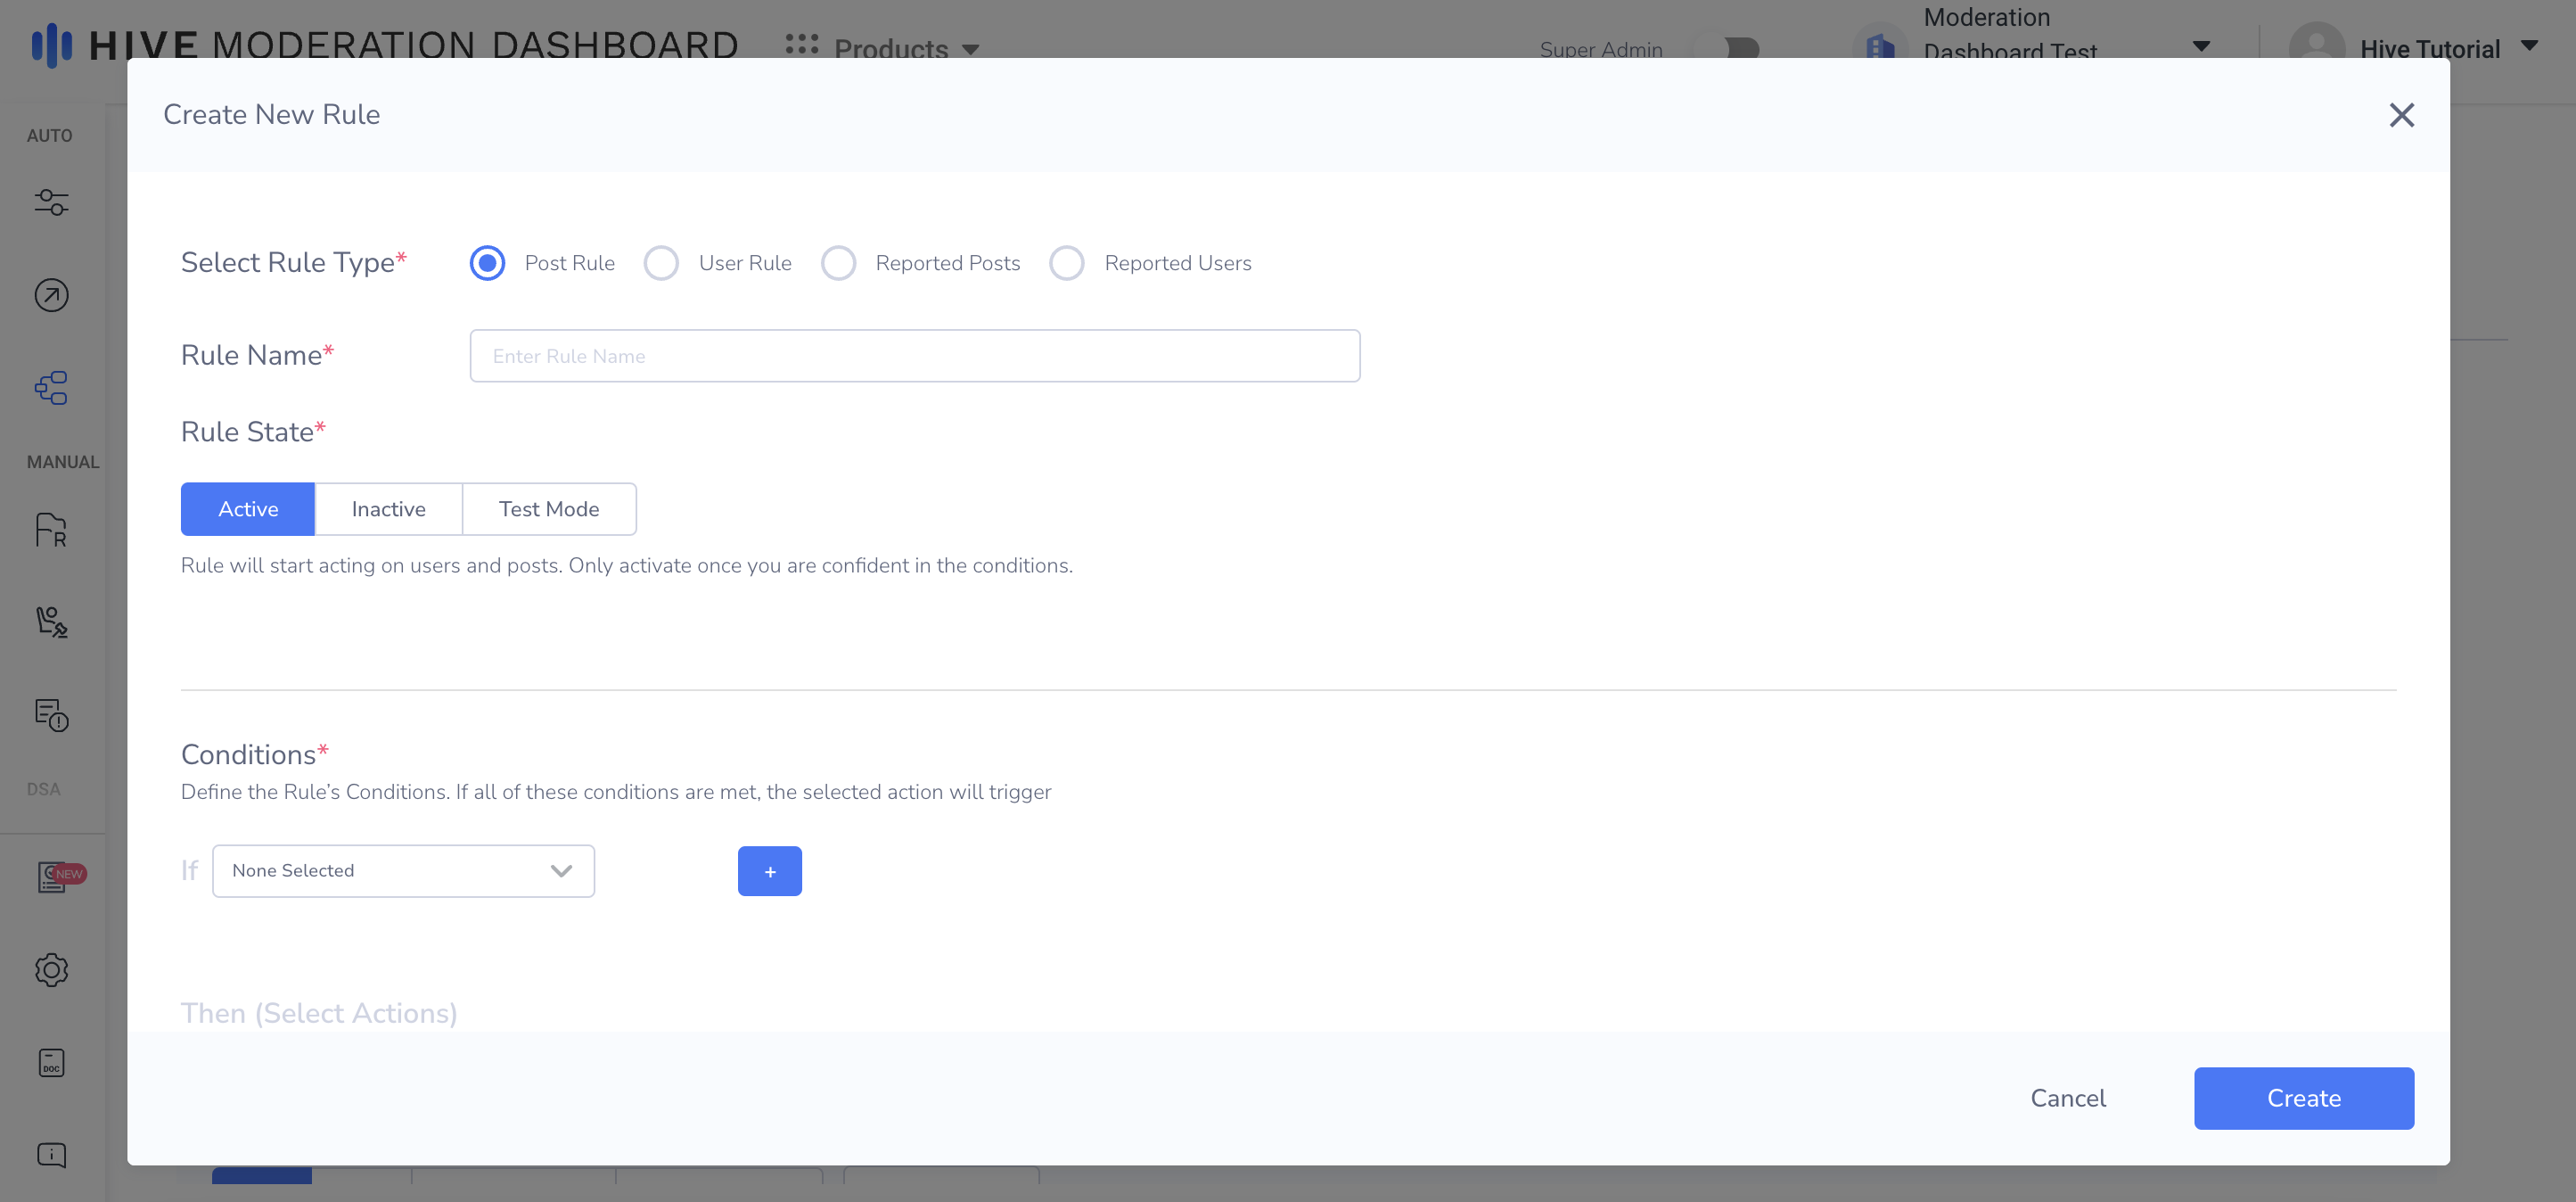
Create New Rule
Rule States
Below are the three possible states for a rule, which affect whether or not your rule catches users and/or posts.
- Active: Rule will start acting on users and posts. Only activate once you are confident in the conditions you have set.
- Inactive: Rule will be in draft mode. Use this state to refine conditions before testing or activating the rule.
- Test Mode: Rule will run in the background, collecting data but not taking action against any violations. Use Test Mode to evaluate the effectiveness of a rule. Note: If you switch a rule's status from Test Mode to Active, we currently do not support taking retroactive action on users and posts caught while the rule was still in Test Mode.
Rule Types
Below are the four possible types of rules, which apply to either posts or users.
- Post Rule: Rules that apply to posts. These rules are run every time an API submission is made. If applicable, an enforcement action is taken.
- User Rule: Rules that apply to users. These rules are run every time an API submission is made. If applicable, an enforcement action is taken. Note: For user rules only, you can configure how often a given user rule should run. A rule can either run 1) once per user or 2) once per a given time period (e.g. 24 hours).
- Reported Posts: Rules that apply to posts reported by users on the customer's platform. These user reports are submitted to a separate endpoint, specifically for handling reported posts/users.
- Reported Users: Rules that apply to users reported by other users on the customer's platform. These user reports are submitted to a separate endpoint, specifically for handling reported posts/users.
Conditions
Below are the possible rule conditions you can configure. A specific rule’s conditions determine what type of content triggers the rule and subsequent action(s).
NOT Operator
Allows you to negate a given condition or group of conditions. To apply NOT for:
- Condition Groups: Toggle the group’s operator (AND or OR).
- Individual Condition Rows: Click the icon at the start of the row.

NOT operator - individual condition row

NOT operator - condition groups
Metadata Configuration
Customers can create rules with conditions that incorporate platform-specific metadata. Sending metadata in the API request along with your content will help you tailor the perfect moderation specific to your company's application.
There are two types of metadata that can be sent:
- Content Metadata: Associated with any post on a platform. For example, a customer may use content metadata to differentiate moderation policies between story posts and feed posts on a platform.
- User Metadata: Associated with a specific user on the platform. Tied to each user ID on Moderation Dashboard, which is sent with every API request. For example, a customer may use user metadata to differentiate between verified v.s. non-verified users on their platform. Note: We save user IDs. If the user ID is changed with a new submission, we will overwrite the old saved user ID with the new user ID.
If a rule is configured to incorporate content and/or user metadata, these metadata fields must be included with each API request.
For more information, refer to the Metadata Configuration page.
Rule Type Examples
Below are examples for each type of rule.
Post Rule Examples
Auto-Moderation
- IF Post is classified as NSFW (visual), THEN [Delete Post]
- IF Post is classified as Suggestive (visual), THEN [Age Restrict Post]
- IF Post is classified as Bullying (text) AND Hate (visual), THEN [Your Custom Action]
Send Post to Review Feed
- IF Post triggers Needs Review thresholds, THEN [Flag for Review]
Spam Manager (refer to Spam Manager page)
- IF Post Has Text in Deny List, THEN [Your Custom Action]
- IF Post Has Text in Allow List, THEN [Your Custom Action]

Example post rule - flag post for review if violent
User Rule Examples
Auto-Moderation
- IF Total Posts classified as Suggestive (visual) OR NSFW (visual) > 50 in the past 90 days, THEN [Your Custom Action]
- IF Total Post count is > 100 AND 40% of total posts classified as Suggestive (visual) OR NSFW (visual) in the past 7 days, THEN [Your Custom Action]
Send User to Review Feed (any rule combination)
- IF Total Posts classified as Bullying (text) > 50 in the past 90 days, THEN [Flag for Review]
Spam Manager (refer to Spam Manager page)
- IF Total Posts with Spam Text in Deny List > 100 in the past 14 days, THEN [Your Custom Action]
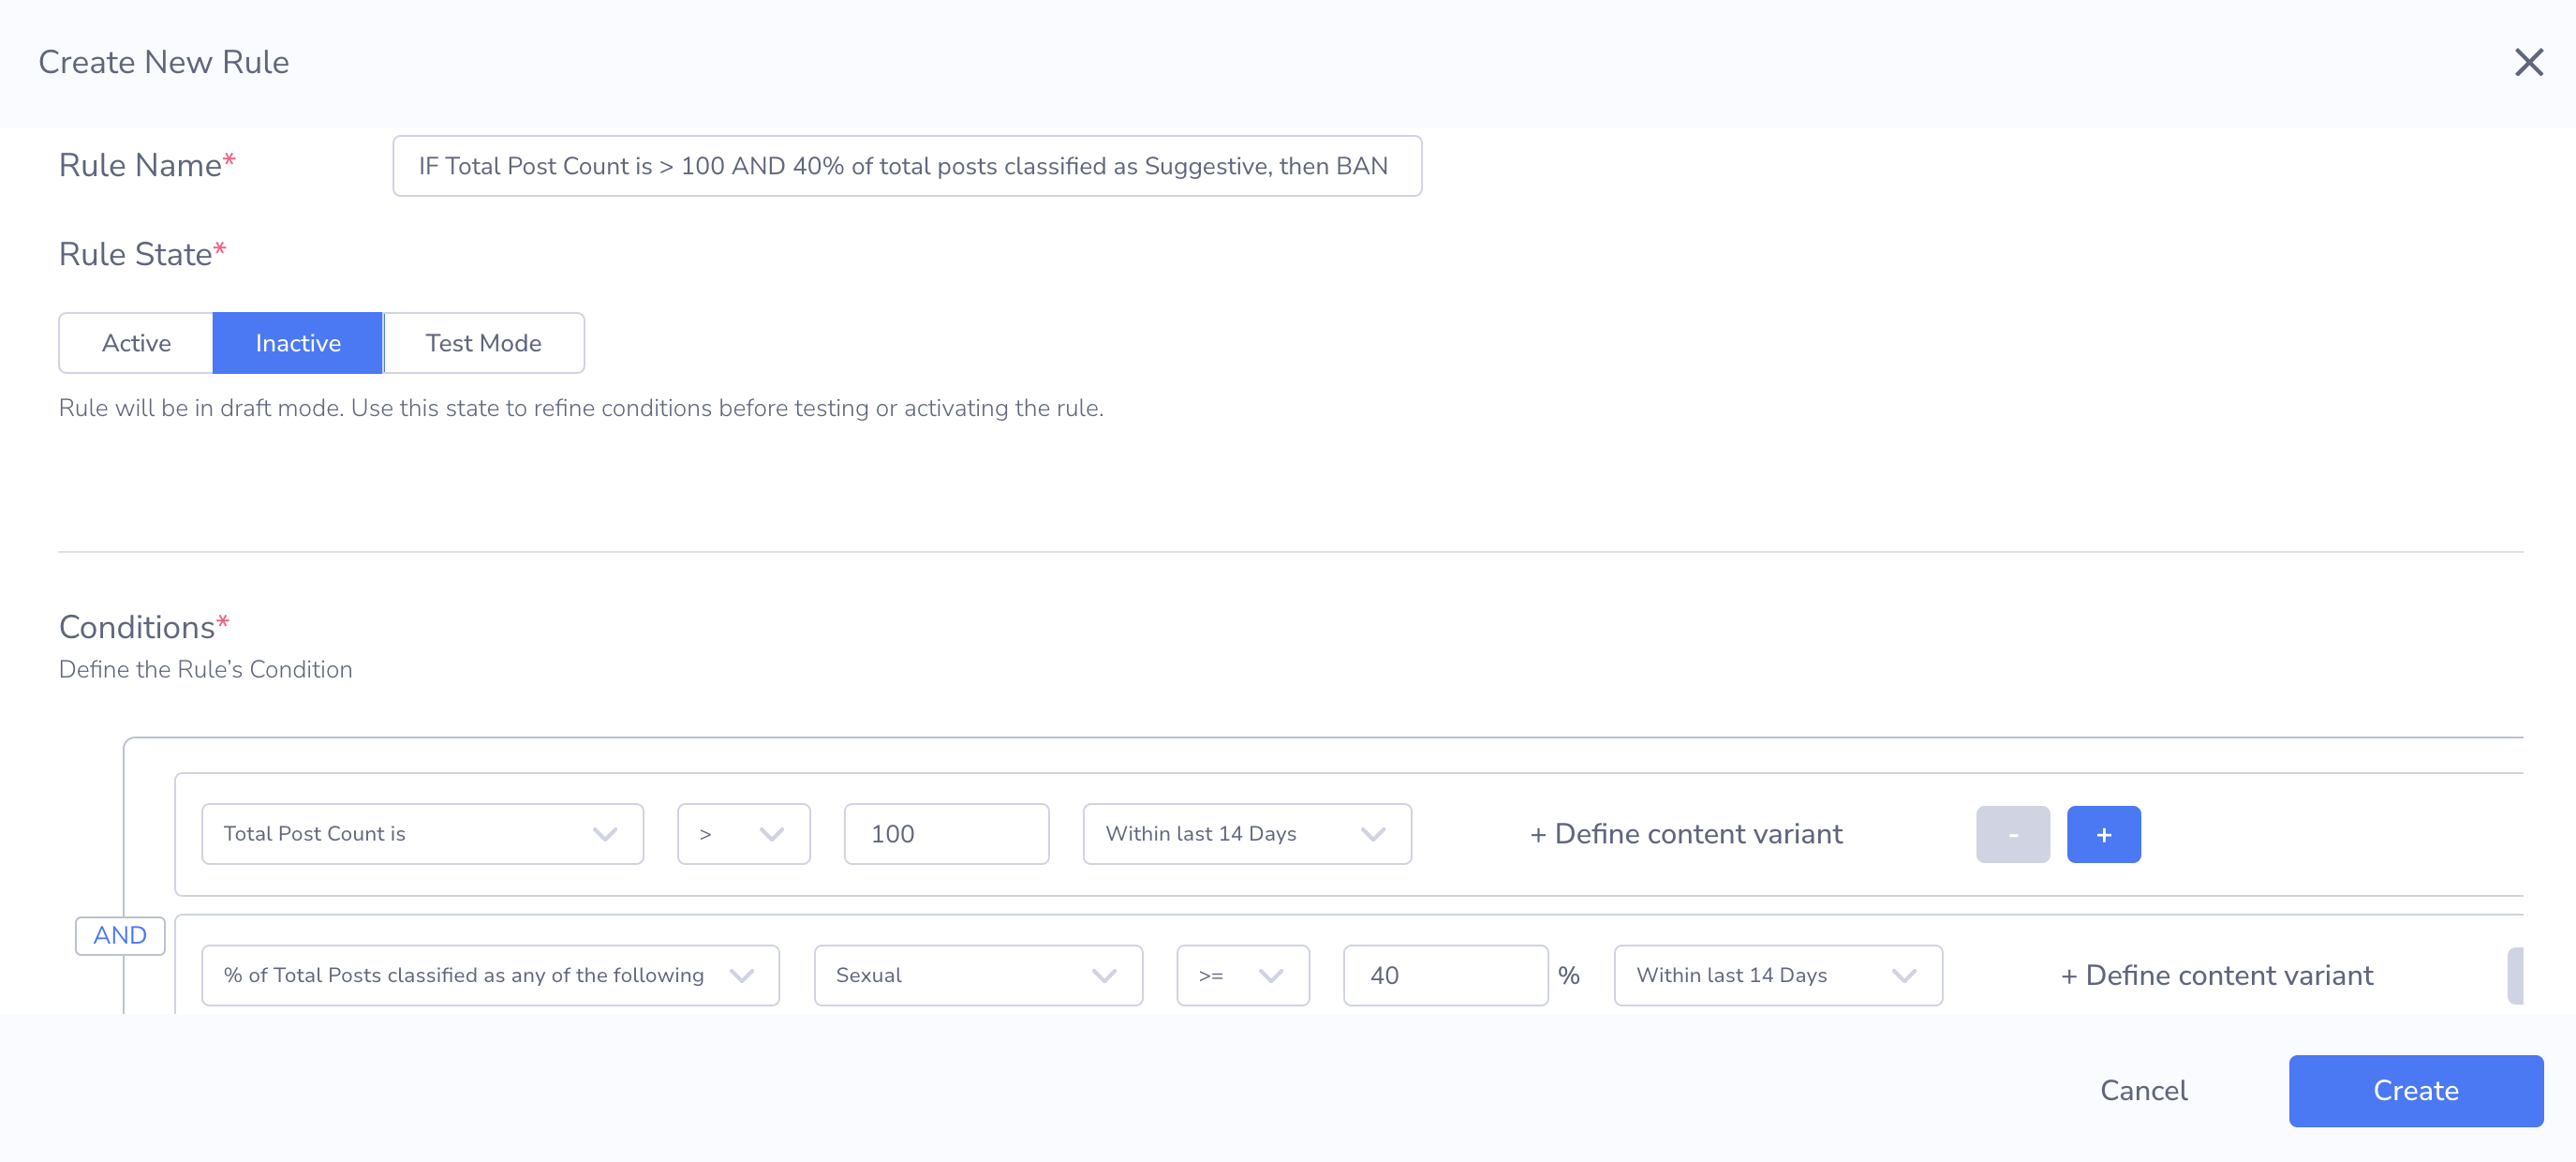
IF total post count is > 100 AND 40% of total posts classified as Suggestive, then BAN (1)
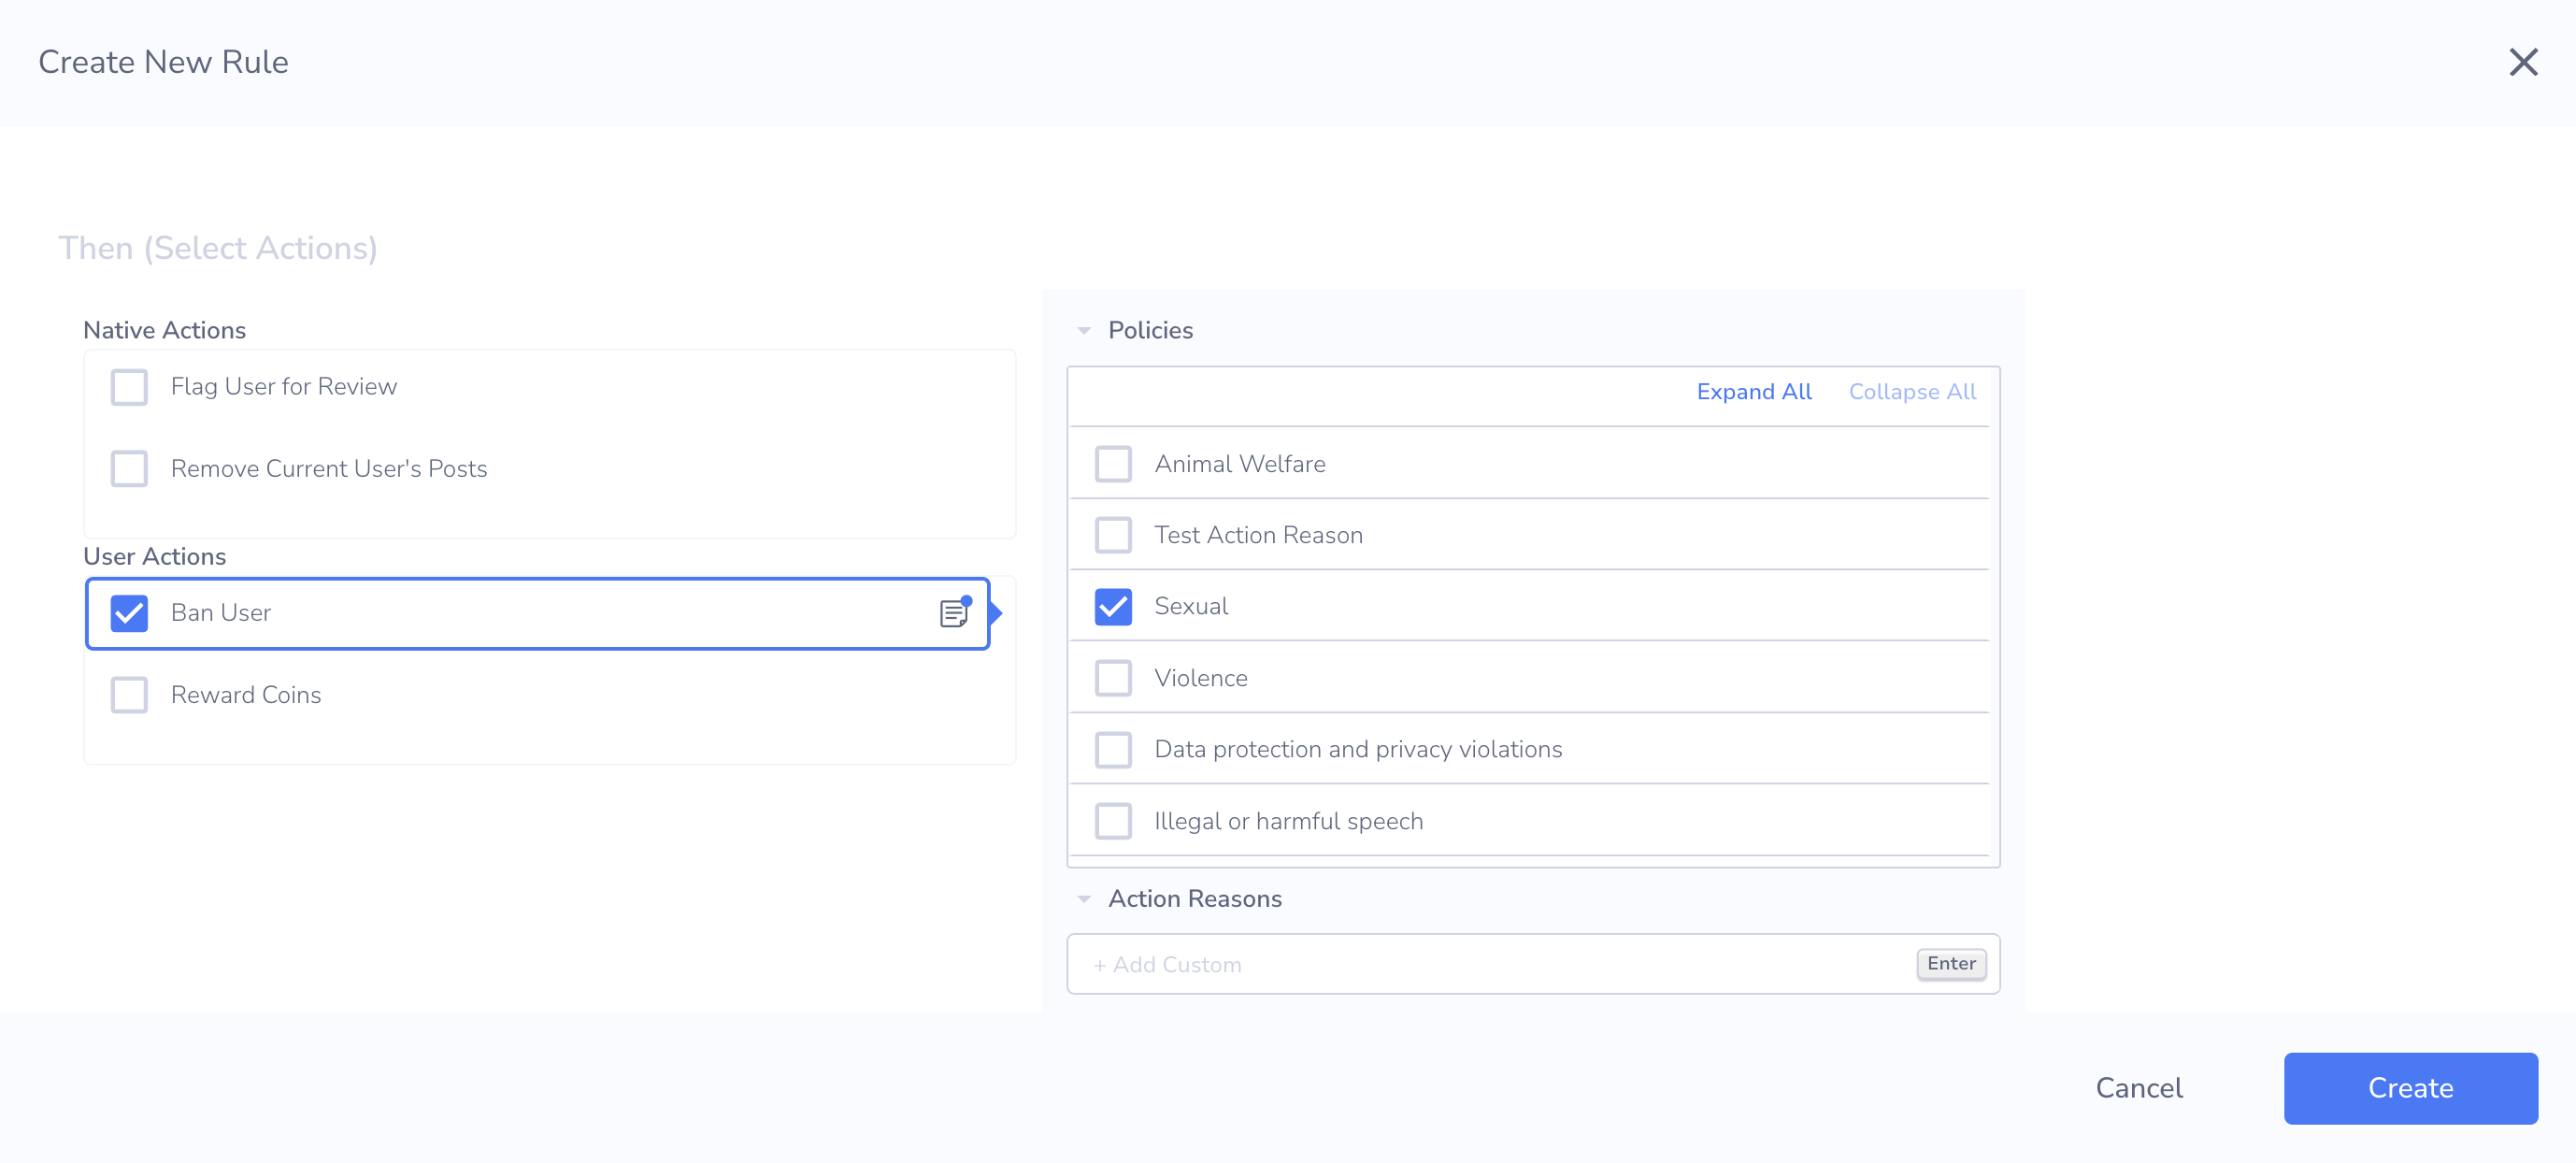
IF total post count is > 100 AND 40% of total posts classified as Suggestive, then BAN (2)
You can specify the exact action you want to take when a rule is triggered. The action dropdown will be populated with all actions created on the Actions page.
Reported Posts Examples
- IF Post reported as any of the following (violence, suggestive, drugs) >= 5, THEN [Your Custom Action]
- IF Post reported (any reason) >= 10, THEN [Your Custom Action]
Reported Users Examples
- IF User reported as any of the following (violence, suggestive, drugs) >= 5 , THEN [Your Custom Action]
- IF User reported (any reason) >= 10, THEN [Your Custom Action]
Order of Rules
On the Rules tab, you can customize the order in which rules are triggered. To reorder rules, use the dotted icon adjacent to each rule to drag them into your desired order.
Customizing order of rules
Next to the Rules List, click on "Advanced Rules Settings". The pop-up window allows you to toggle between:
- Triggering all actions for matching rules in order. Note: Triggering all actions when multiple rules match will send multiple calls to your actions server.
- Only triggering the action for the first matching rule in your order.
Rule order matters if "Only trigger action for first matching rule in order" is toggled on. Otherwise, in most customer use cases, the order has minimal impact.
.png")
Advanced Rules Settings
Updated 5 months ago